
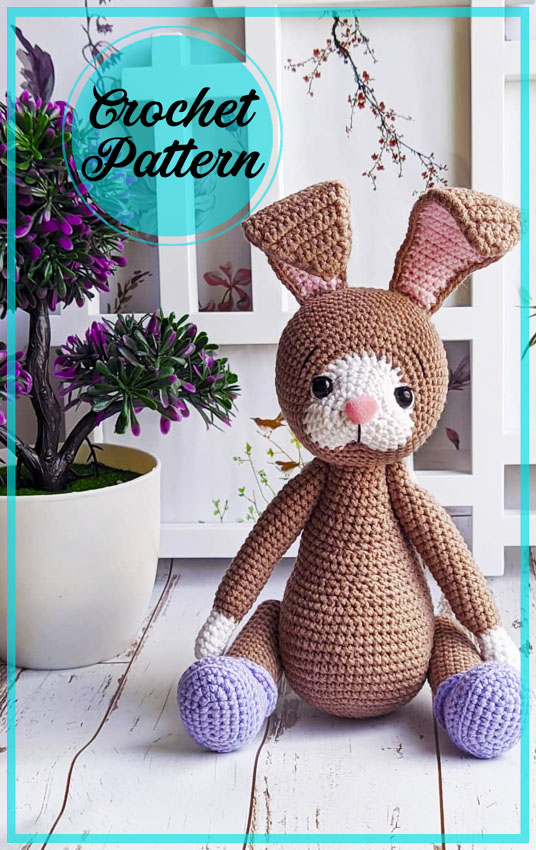
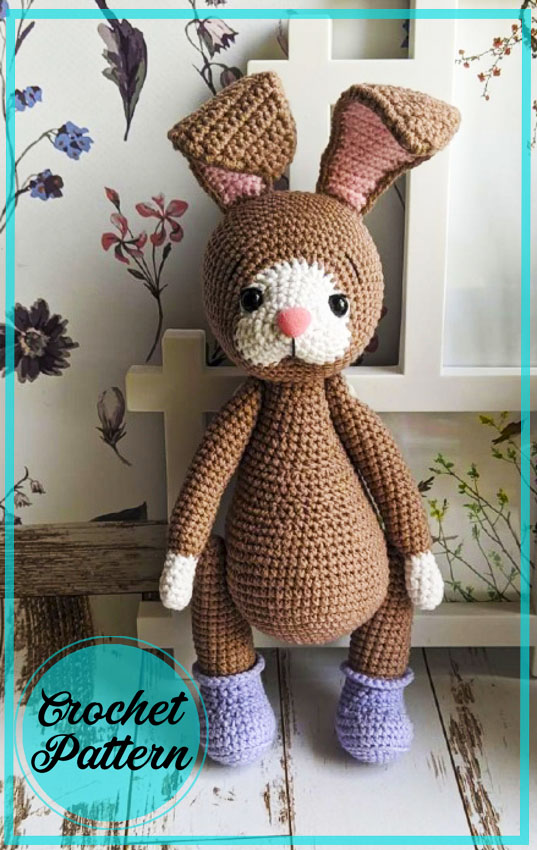
Friends, if you are ready, I will share a very advanced bunny amigurumi pattern today. As you know, these types of amigurumis are not really liked. Because it is really difficult and takes a lot of time to do. However, I know that some of my followers are very strict crochet masters. I am sharing this amigurumi pattern for those who are really at the expert level. I hope you enjoyed my bunny amigurumi. You can find all the pieces in the pattern.
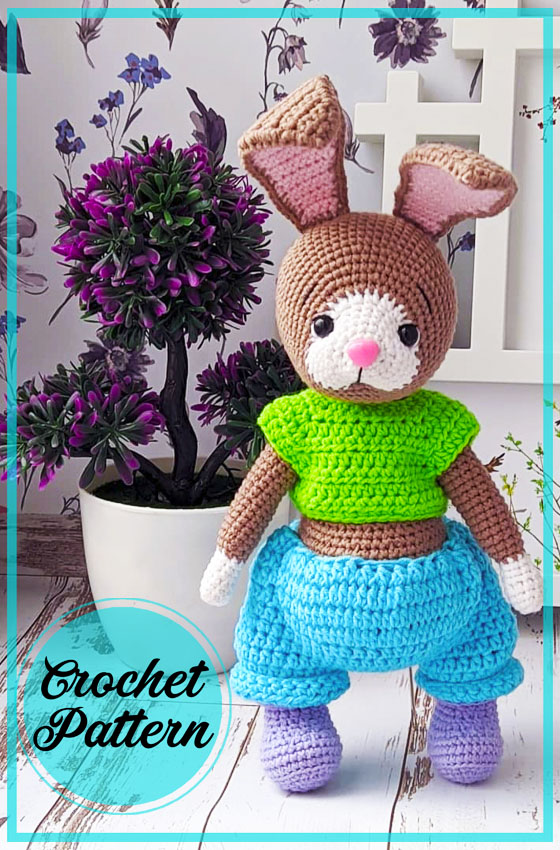
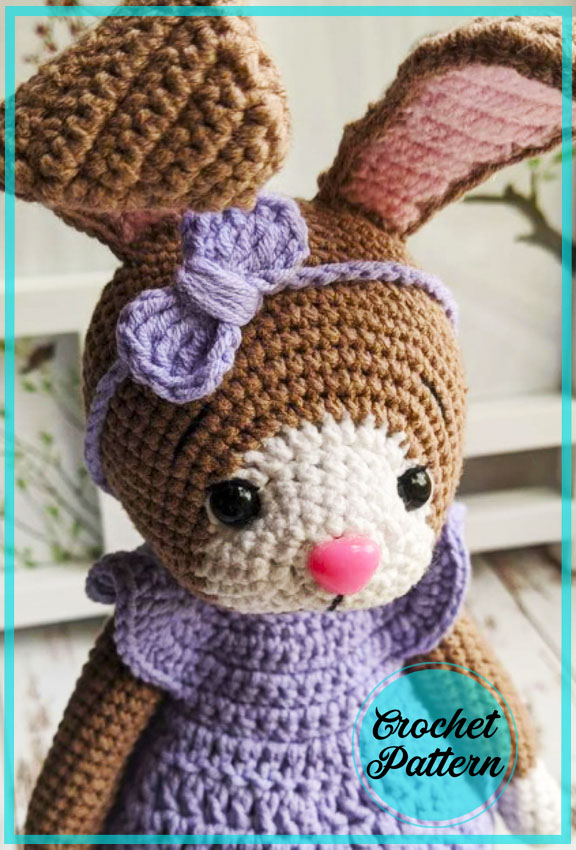
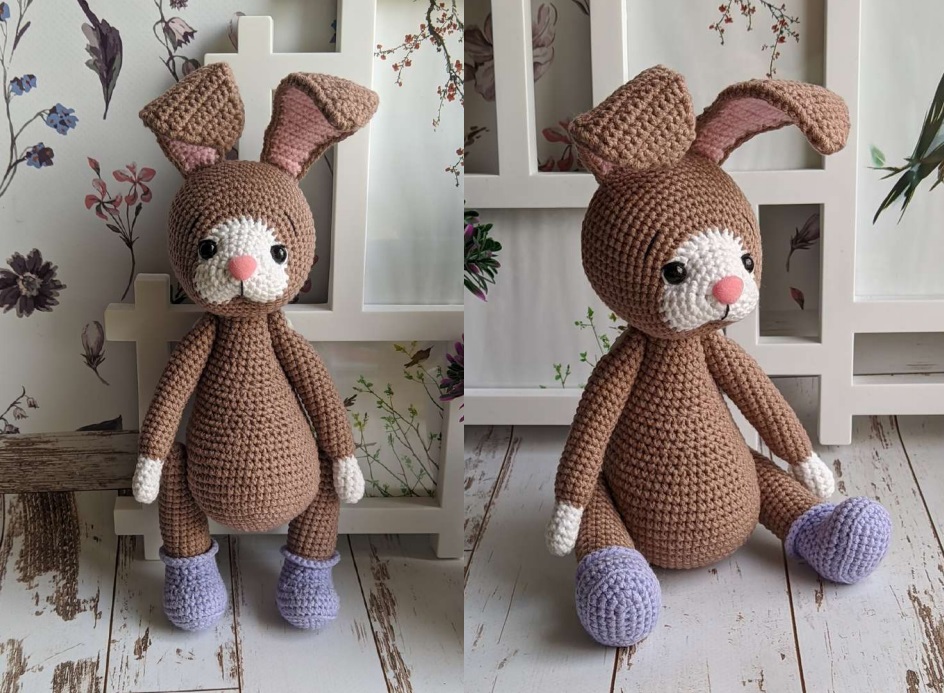
Hello friends. Today I will be sharing an awesome amigurumi bunny pattern. The name of this adorable bunny amigurumi is Mia. It’s a really cool pattern along with her dress. I hope you will like it.
Designer: Alyona Petuhova
https://vk.com/alien2295
https://www.instagram.com/alien_toys22/
Abbreviations
AR – Amigurumi Magic ring
MR – Amigurumi Magic ring
App – application
ll – lift loop
sc : Single Crochet
inc : Increase
dec : Decrease
tr : Triple Crochet/ Treble Crochet
st: Stitch
dc : Double Crochet
hdc: Half Double Crochet
sl-st : Slip Stitch
ch : Chain
..in : make increase into same stitch as many as the number which is given in front of “inc” abbreviation (exp; 3inc, 4inc..).
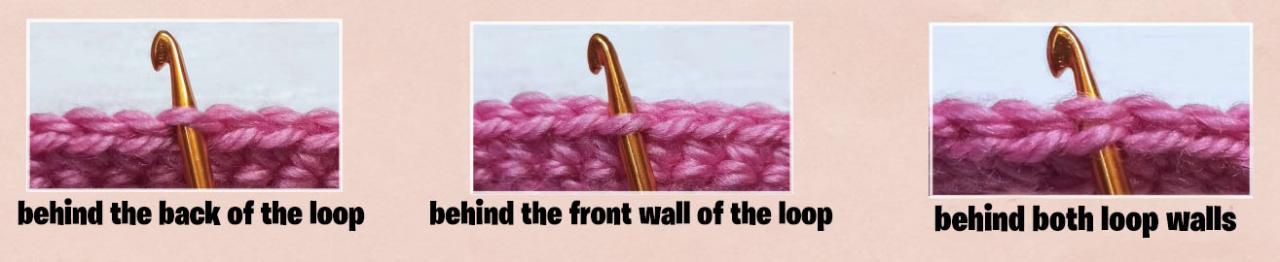
FLO : Crochet into front loops only
BLO : Crochet into back loops only
BL : Bobble Stitch – do 5dc all in the same stitch and then yarn over and pull through all the loops on your hook (the original loop + 1 loop for each partially completed dc).


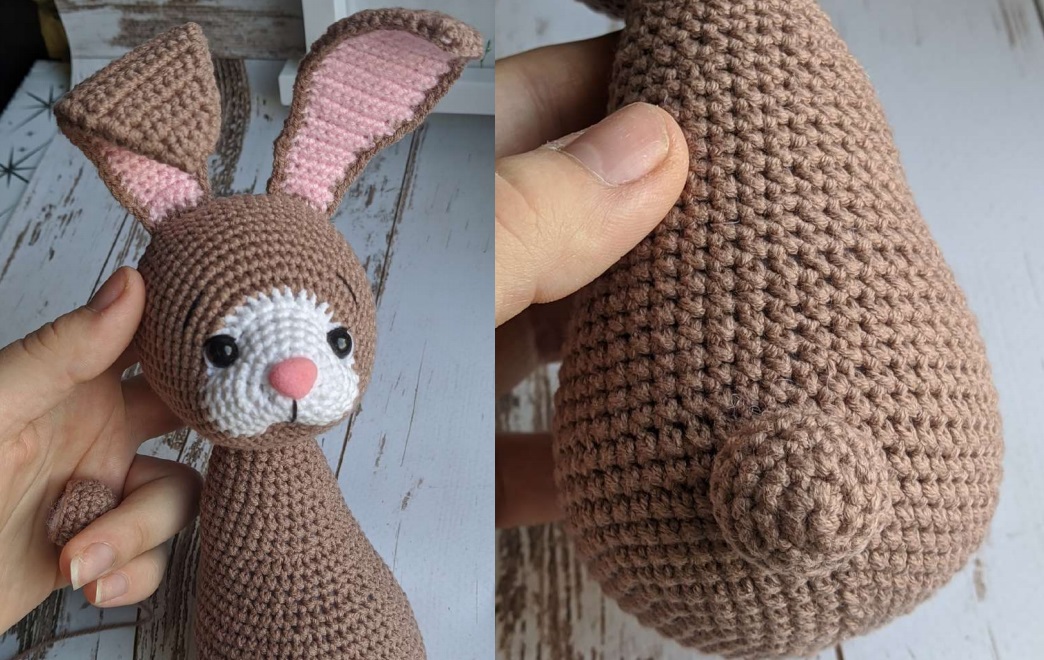
Head
start knitting in white
1. 6 sc in MR
2. 6 inc (12)
3. 2 sc (3 sc in 1)х2, 4 sc, (3 sc in 1)х2, 2 sc (20)
4. 4 sc, 3 inc, 7 sc, 3 inc, 3 sc (26)
5-6. 26 sc
7. 10 sc, 7 inc hdc, 9 sc (33)
меняем на коричневый цвет
8. inc, 7 sc, inc, 3 sc, (inc, 1 sc)х6, 2 sc, inc,
6 sc (42)
9. 1 sc, inc, 7 sc, inc, 7 sc, inc, 4 sc, inc, 4 sc, inc, 8 sc, inc, 5 sc (48)
10. 15 sc, (inc, 6 sc)х4, 5 sc (52)
Insert the nose into the amigurumi ring
11. 22 sc, inc, 10 sc, inc, 18 sc (54)
12. 27 sc, inc, 2 sc, inc, 23 sc (56)
13-21. 56 sc (9 rows,)
Insert eyes 8 mm, at a distance of 8 sc between
22. (12 sc, dec)х4 (52)
23. 5 sc, dec, (11 sc, dec)х3, 6 sc (48)
24. (6 sc, dec)х6 (42)
25. (5 sc, dec)х6 (36)
26. (4 sc, dec)х6 (30)
27. (3 sc, dec)х6 (24)
28. (2 sc, dec)х6 (18)
29. (1 sc, dec)х6 (12)
30. 6 6 dec Pull the hole, fasten the yarn.
Body
1. 6 sc in MR
2. 6 inc (12)
3. (1 sc, inc)х6 (18)
4. (2 sc, inc)х6 (24)
5. (3 sc, inc)х6 (30)
6. (4 sc, inc)х6 (36)
7. (5 sc, inc)х6 (42)
8. (6 sc, inc)х6 (48)
9. (7 sc, inc)х6 (54)
10.(8 sc, inc)х6 (60)
11-15. 60 sc (5 rows)
16. (8 sc, dec)х6 (54)
17-18. 54 sc (2 rows)
19. 12 sc, (3 sc, dec)х6, 12 sc (48)
20. 48 sc
21. 12 sc, (2 sc,dec)х6 (42)
22. 42 sc
23. 12 sc, (1 sc, dec)х6 (36)
24-26. 36 sc (3 rows)
27. 12 sc, 6 decавок, 12 sc (30)
28-30. 30 sc (3 rows)
31. (3 sc, dec)х6 (24)
32-34. 24 sc (3 rows)
35. (2 sc, dec)х6 (18)
36-37. 18 sc (2 rows)
We fill it tightly. We fix the yarn.
We leave a long yarn for sewing.
Tail
1. 6 sc in MR
2. 6 inc
3. (1 sc, inc)х6 (18)
4-5. 18 sc
6. (1 sc, dec)х6 (12)
fill, leave the yarn.
Arms
We start knitting in white
1.4 ch, from the second loop from the hook, knit: inc, 1 sc, 4 sc in 1 loop, 1 sc, inc (10)
2-4. 10 sc (3 rows)
5. (3 sc, dec)х2 (8)
6-7. 8 sc
Change the color to brown
8. (3 sc, inc)х2 (10)
9. (4 sc, inc)х2 (12)
10-31. 12 sc (22 rows)
32. 6 dec Tighten the hole, fasten the yarn.
Ears
We knit 2 pieces in pink and 2 pieces in brown. We do not cut the thread on the brown part. We knit in rotary rows, after each row we make a lifting loop
1.4 ch, in the 2nd loop from the hook we knit: 3sc, 1 ch
2. inc, 1 sc, inc (5)
3. 5 sc
4. inc, 3 sc, inc (7)
5. 7 sc
6. inc, 5 sc, inc (9)
7. 9 sc
8. inc, 7 sc, inc (11)
9-15. 11 sc (7 rows)
16. dec, 7 sc, dec (9)
17. 9 sc
18. dec, 5 sc, dec (7)
19-22. 7 sc (4 rows)
23. dec, 3 sc, dec (5)
24-26. 5 sc (3 rows)
We fix the thread on the part in pink. We continue to knit on brown. Fold the parts in half and tie, tying for both parts. Fasten the yarn. Leave for sewing.
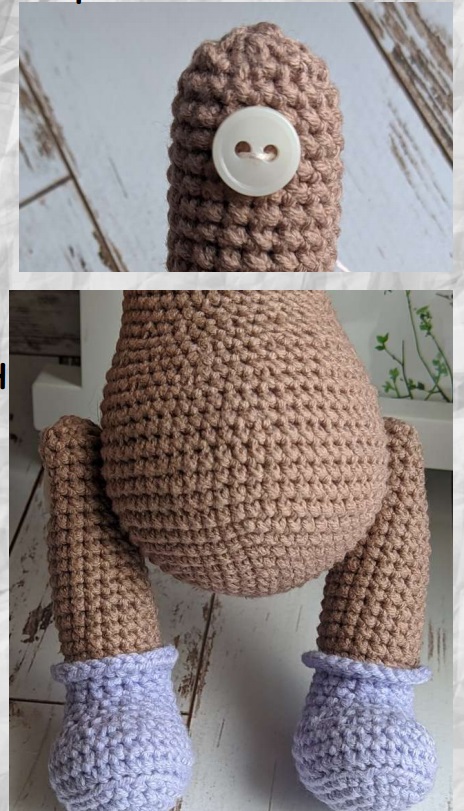
Legs
We start knitting in purple
1. 7 ch, in the 2nd loop from the hook we knit:
5 sc, 3 sc in 1 loop, 4 sc, inc (14)
2. inc, 4 sc, 3 inc, 4 sc, 2 inc (20)
3. 1 sc, inc, 4 sc, (1 sc, inc)х3, 4 sc, (1 sc, inc)х2 (26)
4. 2 sc, inc, 4 sc, (2 sc, inc)х3, 4 sc,(2 sc, inc)х2 (32)
5. knit by the back half-loops 32 sc
6-7. 32 sc (2 rows)
8. 7 sc, (1 sc, dec)х6, 7 sc (26)
9. 7 sc, 6 dec, 7 sc (20)
10. 20 sc
11. 8 sc, 2 dec, 8 sc (18)
12-13. 18 sc
Change the thread to brown. Leave a long thread.
14. knit by the back half-loops 18 sc
15-30. 18 sc (16 rows)
31. (1 sc, dec)х6 (12)
32. 6 dec
Pull off the hole. Hide the thread We tie the boot in the 14th row behind the front half-loops: (1 sc, inc) x9, slst.
Fasten the yarn.
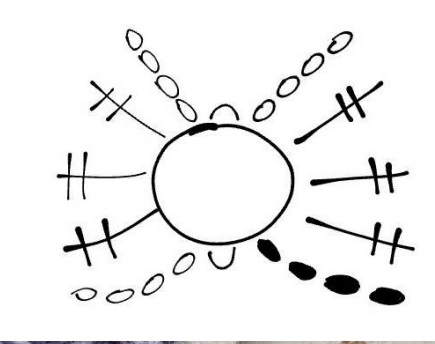
Face tightening
Find points as in the picture and put needles
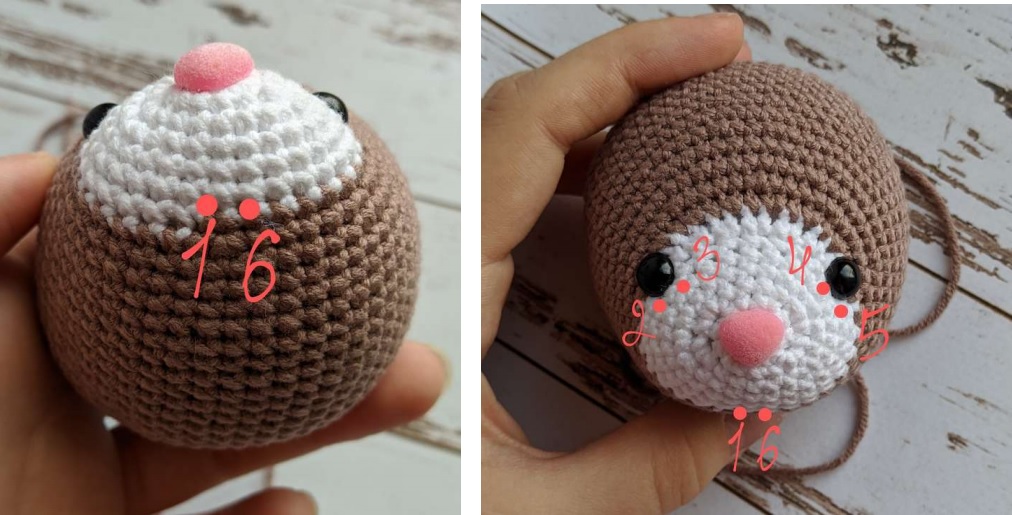
We introduce the needle at point 1 and output at point 2, then insert the needle at point 3 and output at point 6.
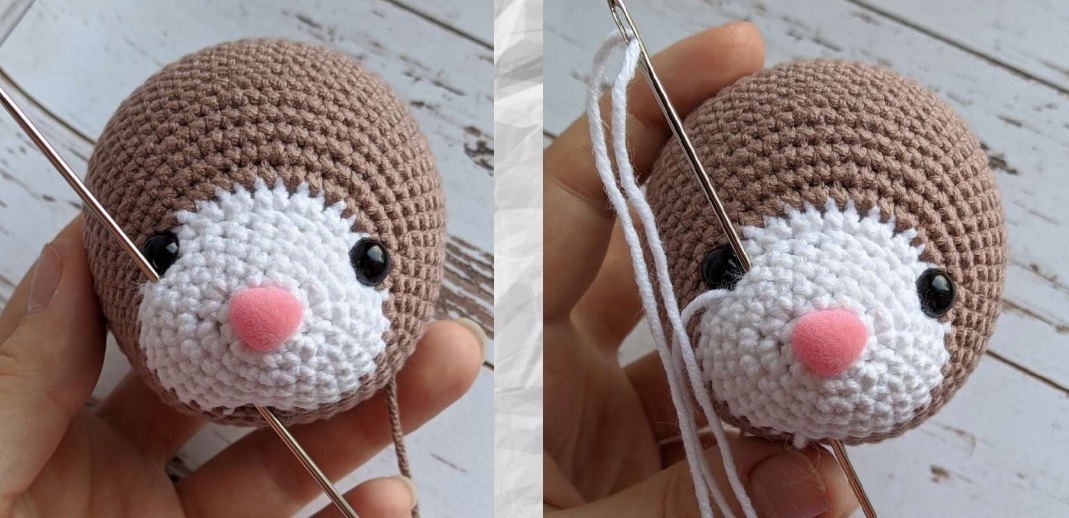
Do not tie. Slightly tighten and continue to pull the second eye Introduce the needle at point 1 and output at point 5, then insert the needle at point 4 and output at point 6.

Pull the eye, tie a knot and hide the threads.

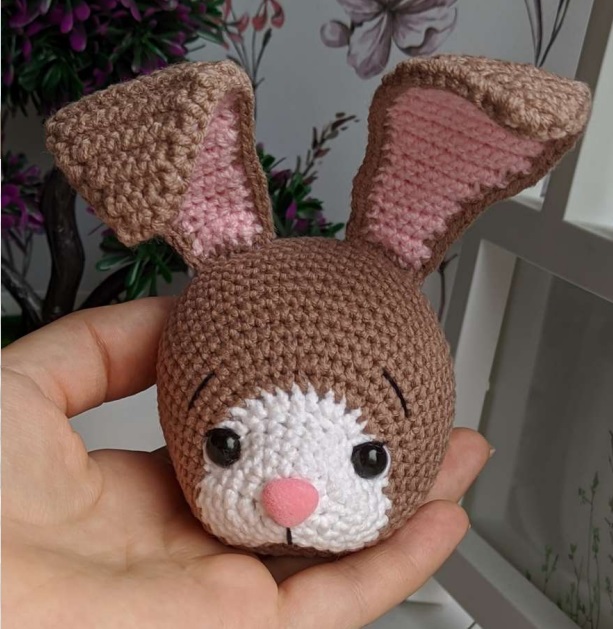
Sew on ears We embroider eyebrows, a strip from the nose We embroider eyes
Assembling the body Sew on the head and tail
Sew on the legs with a button fastening Insert the needle from the inside of the leg between the 5th and 6th row, pass the needle through the button and insert it into the leg through 2 sc.
We stretch it through the body between the 13th and 14th rows, insert it into the second leg, also between the 5th and 6th rows.
Then through the button and insert it into the leg through 2 sc, pull it through the body and tie a knot. Hide the thread.
Sew the handles in the same way.Insert the needle from the inside of the handle between the 4th and 5th row, pass it through the button and insert it into the handle through 2 sc.
We stretch through the body between the 5th and 6th row under the head, insert it into the second handle also between the 4th and 5th row. Continue through the button and enter through 2 sc. We stretch through the body and tie a knot. We hide the thread.
The dress
We knit the dress in rotary rows. After each row, make 1 lifting loop. We collect 25 ch and in the second loop from the hook we knit:
1. 24 sc
2. (3 sc, inc)х6 (30)
3. (4 sc, inc)х6 (36)
4. 4 sc, 7 inc, 14 sc, 7 inc, 4 sc (50)
5. 4 sc, (1 sc, inc)х7, 14 sc, (1 sc, inc)х7,
4 sc (64)
6. 64 sc
7. 4 sc, 7 ch, skip 21 loops, 14 sc, 7 ch, skip 21 loops, 4 sc
8. 4 sc, 7 sc along the chain, 14 sc, 7 sc along the chain, 4 sc
Next, we knit with double crochets
9. 2 ch (5 dc, inc)х6 (42)
10. (6 dc, inc)х6 (48)
11-15. 48 sc (5 rows)
We tie in white according to the following
scheme: (slst, 3 ch, slst) in one loop, sc in the next. We tie this to the end of the row.

Attach thread and tie around the edges of the dress sc. On one side, make eyelets according to the scheme (slst, 3 ch, slst into the next loop). Sew buttons on the other side. The dress is ready!
We knit a bandage. Type ch on the circumference of the head. Tie a bow according to the pattern.
Title: Awesome Bunny Mia Amigurumi PDF Crochet Pattern
Introducing the Awesome Bunny Mia Amigurumi PDF Crochet Pattern, a delightful and charming pattern that will bring joy to any crocheter’s collection. This pattern is perfect for both beginners and experienced crocheters looking to create a lovely and huggable bunny friend.
The Awesome Bunny Mia Amigurumi pattern features a unique and playful design, with big ears and a cute face that will surely capture your heart. The pattern includes detailed instructions and step-by-step photos to guide you through the process, making it easy to follow along even if you’re new to amigurumi.
Using high-quality yarn, this bunny will be soft, squishy, and incredibly adorable. The pattern offers multiple sizes, allowing you to customize your bunny according to your preferences. Whether you want a small bunny to fit in the palm of your hand or a larger one to cuddle with, Awesome Bunny Mia has got you covered.
Not only is this pattern perfect for creating a handmade gift for loved ones, but it also serves as a wonderful project for practicing amigurumi techniques. You’ll learn how to work in continuous rounds, increase and decrease stitches, and shape the bunny into its characteristic form.
So why wait? Embrace your inner creativity and embark on a fun and rewarding crochet journey with the Awesome Bunny Mia Amigurumi PDF Crochet Pattern. Download now and let the magic of amigurumi bring this adorable bunny to life!


Comments0