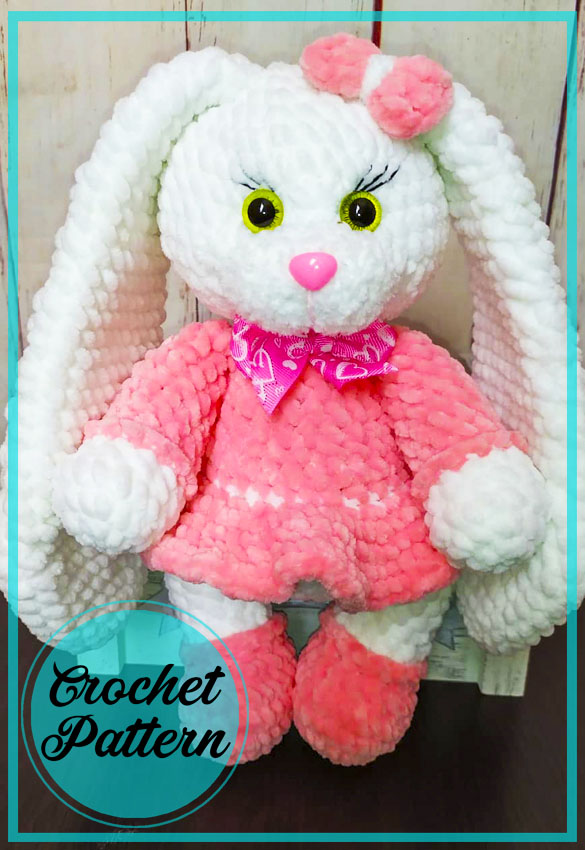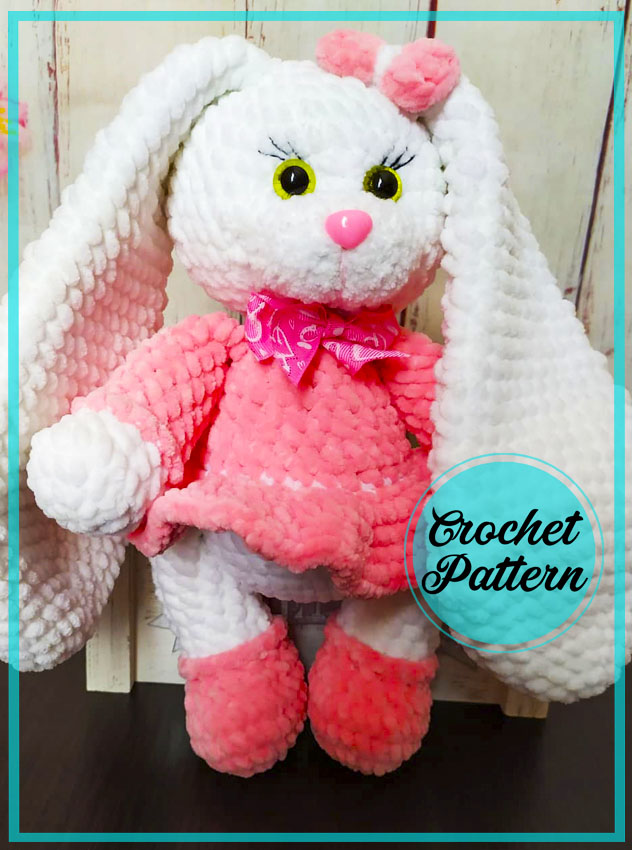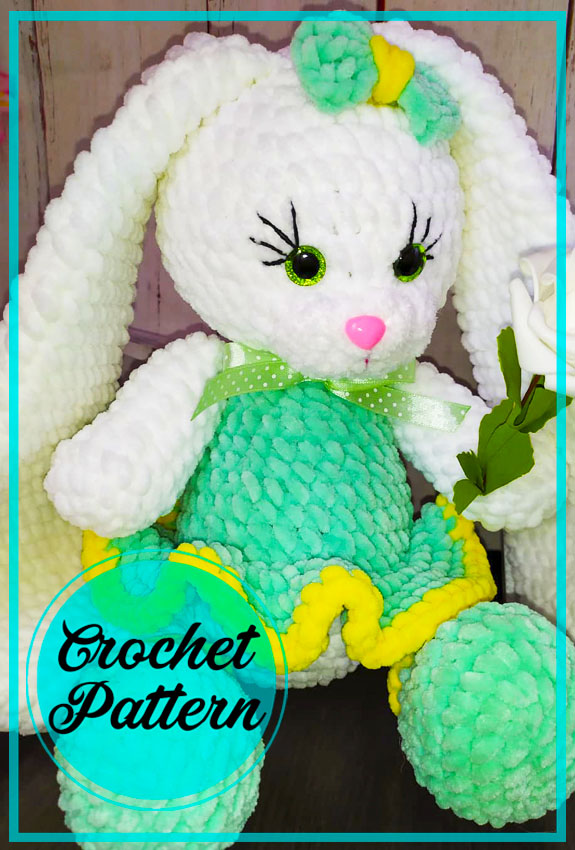
Friends, a new one is added to our cute bunnies today. This cute girl’s name is Martha. A really cute crochet bunny amigurumi. I tried to translate the pattern as clearly as I could, if I have any shortcomings, please let me know.
Designer: Татьяна Шило
@toys_by_mirplusha
Materials:
Yarn Himalaya Dolphin Baby main color 2 skeins, half skein for a dress and
boot, a little white or milky for the muzzle (Alize Softi).
I used a 3.5 mm hook.
Filler
Safety eyes 15 mm.
Safety spout 15 * 12 mm.
Sewing needle.
Matching thread for sewing.
A little bit of Yarnart jeans black yarn to decorate the face
Strong thread for tightening.
For convenience, the marker for the beginning of the row
Abbreviations
AR – Amigurumi Magic ring
MR – Amigurumi Magic ring
App – application
ll – lift loop
sc : Single Crochet
inc : Increase
dec : Decrease
tr : Triple Crochet/ Treble Crochet
st: Stitch
dc : Double Crochet
hdc: Half Double Crochet
sl-st : Slip Stitch
ch : Chain
..in : make increase into same stitch as many as the number which is given in front of “inc” abbreviation (exp; 3inc, 4inc..).
FLO : Crochet into front loops only
BLO : Crochet into back loops only
BL : Bobble Stitch – do 5dc all in the same stitch and then yarn over and pull through all the loops on your hook (the original loop + 1 loop for each partially completed dc).

Head
1.6 sc in MR;
2.6 inc (12);
3.(1 sc, inc)*6 (18);
4.(2 sc, inc)*6 (24);
5.(3 sc, inc)*6 (30);
6.(4 sc, inc)*6 (36);
7.(5 sc, inc)*6 (42);
8– 12. 42 sc ( 5 rows);
13. (5 sc, dec)*6 (42);
14. (4 sc, dec)*6 (36);
15. (3 sc, dec)*6 (30);
16. (2 sc, dec)*6 (24);
17. (4 sc, dec)*3 (15) + СС
The eyes are inserted between the 9th and 10th rows of the head at a distance of 4-5 sc.
Fill the head tightly and evenly from the bottom and sides, and then the middle, giving shape.
Muzzle:
Alize Softi White Yarn
1. Cast on 6 ch, from the 2nd from the hook 4sc, 3 sc in one loop, on the second side we knit 3 sc, inc (12);
2. inc, 3 sc, (inc)*3, 3 sc, inc (2) (18);
3. sc, inc, 3sc, ( 3 sc, inc)*3, 3 sc, ( 1sc, inc)*2 (24);
4. 24 sc+ slst. We leave the yarn for sewing.
Ears:
For ears, you can use a hook 4.5 mm – 5mm, there will be more airy and longer.
1. 6 sc in MR;
2. 6 inc (12);
3. (1 sc, inc)*6 (18);
4. 18 sc;
5. (2 sc, inc)*6 (24) ;
6. 24 sc;
7. (3 sc, inc)*6 (30);
8. 30 sc;
9. (4 sc, inc)*6 (36);
10. 36 sc;
11. dec, 16 sc, dec, 16 sc (34);
12. dec, 15 sc, dec, 15 sc (32);
13. dec, 14 sc, dec, 14 sc (30);
14. dec, 13 sc, dec, 13 sc (28);
15. 28 sc;
16. dec, 12 sc, dec, 12 sc (26);
17. 26 sc;
18. dec, 11 sc, dec, 11 sc (24);
19. 24 sc;
20. dec, 10 sc, dec, 10 sc (22);
21.-22. 22 sc (2 rows);
23. dec, 9 sc, dec, 9 sc (20);
24.-25. 20 sc (2 rows);
26. dec, 8 sc, dec, 8 sc (18);
27.-28. 18 sc (2 rows);
29. dec, 7 sc, dec, sc (16);
30.-31. 16 sc (2 rows);
32. dec, 6 sc, dec, 6 sc (14);
33. 14 sc;
34. dec, 5 sc, dec, 5 sc (12);
35. 12 sc. We knit in half, leave the yarn for sewing.
Body:
We knit in the main color.
1. 6 sc in MR;
2. 6 inc (12);
3. (1 sc, inc)*6 (18);
4. (2 sc, inc)*6 (24) ;
5. (3 sc, inc)*6 (30);
6. (4 sc, inc)*6 (36);
7.-9. 36 sc;
Change the color to an additional one.
10. (4 sc, dec)*6 (30);
11. For rear half loops 30 sc;
12. 30 sc;
15. (3 sc, dec)*6 (24);
14. – 15. 24 sc;
16. (2 sc, dec)*6 (18);
17. 18 sc;
We fill the body tightly and evenly from the bottom and sides, and then the middle, giving shape.
18. (4 sc, dec)*3 (15)+ sl st.
We fasten the yarn and leave the long end for sewing. (I use a yarn to match cotton for sewing).
Skirt:
1.For the front half loops on the body in the 11th row 30 inc (60);
2.(1 sc, inc)*30 (90);
3.– 4. 90 sc;
5.(1 sc, inc)*60 (180)
Hands
1. 6 sc in MR;
2. 6 inc (12);
3. (1 sc, inc)*6 (18);
4. 18 sc;
5. 3 sc, (1 dec*6), 3 sc (12);
6. 12 sc;
7. Color change, for back half-loops 12 sc;
8.-12. 12 sc (5 rows);
We fill the handles from the bottom tightly to the top, we do not fill it (gradually the bottom is tight, the middle is a little bit, we do not fill the top at all).
13 .. 6 sc, fold in half (if the middle moves to miss or dissolve 2 sc in the course of knitting), knit 6 sc together, leave the thread for sewing.
We attach the thread to the front wall of the loop in the 8th row and tie the cuffs.
Tail:
1. 6 sc in MR;
2. 6 inc (12);
3. 12 sc);
4. ( 1dec)*6 +slst We leave the yarn for sewing
We fill it a little bit.
Legs:
1. Cast on 6 ch, from the 2nd from the hook 4sc, 3 sc in one loop, on the second side we knit 3 sc, inc (12);
2. inc, 3 sc, (inc)*3, 3 sc, inc (2) (18);
3. sc, inc, 3sc, ( 3 sc, inc)*3, 3 sc, ( 1sc, inc)*2 (24);
4.-5. 24 sc;
6. 6 sc, ( 1 dec)*5, 8 sc (19);
7. 5 sc, (1 dec)*4, 6 sc (15);
8. Color change, for back half-loops 15 sc;
9. (3 sc, dec)*3 (12);
10.-16. 12 sc;
We fill the legs from the bottom tightly to the top, we do not fill it, (gradually the bottom is tight, the middle is a little bit, we do not fill the top at all).
17. 6 sc, fold in half (if the middle moves to miss or dissolve 2 sc as you knit), knit 6 sc together, leave the thread to sew.
We attach the thread to the front wall of the loop in the 8th row and tie the shoes.
bow tie:
I use this scheme if the bow is made of cotton yarn, if the yarn is marshmallow
Dial 4 inc, (1 sc with 2 yards) * 3, 4ch, slst, 4ch,
(1 sc With 2 yarns) * 3, 4 ch, slst Tighten, make the middle with yarn of a different color.
The bow tie is ready.
Assembly:
1. Sew the muzzle to the head, placing it right under the eyes (fill it in just a little, giving it a shape). Forget-me-not, insert a nose in the upper part of the muzzle in the middle between the eyes.
2. We make a tightening under the eyes and use the same thread to tighten the muzzle from the nose to the lower part of the muzzle.
3. Sew the head to the body.
4. Sew the tail to the body.
5. Sew on handles in row 17, legs in row 8 of the body.
6. Sew the ears to the head at a distance of 3-4 rows of the head. Sew a bow to the ear.
7. Optionally, tie a ribbon tied into a bow around the neck.
Enjoy your knitting and even stitches!

Bunny Martha Amigurumi PDF Crochet Pattern is a delightful and easy-to-follow pattern for creating a charming bunny amigurumi. This pattern is perfect for crafters of all skill levels, from beginners to experienced crocheters. The pattern includes detailed instructions and step-by-step photos to guide you through the process of creating a cute and huggable bunny amigurumi. With its simple design and charming appearance, Bunny Martha is sure to be a favorite among kids and adults alike. Whether you’re looking for a new project to try or a gift for a loved one, Bunny Martha Amigurumi PDF Crochet Pattern is a great choice. So why wait? Start crocheting today and bring home your very own Bunny Martha!


Comments0