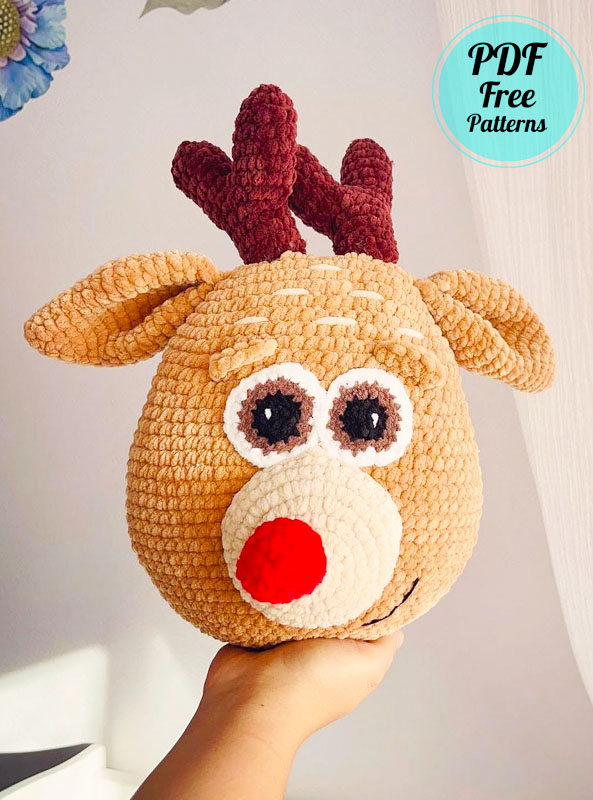
Hello my dears, today I want to share a very cute christmas deer amigurumi pattern. Deer amigurumi is actually just a deer’s head. However, I think this amigurumi toy, which is quite large, will help you especially with Christmas decorations. There are many people we love who decorate the doors for the last Christmas. You can use this kind of ornament for your door, especially if a lot of people come and go to your house. Now if you’re ready, let’s get started.
Designer: boulette_crochet
NOTES
* Rudy measures about 35 cm with recommended yarn and hook size
* Work in spirals, do not join rounds.
* This patter was designed by Boulette & Cie, it’s a FREE pattern. It’s prohibited to sell or copy any parts of this pattern. You’re more than welcome to sell the finished product.
* Don’t forget to tag @boulette_crochet if you post your Rudy, I would love to see your pictures!
ABBREVIATIONS
MR – magic ring
ST – stitch
SL ST – slip stitch
SC – single crochet
HDC – half double crochet
INC – increase
INC3 / INCA – increase with 3 or 4 sc in the same st
DEC – decrease
RND – round
MATERIALS
Thick plush yarn in:
° caramel (about 120g)
° dark brown (about 40g)
° beige (about 20g)
° red (less than 10g)
° Thin plush yarn in °black
° brown
° white
(Very little quantity)
° black embroidery thread or cotton yarn
° white & beige cotton yarn for sewing
* 5MM & 3MM hooks *stuffing
* tapestry needle
* stitch marker
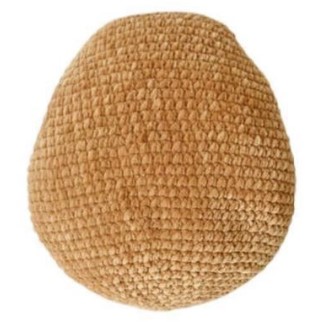
HEAD
HONEY BUNNY 09 (light brown) & 5MM HOOK
1) Ch 13, 11 sc, inc4, 10 sc, inc3 (28)
2) 1 sc, 1 inc, 8 sc, (1 sc, 1 inc) x3, 8 sc, (1 sc, 1 inc)x2 (34)
3) 1 sc, 1 inc, 11 sc, 1 inc, 3 sc, 1 inc, 13 sc, 1 inc, 2 sc (38)
4) 1 sc, 1 inc, 13 sc, 1 inc, 3 sc, 1 inc, 15 sc, 1 inc, 2 sc (42)
5) 42 sc
6) 1 inc, 17 sc, 1 inc, 2 sc, 1 inc, 17 sc, 1 inc, 2 sc (46)
7) 1 sc, 1 inc, 17 sc, 1 inc, 4 sc, 1 inc, 17 sc, 1 inc, 3 sc (50)
8) 2 sc, 1 inc, 17 sc, 1 inc, 6 sc, 1 inc, 17 sc, 1 inc, 4 sc (54)
9) 3 sc, 1 inc, 17 sc, 1 inc., 8 sc, 1 inc, 17 sc, 1 inc, 5 sc (58)
10)4 sc, 1 inc, 17 sc, 1 inc, 10 sc, 1 inc, 17 sc, 1 inc, 6 sc (62)
11-14) 62 sc (4 rounds)
15) 1 sc, 1 inc, 26 sc, 1 inc, 3 sc, 1 inc, 26 sc, 1 inc, 2 sc (66)
16) 66 sc (66)
17) (10 sc, 1 inc) x6 (72)
18) (11 sc, 1 inc) x6 (78)
19-24) 78 sc (6 rounds)
25) (11 sc, 1 dec) x6 (72)
26) (10 sc, 1 dec) x6 (66)
27-28) 66 sc (2 rounds)
29) (9 sc, 1 dec) x6 (60)
30) (8 sc, 1 dec) x6 (54)
31) (7 sc, 1 dec) x6 (48)
32) (6 sc, 1 dec) x6 (42)
33) (5 sc, 1 dec) x6 (36)
start stuffing
34) (4 sc, 1 dec) x6 (30)
35) (3 sc, 1 dec) x6 (24)
36) (2 sc, 1 dec)x6 (18)
37) (1 sc, 1 dec) x6 (12)
finish stuffing
38) 6 dec (6)
Fasten off and hide the tail.
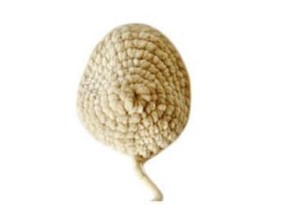
MUZZLE & NOSE
HONEY BUNNY 05 (beige) & 5MM HOOK
1) 6 sc in MR
2) 6 inc (12)
3) (1 sc, 1 inc) x6 (18)
4) (2 sc, 1 inc) x6 (24)
5) 3 sc, (1 sc, 1 inc) x6, 9 sc (30)
6) 3 sc, (2 sc, 1 inc) x6, 9 sc (36)
7-8) 36 sc (2 rounds)
Fasten off and hide the tail.
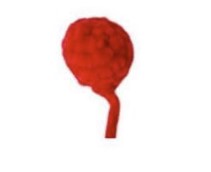
HONEY BUNNY 40 (red) & 5MM HOOK
1) 6 sc in mr (6)
2) 6 inc (12)
3-4) 12 sc (2 rounds)
5) 6 dec (6)
Stuff firmly. Fasten off and leave a long tail for sewing.
ANTLERS
HONEY BUNNY 12 (dark brown) & 5MM HOOK
Make a magic ring and leave a long beginning tail (you’ll need it later, don’t hide it)
1) 5 sc in MR (5)
2) 5 inc (10)
3-5) 10 sc (3 rounds)
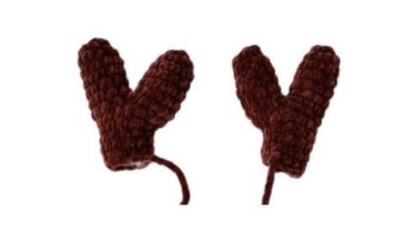
Fasten off and hide the tail
2) 5 inc (10)
1) 5 sc in MR (5)
3-7) 10 sc (5 rounds)
We are now going to join the two pieces to make an antler:
8) insert hook in the first st of the first piece, 10 sc around the first piece, 10 sc around the second piece (20)
9) (1 sc, 1 dec) x5, 5 sc (15)
10) (1 dec, 1 sc) x3, 6 sc (12)
11 – 14) 12 sc (4 rounds)
Fasten off and leave a long tail for sewing.
Using a tapestry needle and the beginning tail from the first piece, make a few whip stitches to close the hole from row 8 (where we joined both pieces). Repeat the process to make the second antler.
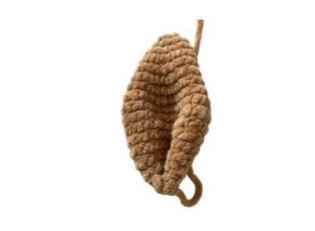
EARS
HONEY BUNNY 09 (light brown) & 5MM HOOK
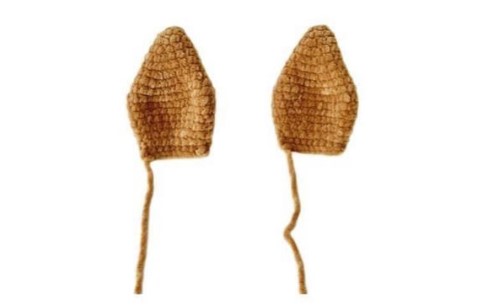
1) 6 sc in mr
2) (1 sc, 1 inc) x3 (9)
3) (2 sc, 1 inc) x3 (12)
4) (3 sc, 1 inc) x3 (15)
5) 15 sc (15)
6) (4 sc, 1 inc) x3 (18)
7) (5 sc, 1 inc) x3 (21)
8) (6 sc, 1 inc) x3 (24)
9) (3 sc, 1 inc) x6 (30)
10-11) 30 sc (2 rounds)
12) (3 sc, 1 dec) x6 (24)
13 – 14) 24 sc (2 rounds)
15) (2 sc, 1 dec) x6 (18)
16) 18 sc
Flatten the ear and join both sides with 9 sc. Fasten off and leave a long tail. Fold the ear and sew both sides together.
Repeat the process to make the second ear.
EYES
HAPPY CHENILLE 20, 22 & 28 AND 3MM HOOK
To make the eyes you’ll need some thin plush yarn in black, brown and white. I used Happy Chenille by DMC.
Start with black yarn:
1) 6 sc in MR
2) 6 inc (12)
Change to brown:
3) (1 hdc, 1 inc hdc) x6 (18) Change to white:
4) (2 hdc, 1 inc hdc) x6 (25) 1 sl st to close and fasten off. Hide all the tails.
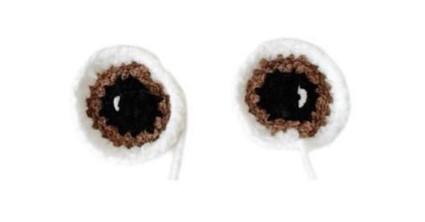
The sl st at the end of the last row will be the bottom of the eye. Make a stitch between rows 1 & 2 using white yarn for the detail of the eyes.
Using white cotton yarn, sew both eyes together in the middle in order to join them (about 4-5 sts, starting from the bottom) Do not sew all the way up. Leave a long tail.
ASSEMBLING
1) Sew the antlers on top of the head, between rows 1-2 and 3 sts apart
2) Sew ears on the sides of the head, between rows 3-4
3) Sew the eyes on the middle of the face, the top should be between rows 10-11 and the bottom between rows 17-18.
4) Sew the nose on the muzzle, between rows 1-2. Note that the increases of the muzzle from rows 5-6 are the top. Cut a long piece of beige cotton yarn and attach it to the muzzle. Sew the muzzle on the face. The top of the muzzle should be under the eyes, on the same row. The bottom of the muzzle should be between rows 28-29.
5 EYEBROWS: With the same color yarn you used for the head, ch6 and make 5 sc. Fasten off. Repeat to make the second eyebrow. Sew only the chains to the head, not the sc. The first ch will be 1 row above the eye, the last chain will be 2 rows below, 1 row apart from the corner of the eye.
6) With black yarn or embroidery thread, make a little mouth next to the muzzle in the space of 5 rows.
7) Cut a piece of beige plush yarn and make the details on the face, in the space of 3 sts and 3 sts apart. Skip one row each time.
This is a free crochet pattern for a cute and festive Christmas deer ornament. The pattern is provided in PDF format, making it easy to download and print. The amigurumi technique is used to create a soft and huggable ornament that is perfect for decorating your Christmas tree or giving as a gift. The pattern includes step-by-step instructions and detailed photos to guide you through the process. Whether you are a seasoned crocheter or a beginner, this pattern is suitable for all skill levels. So why not get into the holiday spirit and make your own adorable Christmas deer ornament?


Comments0