
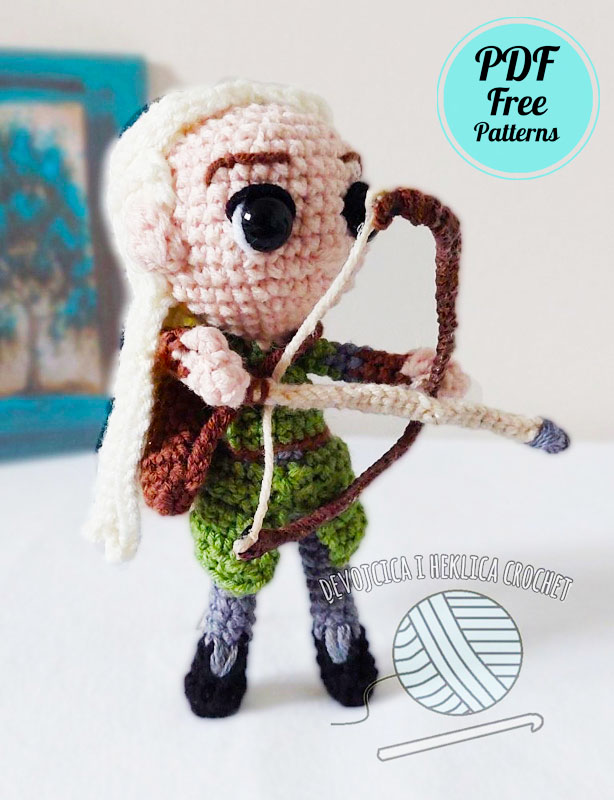
Hello my dears, I have shared a few crochet amigurumi patterns about the lord of the rings before. However, I clearly did not expect the character of Legolas to turn into an amigurumi toy. Although making the amigurumi doll is difficult, I think Legolas is so popular that it is worth a try. Especially after the lord of the rings and the hobbit movies, there is almost no one who does not know Legolas. Although Legolas was not included in the rings of power amazon series, almost all of those who watched the movie know very well.
Designer: devojcica_i_heklica_crochet
Materials and tools:
– Crochet hook 1.7mm and 2.1mm
– Stuffing
– 8mm safety eyes ( but you could also embroider eyes )
– Yarn ( I used lanoso alara) 50%cotton 50%acrylic 50g=160m In colours:
Peach (skin)
Very light yellow/white (hair)
Dark grey (pants, details)
Dark green (jacket)
Black (boots, eye embroidery)
White (eye embroidery)
Beige (arrow and bow details)
Brown (belt and details)
– Needle
– Wire
Abbreviations:
– Sc – single crochet
– MR – magic ring
– Dec – decrease
– Inc – increase
– St, sts – stitch, stitches
– Bobble – yo, put the hook in a stitch, yo, pull through 2 loops on your hook twice, yo and pull through
– Hdc – half double crochet
– Ch – chain
– Sl – slip stitch
– Number in () is the number of sts at the end of each row
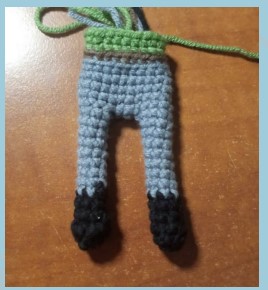
LEGS
Hook is 1.7mm.
Work as tight as you can
We are going to make 1 leg and fasten off. Then we need to make second leg and join with first one and continue working on the body.
In Black
R1: sc6 in MR (6)
R2: [sc, inc] x3 (9)
R3: sc5, dec2 (7)
R4 – R5: sc7 (7) (2 rounds)
Change to dark gray
R6-R13: sc7 (7) (8 rounds)
Fo. Repeat to make second leg and then continue to the body.
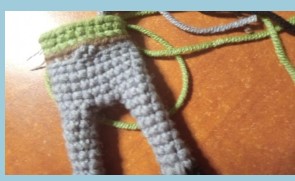
BODY
R14: sc7, ch3, sc7, sc3 (20)
R15: inc, sc15, inc, sc3 (22)
R16-18: sc22 (22) (3 rounds)
R19: dec, sc15, dec, sc3 (20)
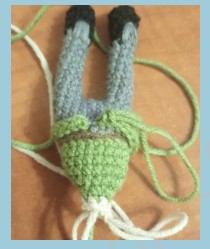
Change to brown
R20: sc20 in BLO (20)
Change to dark green:
R21: sc20 in BLO (20)
R22: sc20 (20)
Before you start stuffing, embroider details on his boots:
Do it on both feet
And then make a small buckle on the belt.
Start stuffing and continue crocheting:
R23: sc2, dec, sc7, dec, sc5, dec (17)
R24: sc2, dec, sc7, dec, sc4 (15)
R25: sc2, dec, sc5, dec, sc2, dec (12)
R26: dec6 (6)
Peach
R27: sc6 (6)
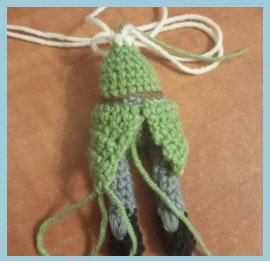
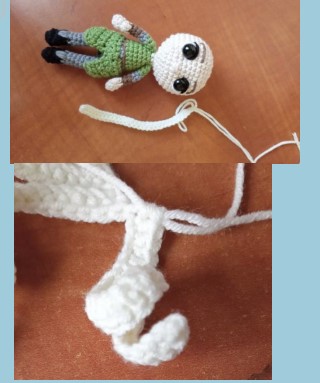
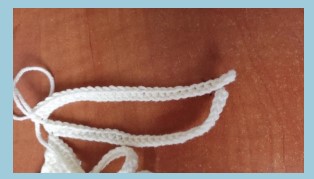
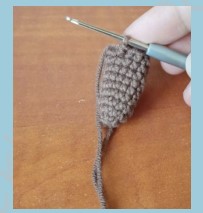
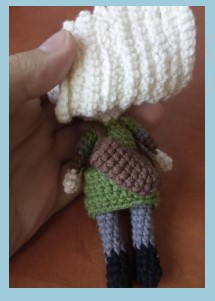
Before we work the head, lets make a skirt:
Work in the FLOs left from R20. Work in rows and ch1 after each row to turn:
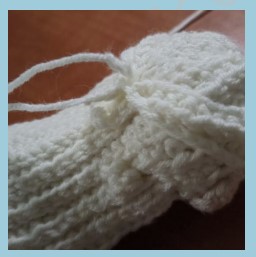
R1: sc20 (20) (picture above)
R2: dc, hdc sc16, hdc, dc (20)
R3: hdc2, sc16, hdc2 (20)
R4-5: sc20 (2 rows)
R6: hdc3, sc14, hdc3 (20)
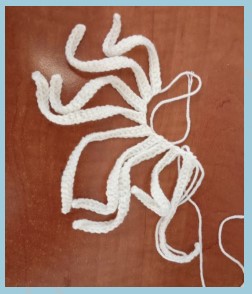
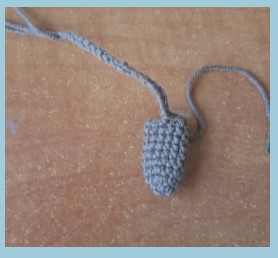
R7: sc20 (20), FO, hide the tail left
This is how it should look like
Now go on with the head:
R28: inc6 (12)
R29: [sc, inc] x6 (18)
R30: [sc2, inc] x6 (24)
R31: [sc3, inc] x6 (30)
R32: [sc4, inc] x6 (36)
R33: sc2, sc18 in FLO, sc16 (36)
R34-R39: sc36 (36) (6 rounds)
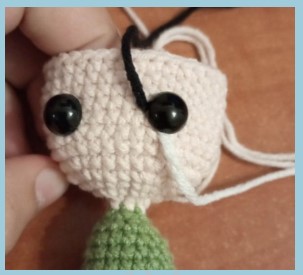
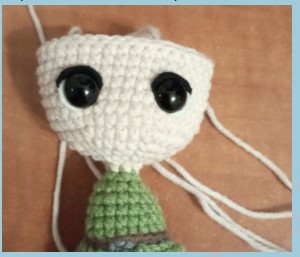
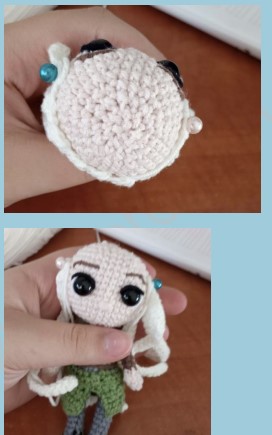
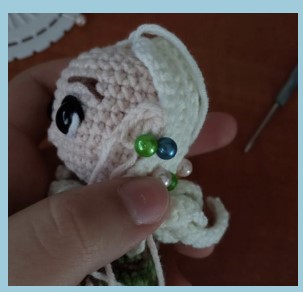
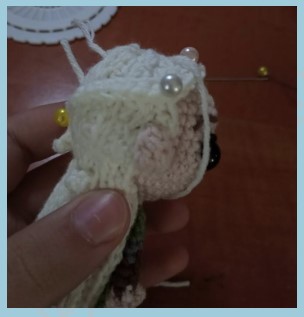
Put safety eyes between R35 and R36, 7sts apart
If you want to embroider around the eyes, you can do it now.
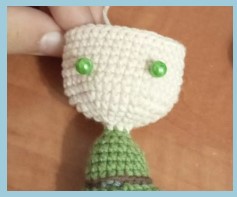
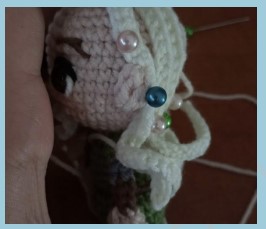
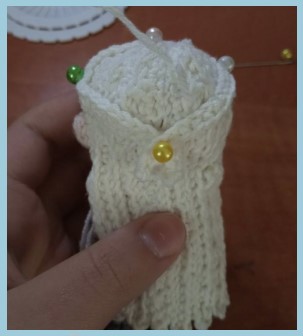
Use pins to define the position of the eyes. When you are ready, place the safety eyes.
They might look a bit big at the moment, but later it will look just perfect.
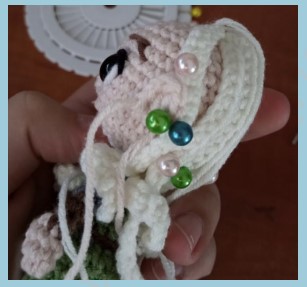
For example, here is how they look with and without embroidery.
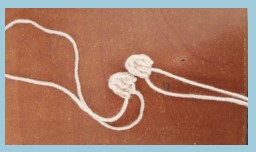
Start by placing black and white threads as shown.
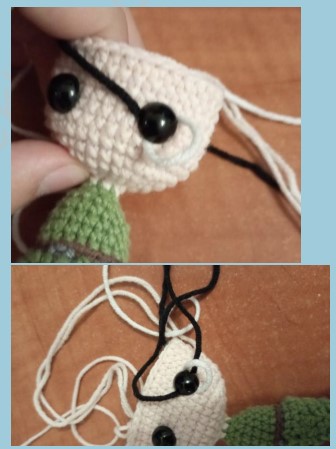
Cross them like this.
It should look like this.
Repeat for the other eye.
This is optional, but you can also embroider a nose using some skin colored yarn.
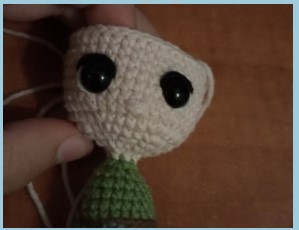
Continue crocheting
R40: [sc4, dec] x6 (30)
R41: [sc3, dec] x6 (24)
R42: [sc2, dec] x6 (18)
R43: [sc, dec] x6 (12)
R44: dec6 (6)
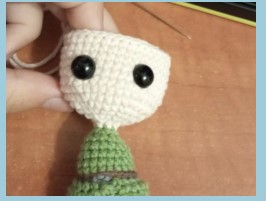
Use a tapestry needle to close the remaining hole
ARMS
Hook is 1.7mm
In peach
R1: sc6 in MR (6)
R2: sc6 (6)
R3: sc5, bobble (6)
Change to brown or black
R4: sc4, dec (5)
R5-6: sc5 (5) (2 rounds)
Change to dark gray
R7-8: sc5 (5) (2 rounds)
Change to dark green
R9-11: sc5 (5) (3 rounds)
Fo and leave a long tail for sewing.
Make 2. Attach arm to the body
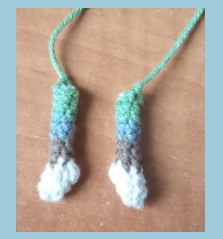
While sewing, make sure that the thumbs (bobbles) are pointing forward!
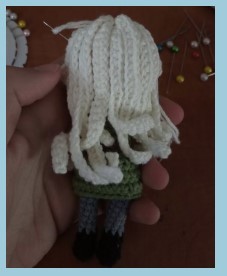
HAIR
With a 1.7mm hook
Use white/very light yellow colour.
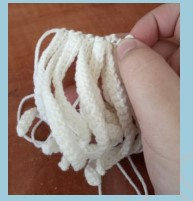
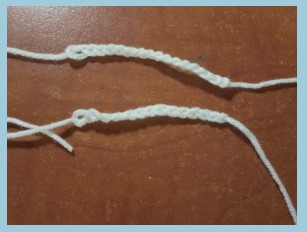
Mine was:ch30, turn, sc29 (29) x9
To make sure you get the best result, compare this strand to the body. It should reach dolls waist.
To prevent this (a big curl), try working looser and stretch each strand after you crochet it
And it will look like this.
You will notice that the strands start to curl again after you leave them, but don’t worry. You can stretch them a few more times, but after we sew them on, they will stop curling
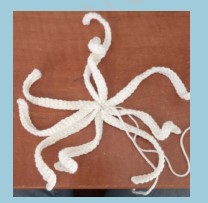
Make 9 strands(This should be enough to cover the head with hair. If not, crochet more strands)
Again, you can make more or less strands than I did, just make sure that when you pin the hair like this, there is a lot of space between the hair and the eye
(We are not going to sew the hair here, this is just for the measuring purposes!)
Cut the yarn and leave the wig aside for a second
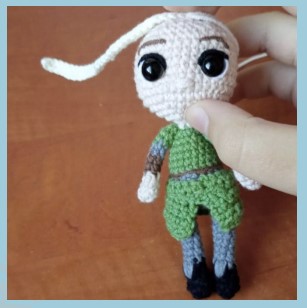
EARS
We are now going to make a pair of elvish ears, but won’t sew them on yet. We will add them at some point while adding hair. (I will let you know)
These are elvish ears. So, if you think they aren’t pointy enough, you can pinch them. If it is still not pointy, you can ch1 before tr. Working loosely will also help making it the right shape.
R1: in MR: sc, hdc, tr, ch2, sc, cut the yarn. Make 2
Now, sew the hair on:
Pull the tail through the top of each strand
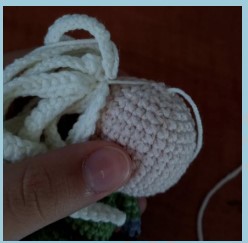
Pull. Make a small knot
Sew the hair on top of the head
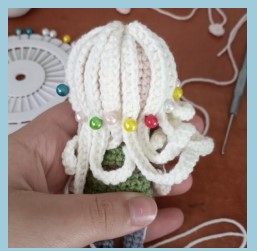
Pin each of them down
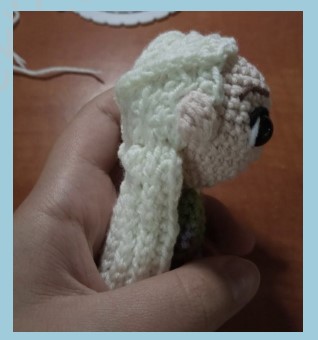
Then pin the ears 4sts away from the eyes on each side
Readjust the first hair strand to make it look like it has been tucked behind the ear (repeat on the other side as well)
Sew the ear down (repeat on the other side as well)
Then stitch each hair strand to the chin level
(This step is optional) stitch each of the strands together to reduce the bald spots
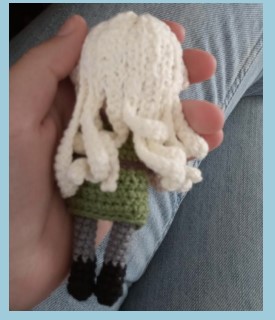
This is from the front
Now, prepare an additional strand:
ch23, sc2, sl, sc23, sc21, sl in the very first ch
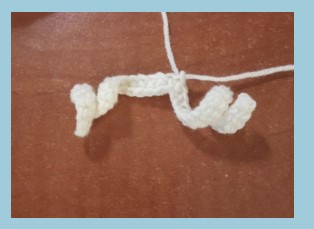
Sew it above his forehead
Pin it above the ear
And then leave the rest hanging
Sew it down.
Additionally, you can add some braids if you like:
(These are just some long chains)

Sew them like this:
Tie the braids like this and hide the tails
QUIVER
Use brown yarn and a 1.7mm hook
R1: sc6 in MR (6)
R2: [sc, inc] x3 (9)
R3: [sc2, inc] x3 (12)
R4-9: sc12 (12) (6 rounds)
To make the shoulder strap, ch25
And then sl in the bottom
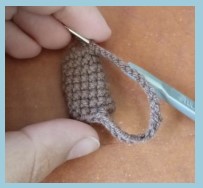
Cut the yarn and hide the tail
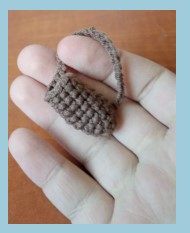
Put it over his shoulder:
BOW AND ARROW
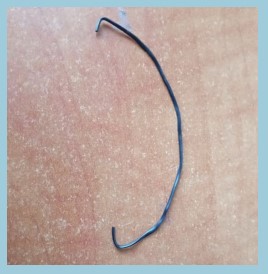
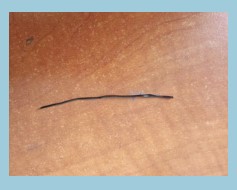
These pieces are made out of wire, but you will also need some beige, some brown and some grey yarn The wire you will use for the bow should be around the height of your doll.
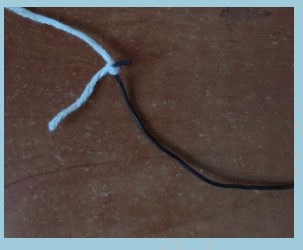
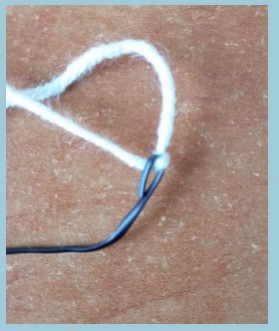
The wire for the arrow should be around 7cm (a bit less than 3 inches) First, bend a long piece of wire like this:
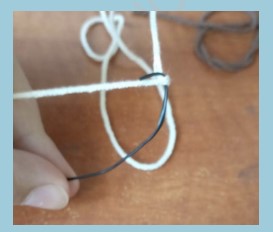
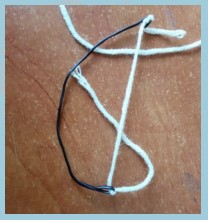
Then, use beige yarn and tie it like this:
And on the other side as well:
Bend the wire to secure the yarn:
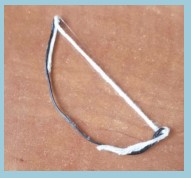
If you want, you can put a few drops of glue to secure the yarn even more I glue the tails down like this:
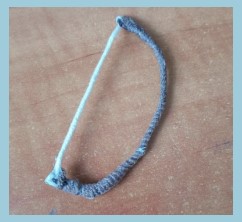
Then wrap the rest of it in brown yarn
The bow is done!
To make the arrow, use a shorter wire and stretch it out like so:
You can either wrap it or crochet over it; I did a couple of sc
Secure the ends by bending the wire, just like you did with the bow

Decorate the arrow. I just wrapped the ends with yarn
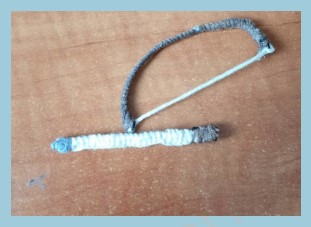
Done!
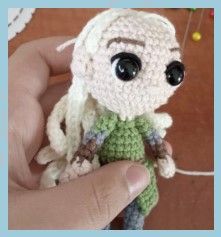
Congratulations, your Legolas is done! Remember to tag me if you post him in social media!
Crochet Legolas Greenleaf Amigurumi PDF Free Pattern is a pattern for creating an adorable amigurumi doll inspired by the character Legolas from The Lord of the Rings. This free pattern provides step-by-step instructions and detailed diagrams to guide you through the process of creating this whimsical character. Whether you are a seasoned crocheter or just starting out, this pattern is perfect for anyone who loves working with yarn and wants to create a unique and memorable project. With its intricate details and charming design, this Legolas Greenleaf Amigurumi doll is sure to be a favorite among fans of the fantasy genre and amigurumi enthusiasts alike. So why not give it a try and bring this beloved character to life with your own two hands?

Comments0