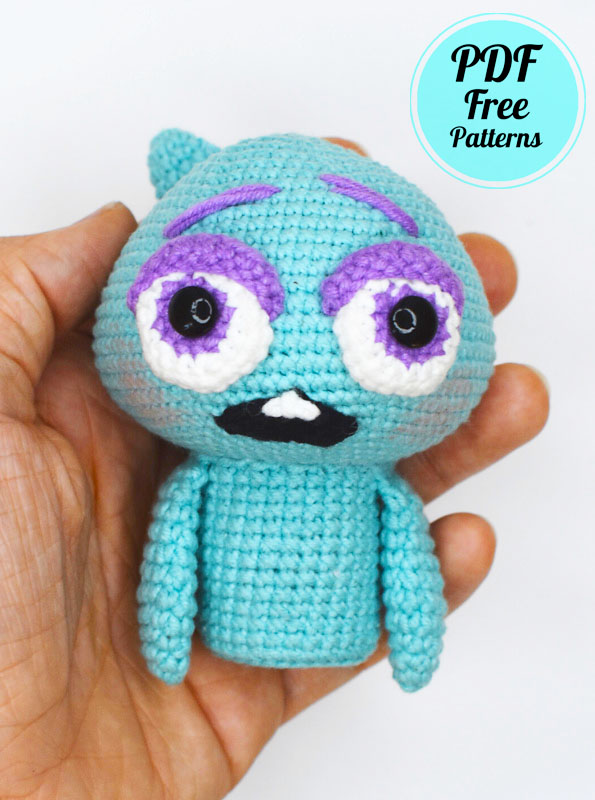
Hello my dears. Today I will share a wonderful amigurumi cartoon character pattern. This crochet amigurumi pattern, the construction of which is explained in great detail, is free. Although the construction of the Amigurumi doll may seem simple, it is an intermediate crochet pattern because it consists of many parts and has a very detailed structure. Please stay tuned for more amigurumi free patterns.
Designer: sweet_heart_things
Materials
Yarn: YARNART Jeans (55%cotton, 45% acrylic,
160 m (175 yd) / 50 g (1.75oz):
№53 (Black) №72 ( Purple) №81 (TURQUOISE) №01 (White)
Hook size 2 mm
Safety eyes 7 mm
Plastic lid for the bottom
Tapestry needle
Fibrefill/toy stuffing
ABBREVIATIONS
MR – magic ring
R – row/round
CH – chain
ST – stitch
SC – single crochet
HDC – half double crochet
DC – double crochet
INC – increase (2 sc in one st)
DEC – invisible decrease (crochet next 2 st
together)
BLO – back loop only
sl st – slip stitch
[n] inc/dec – increase/decrease [n] times in a row
() x … – repeat instructions in baskets … times number in () at the end of the row indicates number of st in that row
HEAD
R1: 6 SC in MR
R2: 6 INC (12)
R3: (1 SC, INC) X 6 (18)
R4: (2 SC, INC) X 6 (24)
R5: (3 SC, INC) X 6 (30)
R6: (4 SC, INC) X 6 (36)
R7: (5 SC, INC) X 6 (42)
R8: (6 SC, INC) X 6 (48)
R9: (7 SC, INC) X 6 (54)
R10: (8 SC, INC) X 6 (60)
R11: 60 SC
R12: (9 SC, INC) X 6 (66)
R13 -14: 66 SC
R15: (10 SC, INC) X 6 (72)
R16: (11 SC, INC) X 6 (78)
R17: (12 SC, INC) X 6 (84)
R18 -20 (3 ROUNDS): 84 SC
R21: (12 SC, DEC) X 6 (78)
R22: (11 SC, DEC) X 6 (72)
R23: (10 SC, DEC) X 6 (66)
R24: (9 SC, DEC) X 6 (60)
R25: (8 SC, DEC) X 6 (54)
R26: (7 SC, DEC) X 6 (48)
R27: (6 SC, DEC) X 6 (42)
R28: (5 SC, DEC) X 6 (36)
STUFF DETAIL VERY TIGHT.
R29: (4 SC, DEC) X 6 (30)
R30: (3 SC, DEC) X 6 (24)
R31: (2 SC, DEC) X 6 (18)
R32: (1 SC, DEC) X 6 (12)
R33: DEC X 6 (6)
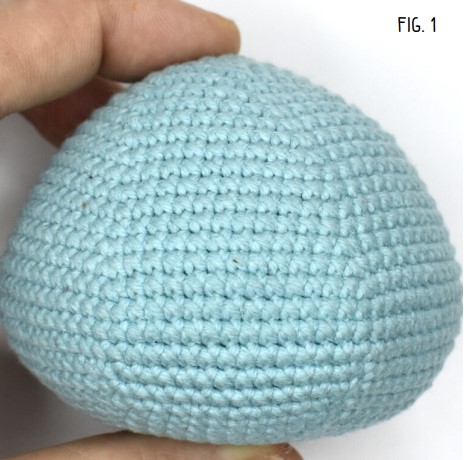
FASTEN OFF, LEAVING A LONG TAIL TO CLOSE THE REMAINING HOLE.
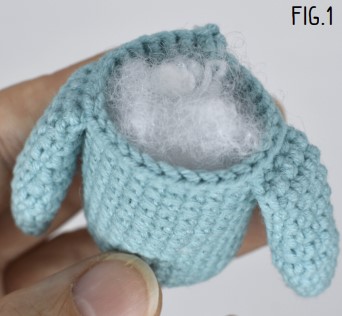
FILL THE REMAINING HEAD WITH FIBERFILL. TO SIMPLIFY THE FILLING USE THE CLAMPING SCISSOR AND STEM-END OF THE WOODEN SPOON.
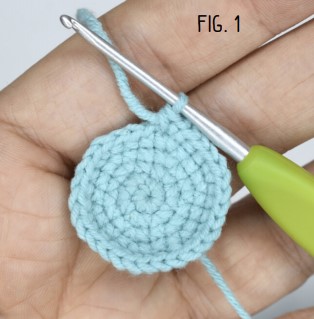
CLOSE THE SMALL HOLE THAT REMAINS. HIDE YARN TAIL INSIDE THE DETAIL. [FIG. 1]
HANDS
Start to crochet with TURQUOISE color yarn.
R1: 6 SC in MR
R2: (2 SC, INC) X 2 (8)
R3: (3 SC, INC) X 2 (10)
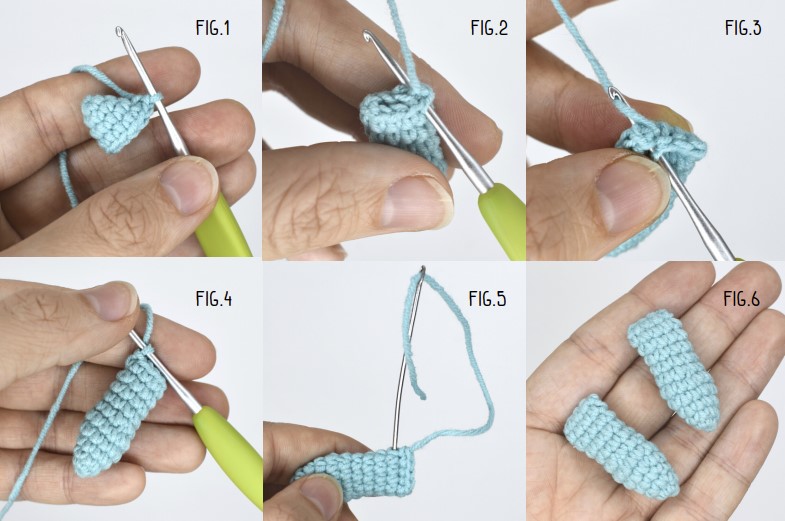
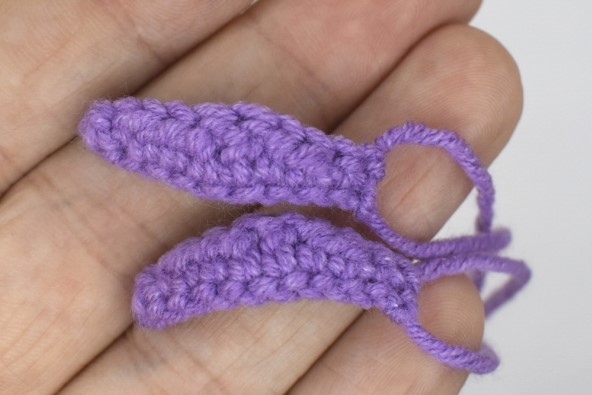
R4: (4 SC, INC) X 2 (12) [fig.1]
R5: 12 SC
R6: (2 SC, DEC) X 3 (9)
R7–10 (4 ROUNDS): 9 SC
DON’T FILL DETAILS WITH FIBER.
FOLD EDGES TOGETHER AND SINGLE CROCHET THEM. [fig. 2-4]
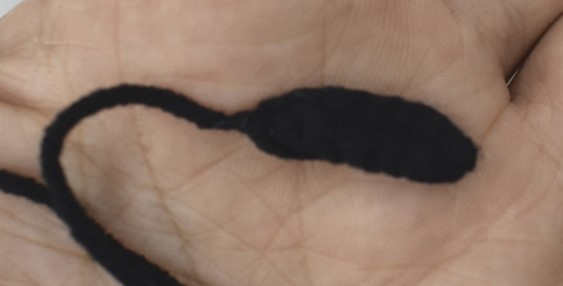
FASTEN OFF. HIDE YARN TAIL INSIDE THE DETAIL. [fig. 5]
Make 2 details. [fig. 6]
BODY
Start to crochet with TURQUOISE color yarn.
R1: 6 SC in MR
R2: 6 INC (12)
R3: (1 SC, INC) X 6 (18)
R4: (2 SC, INC) X 6 (24)
R5: (3 SC, INC) X 6 (30) [fig.1]
R6: BLO 30 sc [fig.2-3]
Cut a circle with a diameter of 2.7 cm (1”) from a plastic cover or cardboard.
Put the circle on the bottom of the BODY. [fig.4-5].

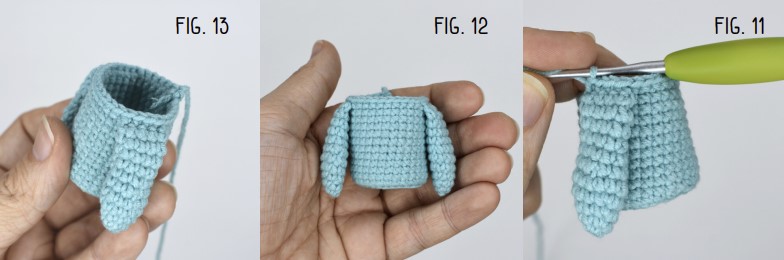
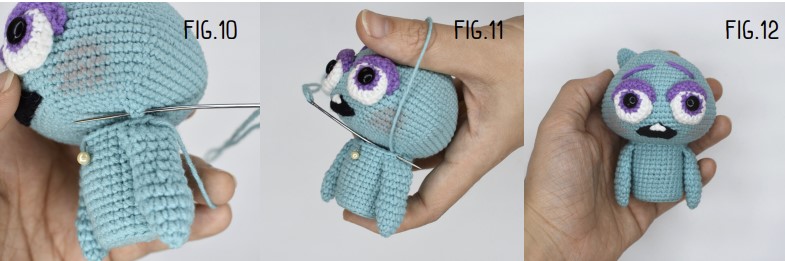
R7-16 (10 rounds): 30 sc [fig.6-7]
R17: 5 sc, 4 sc taking the loops of the left hand and body [fig. 8-11], 10 sc, 4 sc taking the loops of the right hand and body, 7 sc (30) [fig.12]
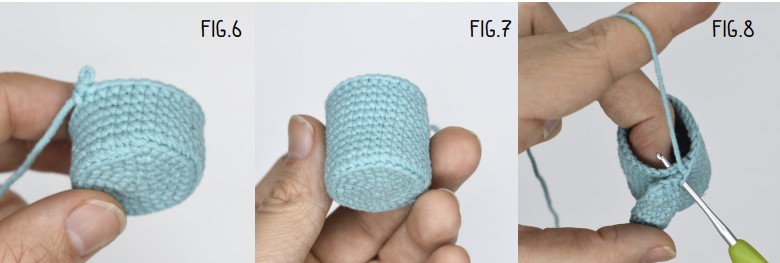
Cut the yarn leaving a long tail for assembly. [fig.13]
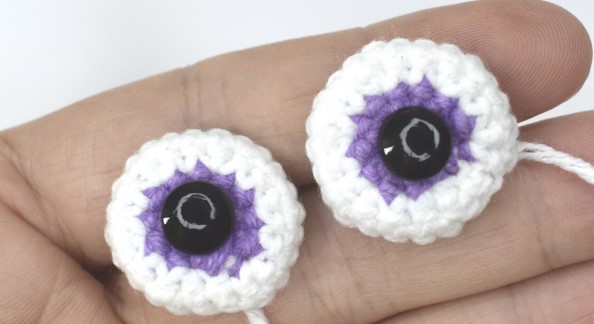
EYES
Start to crochet with purple color yarn.
R1: 6 SC in MR
R2: 6 INC (12)
Change yarn color to the white.
R3: (1 SC, INC) X 6 (18)
R4: (2 SC, INC) X 6, sl st to the next loop (24)
Cut the yarn leaving a long tail for assembly.
Insert safety eyes or attach them with glue.
The process of crocheting the eyes you can see at the link below:
EYELIDS
Start to crochet with purple color yarn
R1: Make a chain of 11 ,sc into the 2nd st from hook, sc, hdc, hdc, dc, dc, hdc, hdc, sc, sc. (10)
Start to crochet with purple color yarn.
Cut the yarn leaving a long tail for assembly.
MOUTH
Start to crochet with black color yarn.
R1: Make a chain of 8 , sl st into the 2nd st from hook, sc, hdc, hdc, hdc, sc, sl st (7)
Cut the yarn leaving a long tail for assembly.
Use white yarn to emboider teeth.
ASSEMBLY

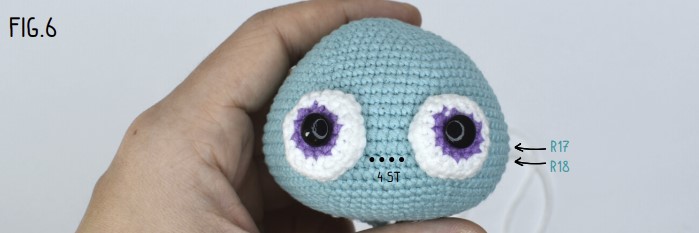
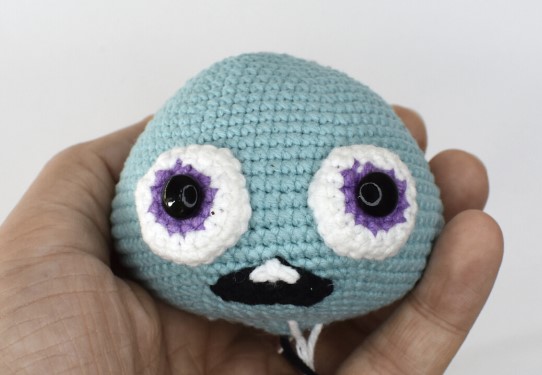
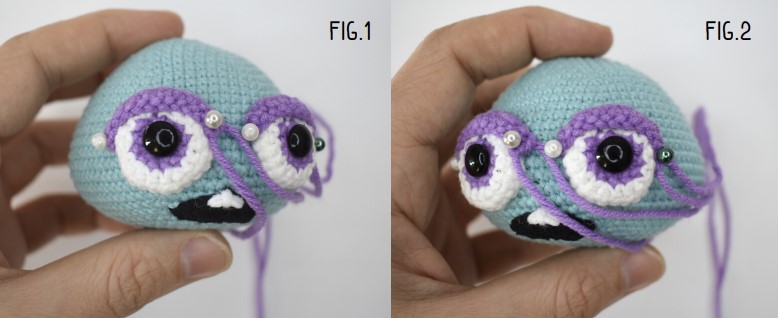
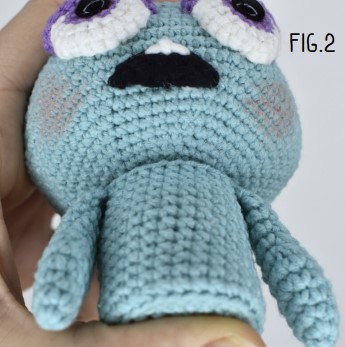
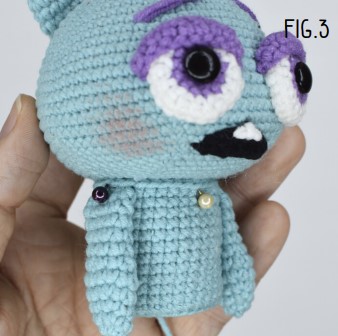
Insert eyes between R17 and R18 (4 st apart) with help of pins. Sew them to the head. [fig. 1 -6]
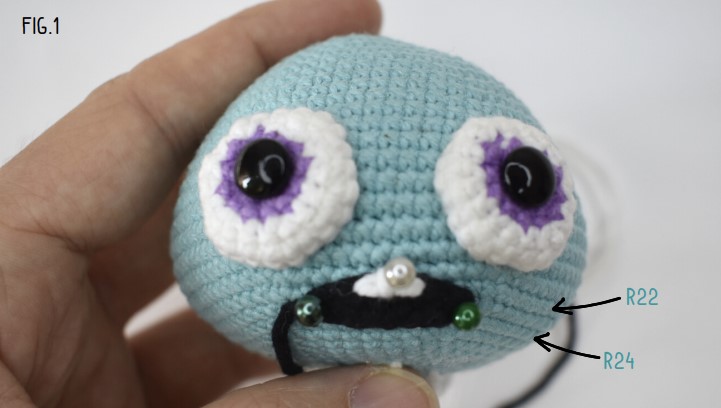
Pin the mouth in the center of the bottom of the head. (R22 -R24) [Fig.1]
Sew mouth to the head. [Fig.2]
Pin the eyelids [fig.1-2]
Sew them on.
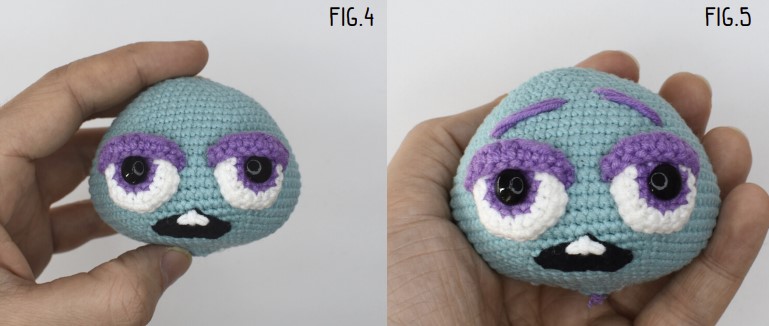
I only sew on the edges of the eyelids. This allows to change the toy’s facial expressions. [fig.3-4]
Emboider eybrows with purple yarn.
Eyebrow length: 2 cm/ 0.8”[fig.5]
“HORN”
R1: 6 SC in MR
R2: (1 SC, INC) X 3 (9)
R3: (2 SC, INC) X 3 (12)
R4: (3 SC, INC) X 3 (15)
R5: 15 sc
Fold edges together and single crochet them.
Fasten off. Sew the “horn” to the head. [fig.1-3]
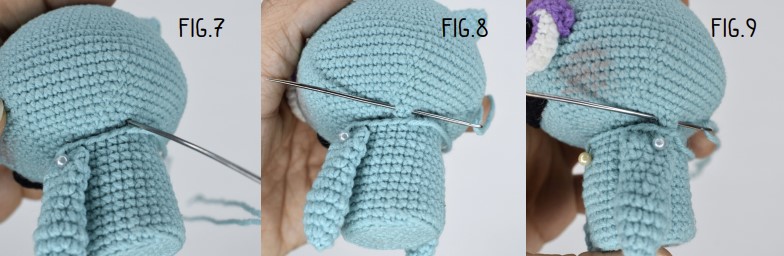
Fill the body with fibrefill.
[fig.1]
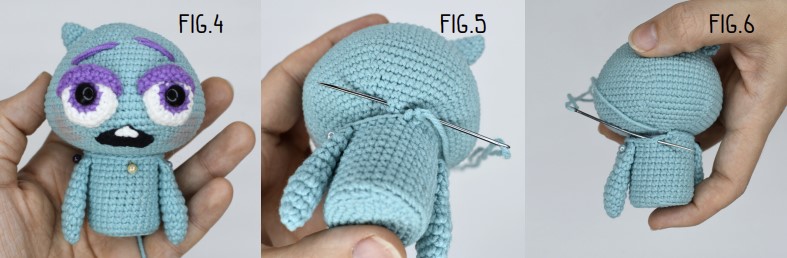
Place the body in the centre of the head, pin it.[fig.2-4]
and sew around the head.
[fig. 5-12]
Pink pastel can be used to draw cheeks.
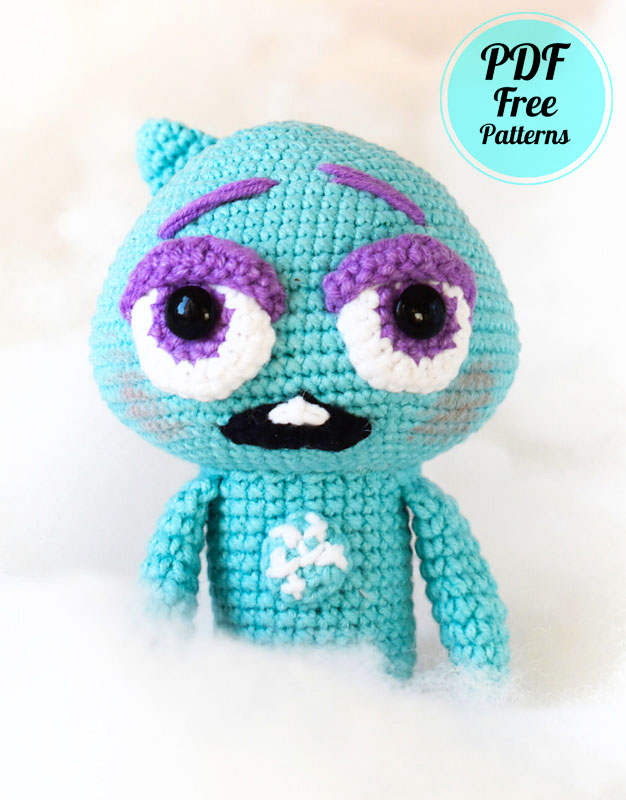
For the “spark”:
Crochet with TURQUOISE color yarn:
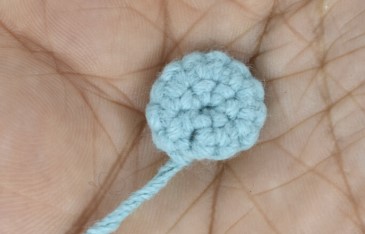
R1: 6 SC in MR
R2: 6 INC, sl st (12)
Cut the yarn leaving a long tail. [fig.1]
Embroider with white color yarn, as shown at the photo. [fig.2]
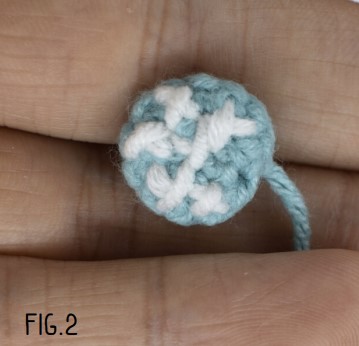
Sew “the spark” to the body. [fig.3]
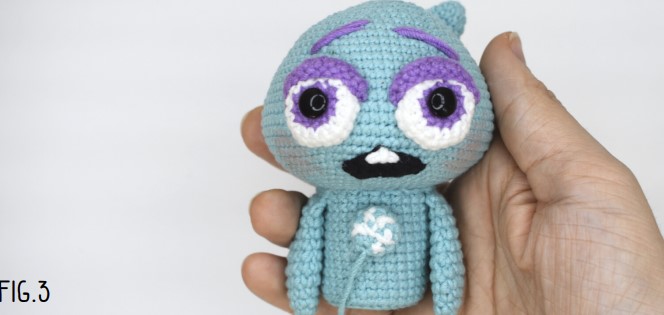
THE SOUL 22 is READY!
Disney Soul 22 Crochet Doll Amigurumi is a delightful and free PDF pattern that allows you to create a charming Disney-inspired doll. This pattern is perfect for crafters of all skill levels, as it provides detailed instructions and step-by-step guidance to help you create a beautiful and unique doll. The amigurumi technique used in this pattern creates a soft and huggable doll that is sure to be a favorite with kids and adults alike. With its adorable Disney-inspired design, this crochet doll makes a wonderful gift or addition to any collection. So why not try your hand at creating a magical Disney Soul 22 Crochet Doll today? Download the free PDF pattern now and let your creativity soar!


Comments0