add a new one to the free amigurumi pattern. You can always follow us to reach the newest, most popular, most accurate pattern. Here is Amigurumi Bear and Bunny Pattern;
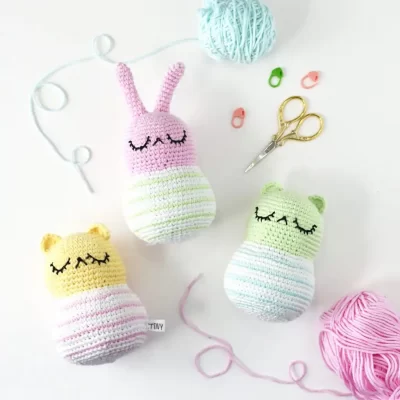
 Amigurumi Bear and Bunny Pattern
Amigurumi Bear and Bunny Pattern
MATERIALS (recommendations in parentheses)
- Medium weight yarn (worsted, aran, or 10-ply) in 3 colors
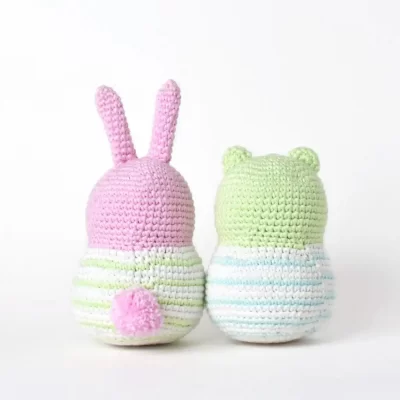
- Color A – Head and Ears (I Love This Cotton in Pink for Bunny and Pistache for Bear)
- Color B – Main Shirt (I Love This Cotton in White)
- Color C – Contrast Shirt (I Love This Cotton in Pistache for Bunny and Aqua for Bear)
- Fine weight yarn (sport) or embroidery floss in black for face (Grace Patons in Night)
- 2.75 mm (C) hook (Clover Amour)
- Toy stuffing (Fairfield Poly-Fil)
- Stitch marker (Tulip Heart Stitch Markers)
- Embroidery/sewing needle (DMC Embroidery Needle)
- Tapestry needle (DMC Tapestry Needle Size 16)
- Scissors (Gingher Stork Scissors)
12 single crochet stitches x 13 rows = 2×2 inches. The final size is approximately 5 inches tall for Bear and 7 inches tall for Bunny.
CROCHET STITCHES & ABBREVIATIONS (US TERMINOLOGY)
ch – chain
mr – magic ring
rnd(s) – round(s)
st(s) – stitch(es)
sl st – slip stitch
sc – single crochet
inc – single crochet increase
inv dec – invisible decrease
hdc – half double crochet
x – times (indicates number of times to repeat)
[ ] – repeat steps between brackets for the specified number of times
( ) – the number of stitches you should have at the end of each round
SPECIAL TECHNIQUES
- Magic ring
- Invisible decrease
- Finish off
- Changing color – Take last yarn over of st before color change with new color. Continue working with new color.
- Sl st after color change – Using a sl st after your color change makes the color change look a little smoother and less jagged.
NOTES
- All sections are worked in a continuous round, unless otherwise specified.
- Mark the beginning of each round with a stitch marker.
- Demonstration photos are shown right handed.
- Count sl sts in pattern as sts.
- The body is the same for Bunny and Bear.
- Not all yarns are created equal! Yarns listed as the same weight (e.g. worsted) frequently differ in size and stretch. I Love This Cotton is on the thinner end of worsted yarns.
BODY (start with color A)
rnd 1: Start with a mr, sc 6 (6 sts)
rnd 2: Inc 6x (12 sts)
rnd 3: [sc 1, inc] 6x (18 sts)
rnd 4: [sc 2, inc] 6x (24 sts)
rnd 5: [sc 3, inc] 6x (30 sts)
rnd 6: [sc 4, inc] 6x (36 sts)
rnd 7: [sc 5, inc] 6x (42 sts)
rnd 8: [sc 6, inc] 6x (48 sts)
rnds 9-16: Sc around (48 sts for 8 rnds)
rnd 17: [sc 6, inv dec] 6x (42 sts)
rnd 18: [sc 5, inv dec] 6x (36 sts)
rnd 19: [sc 5, inc] 6x (42 sts)
– – YOU’LL BE CHANGING COLOR STARTING IN THE NEXT ROUND. COUNT EACH SL ST AS A NORMAL ST. DON’T CUT COLOR B OR C, CARRY THE YARN UP INSIDE OF THE BODY. – –
rnd 20: Sc 1, change to color B, sl st, sc 4, inc, [sc 6, inc] 5x (48 sts) Cut color A and weave in.
rnd 21: [sc 7, inc] 6x (54 sts)
– – – EMBROIDER FACE BEFORE CONTINUING. SEE PHOTO TUTORIAL BELOW – – –
rnd 22: Sc 1, change to color C, sl st, sc 2, inc, [sc 8, inc] 5x, sc 4 (60 sts)
rnd 23: Sc 2, change to color B, sl st, sc around (60 sts)
rnd 24: Sc around (60 sts)
rnd 25: Sc 2, change to color C, sl st, sc around (60 sts)
rnd 26: Sc 3, change to color B, sl st, sc around (60 sts)
rnd 27: Sc around (60 sts)
rnd 28: Sc 3, change to color C, sl st, sc around (60 sts)
rnd 29: Sc 4, change to color B, sl st, sc around (60 sts)
rnd 30: Sc around (60 sts)
rnd 31: Sc 4, change to color C, sl st, sc around (60 sts)
rnd 32: Sc 5, change to color B, sl st, sc 2, inv dec, [sc 8, inv dec] 5x (54 sts)
rnd 33: Sc 4, inv dec, [sc 7, inv dec] 5x, sc 3 (48 sts)
rnd 34: Sc 5, change to color C, sl st, inv dec, [sc 6, inv dec] 5x (42 sts)
rnd 35: Sc 2, inv dec, sc 2, change to color B, sl st, sc 2, inv dec, [sc 5, inv dec] 4x, sc 3 (36 sts) Cut color C and weave in.
rnd 36: [sc 4, inv dec] 6x (30 sts)
– – – BEGIN STUFFING AND CONTINUE STUFFING UNTIL YOU CLOSE THE BODY. – – –
rnd 37: [sc 3, inv dec] 6x (24 sts)
rnd 38: [sc 2, inv dec] 6x (18 sts)
rnd 39: [sc 1, inv dec] 6x (12 sts)
rnd 40: Inv dec 6x (6 sts)
Fasten off, leaving a 12-inch tail. Finish off and weave in any remaining ends.
– – – MAKE EITHER THE BEAR EARS OR BUNNY EARS & TAIL TO FINISH YOUR DOLL! – – –
 Amigurumi Bear and Bunny Pattern
BEAR EARS (Make 2 using color A, not a continuous round)
rnd 1: Start with a mr, sc 7, ch 1, turn (7 sts)
rnd 2: 7 hdc (7 sts)
Fasten off, leaving a 12-inch tail for attaching. Weave in beginning yarn tail. See photo tutorial for attaching on page 5.
BUNNY EARS (Make 2 using color A)
rnd 1: Start with a mr, sc 4 (4 sts)
rnd 2: [inc, sc 1] 2x (6 sts)
rnd 3: [inc, sc 2] 2x (8 sts)
rnds 4-12: Sc around (8 sts for 9 rnds)
rnd 13: Sc 7, sl st in last st of rnd (8 sts)
Fasten off, leaving a 12-inch tail for attaching. Weave in beginning yarn tail. See photo tutorial for attaching on page 5.
BUNNY TAIL (Using color A)
Make a pompom with a diameter of 1.5 inches. Leave two 8-inch yarn tails to secure. See photo tutorial for attaching on page 6.
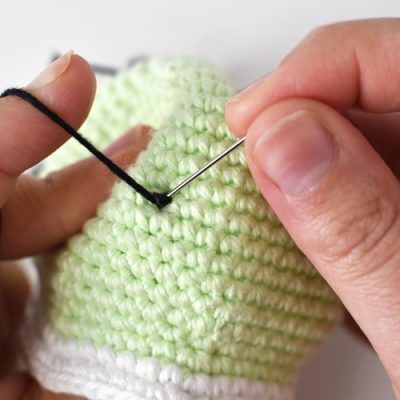
EMBROIDERING THE FACE
Embroidering on crochet takes a bit of practice, but it gives your amigurumi lots of personality. The key to embroidering on crochet is to make sure to insert your needle through your stitches and not in a hole between stitches so your thread remains secure. It is also much easier to embroider on crochet before you’ve finished and stuffed your piece.
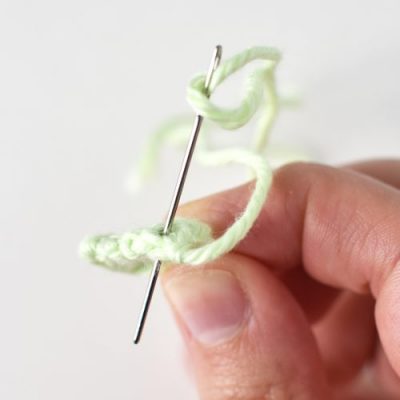
To begin, cut a 24-inch piece of fine weight yarn or embroidery floss (using all 6 strands). Thread embroidery needle and double knot end.
If you’d rather not embroider the eyes, simply use safety eyes between rnds 11 and 12 and just embroider the nose and mouth using steps 1-5.

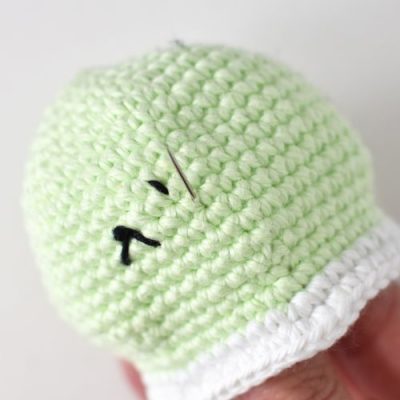
1. To make the nose, bring threaded needle up through st on rnd 12 of head on side opposite color changes.

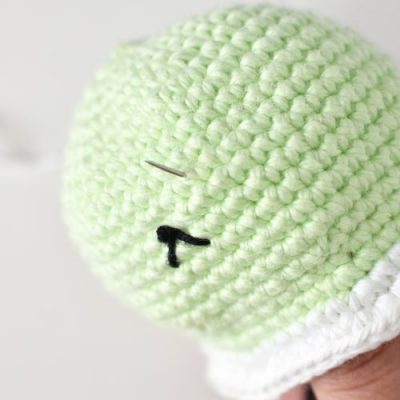
2. Make a french knot by wrapping thread tightly around needle twice.
3. Finish french knot by holding knot tightly to body and inserting needle very close to the hole you came up from.
4. To make the mouth, bring needle up through st on rnd 13 to the left of nose.
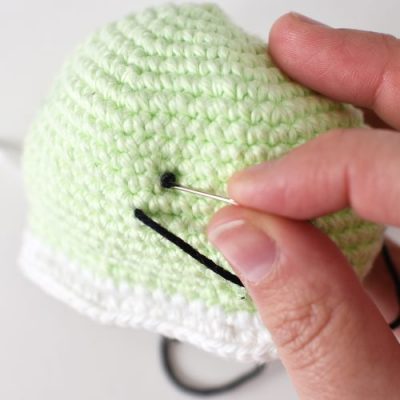
5. Insert needle under bottom of nose to make one side of mouth. Repeat step 4 and 5 for right side of mouth.

6. To begin eye, bring needle up through st on rnd 11.

7. Insert needle into st of rnd 12, below and slightly to the side to follow curve of eye.
8. Bring needle up through st of rnd 13 following eye curve. Insert needle through bottom of previous st. Repeat 6 more times to finish curve of eye. Eye should be 4 sts wide.

9. To make the lashes, bring needle up through st near eyeline. Insert needle through hole on eyeline. Repeat 7 more times for a total of 8 lashes.
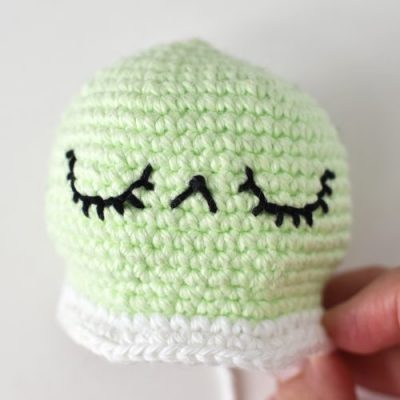
10. Mirror steps 6-9 for other eye (start in the inner corner).
ATTACHING THE BEAR EARS
Attach Bear’s ears at the center of the head between rounds 3 and 8 using tapestry needle and yarn tail.
1. Insert threaded needle through hole next to knot to begin.

2. Insert needle under st of rnd 4 at center of head.

3. Insert needle in next hole through front of ear.

4. Insert needle back through same hole you came out of in step 2 and under st of next rnd. Repeat steps 2 & 3 four more times to end of ear.

5. When you get to end of ear, insert needle into head through same stitch you came out of.

6. Bring needle out through back of head. Thread through several stitches to secure.
7. Bring needle out through another part of Bear’s head. Cut yarn close to head so loose end retracts into Bear.

8. Repeat steps 1-7 for left ear, starting on the outer left corner.
ATTACHING THE BUNNY EARS
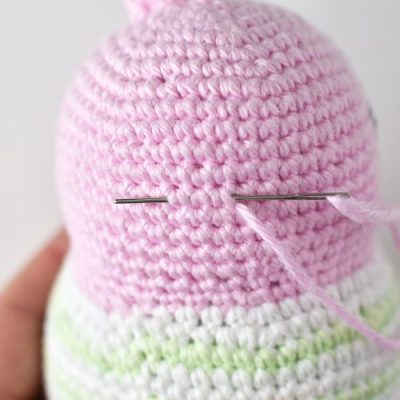
Attach Bunny’s ears at the center of the head between rnds 1 and 5 using tapestry needle and yarn tail.

1. Insert threaded needle under st on rnd 2 at center of head.

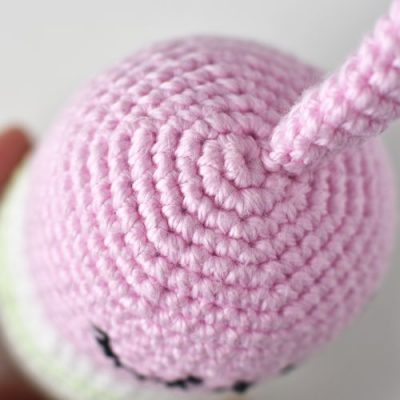
2. Insert needle through next st of ear from inside to outside.

3. Insert needle back through same hole you came out of in step 1 and under st of next rnd. Repeat steps 2 & 3 six more times until you’ve gone around ear.

4. When you’ve reached end of ear, insert needle through first st attached and back into head.
5. Bring the needle out through back of head. Thread through several stitches to secure. Then bring needle out through other part of Bunny and cut yarn close to body.
6. Repeat steps 1-5 for other ear.
ATTACHING THE BUNNY TAIL

1. Thread tapestry needle with one yarn tail. Insert needle under st below rnd 20.
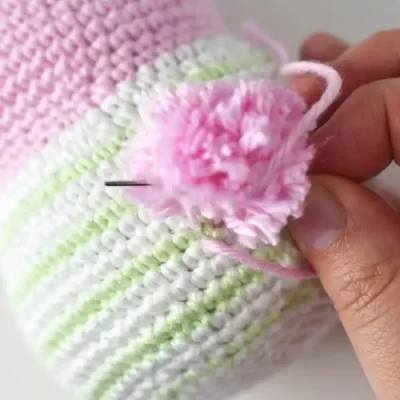
2. Insert needle through center of pompom. Pull tightly so pompom is flush with body. Repeat steps 1 & 2 four more times to secure.

3. Tie both yarn tails together with a double knot. Pull tightly so the knot is hidden under pompom.
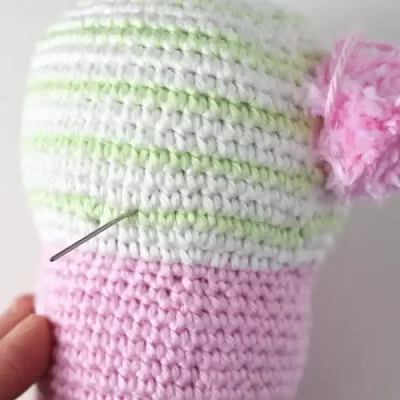
4. Thread needle with both yarn tails, bring out through another part of body. Pull yarn tightly to retract knot into body. Cut tails close to body.
That’s all. Finish the amigurumi bear and amigurumi bunny pattern!
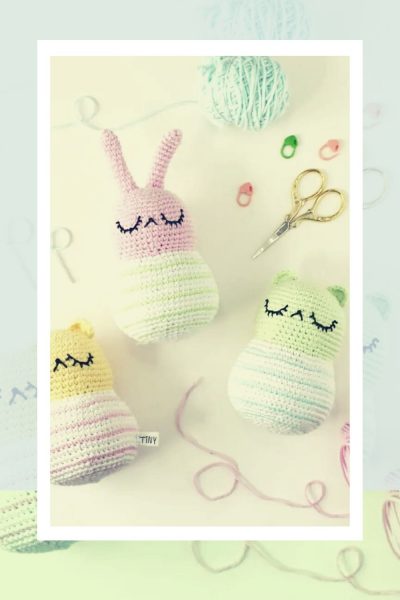

The “Amigurumi Bear and Bunny Pattern” is a delightful crochet project that combines the beauty of two beloved animal friends. This pattern showcases a charming bear and a playful bunny, both designed in amigurumi style.
The amigurumi technique involves using minimal yarn to create detailed and intricate designs. This pattern is perfect for beginners looking to explore the world of amigurumi or experienced crocheters looking to expand their skills.
The bear and bunny are made using a combination of single crochet stitches and increases to create the desired shape and size. The finished pieces measure approximately 10cm in height when completed.
This pattern includes full instructions on how to make the bear and bunny, as well as helpful tips on yarn selection and finishing touches. With patience and practice, you can create your own adorable amigurumi bear and bunny to cherish forever.


Comments0