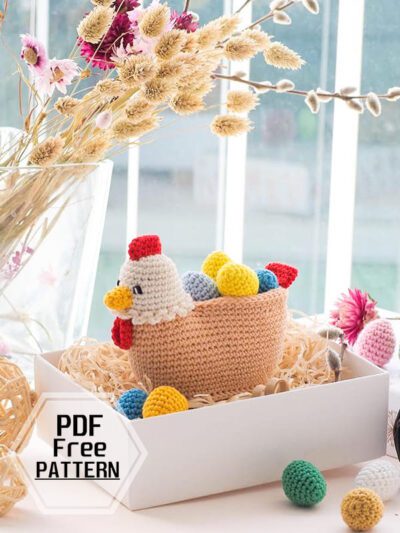
add a new one to the free amigurumi pattern. You can always follow us to reach the newest, most popular, most accurate pattern. Here is Crochet Easter Chicken Amigurumi;
Designer: rnata6744
Ravelry: rnata6744
Materials
• 2,5 mm hook
• Cotton yarn (I used Catania from “Schachenmayr”); Orange (401), Red (115), Yellow (208),
Cream (130), Blue (384)
• Black and white embroidery thread
• Stuffing
• Yarn needle
• Stitch marker
I used black thread
• Cupboard
The size of Easter chick is approximately 13 cm. It may vary though depending on the kind of yarn and hook size used. You can also use and
color of yarn. Feel free to add accessories to your very own easter toy.
Abbreviations
ch– chain
sc– single crochet
st/sts– stitch/ stitches
inc– increase
dec– decrease
slst– slip stitch
FLO– Front loop only
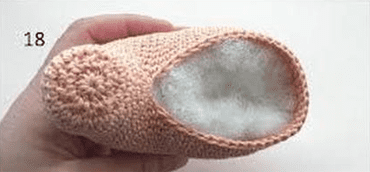
Body
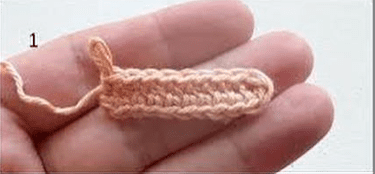
Use the orange yarn.
Ch 10. Stitches are worked around both sides of the foundation chain.
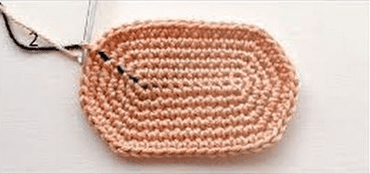
Rnd 1. Start in second ch from the hook, inc in this stitch, 7sc, 3sc in last stitch. Continue on the other side of the foundation chain, 8sc, slst in the first st (20)
Tip: Close the round with a slip stitch into the first sc and take care not to twist the chain. Place a stitch marker into the slst.
Rnd 2. ch1, 2 inc, 7sc, 3 inc, 7sc, inc, slst in the first st (26)
Rnd 3. ch1, (sc, inc) x 2, 7sc, (sc, inc) x 3, 8sc, inc, slst in the first st (32)
Rnd 4. ch1, sc, (inc, 2sc) x 2, 7sc, (inc, 2sc) x 3, 7sc, inc, sc, slst in the first st (38)
Rnd 5. ch1, 2sc, (inc, 3sc) x 2, 7sc, (inc, 3sc) x 3, 7sc, inc, sc, slst in the first st (44)
Rnd 6. ch1, 3sc, (inc, 4sc) x 2, 7sc, (inc, 4sc) x 3, 7sc, inc, sc, slst in the first st (50)
Rnd 7. ch1, 4sc, (inc, 5sc) x 2, 7sc, (inc, 5sc) x 3, 7sc, inc, sc, slst in the first st (56)
Rnd 8. edging between the bottom and body: ch1, make the single crochet* in the space (using the post of stitch) between stitches (56)
* Insert your hook from front to back through space between the single crochet stitches. Yarn over, complete the single crochet as usual.
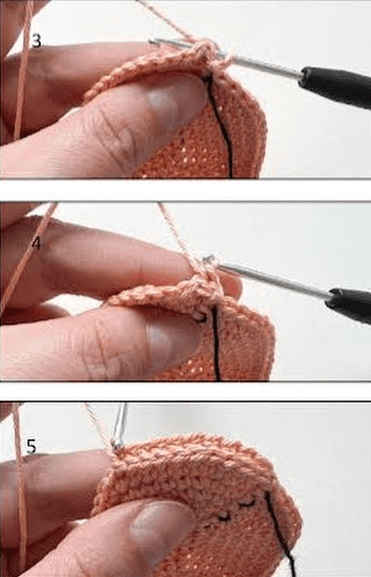
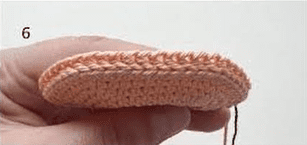
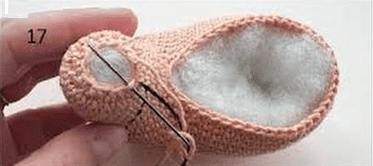
Use the cardboard, cut an oval a little birt smaller than your crochet oval and put it inside after round 22.

Don’t join at the end of the next rounds.
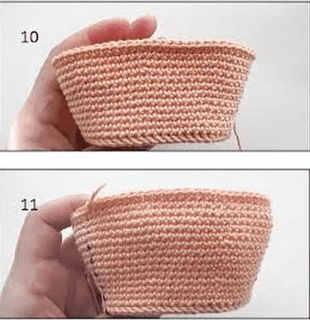
Rnd 9-11. sc around (56), 3 rounds
Rnd 12. (6sc, inc) x 8 (64)
Rnd 13-16. sc around (64), 4 rounds
Rnd 17. (7sc, inc) x 8 (72)
Rnd 18-21. sc around (72), 4 rounds
Rnd 22. (7sc, dec) x 8 (64)
Rnd 23. sc around (64)
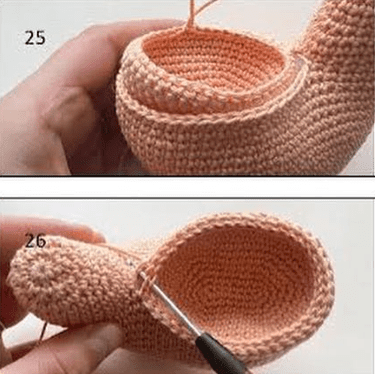
Don’t cut the yarn are going to crochet the head. Don’t remove your stitch marker from the body.
Head
Rnd 24. 19sc, skip next 40 stitches of the body (we leave them for the egg) and insert your
hook in next stitch, 5sc (24)

Start to stuff the body and the head.
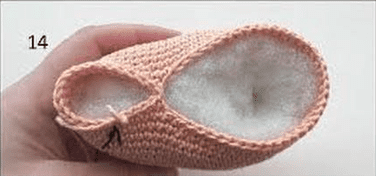
Rnd 25-27. sc around (24), 3 rounds
Rnd 28. 18sc, 2dec, 2sc (22)
Rnd 29. 17sc, 2dec, sc (20)
Rnd 30-31. sc around (20), 2 rounds
Rnd 32. (dec) x 10 (10)
Stuff the head firmly
How to close the end of the round: with a darning needle, insert the remaining yarn through all the front loops of the stitches on the last round. Pull all together at once and sew to hide the yarn inside the part you are working on.
Top part (for eggs)
Use the orange yarn.
Ch8. Stitches are worked around both sides of the foundation chain.
Rnd 1. Start in second ch from the hook, inc in thes stitch, 5sc, 3sc in last stitch. Continue on the other side of the foundationd chain, 6sc (16)
Rnd 2. 2 inc, 5sc, 3 inc, 5sc, inc (22)
Rnd 3. (sc, inc) x 2, 5sc, (sc, inc) x 3, 6sc, inc (28)
Rnd 4. (2sc, inc) x 2, 5sc, (2sc, inc) x 3, 7sc, inc (34)
Rnd 5. 2sc, (inc, 3sc) x 2, 5sc, (inc, 3sc) x 3, 5sc, inc, sc (40)
Rnd 6. 3sc, inc, 19sc, inc, 16sc (42)
Rnd 7-10. sc around (42), 4 rounds
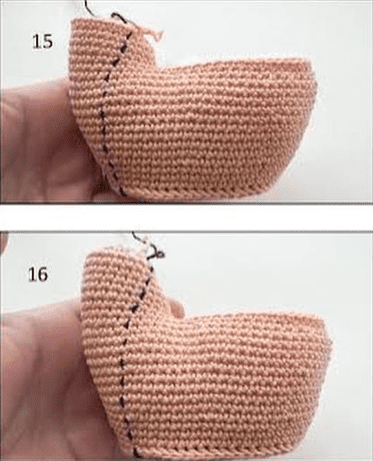
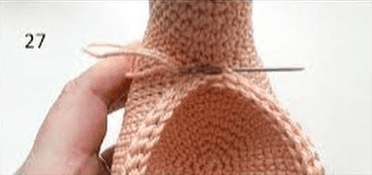
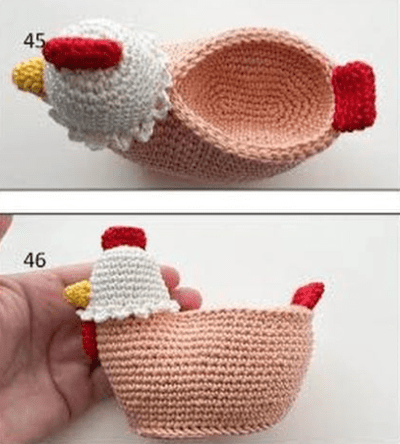
Crochet 5sc more after round 10 to bring the yarn in the corner. Turn out the top part with wrong side to outside. Don’t cut the yarn are going to connect the top part with body.
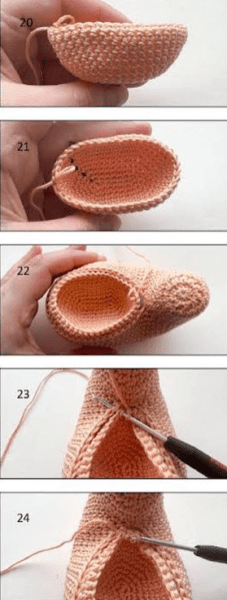
Stuff the body lightly. Insert the top part inside to the body, then insert your hook in next stitch of top part and the stitch of the body. Pick up the yarn and pull it through. Again, insert your hook in next two stitches and make a slst. Connect the top part and body together using the slip stitch. Make a slip stitch loosely.
Close the small hole between the head and the top part using the needle.
Cap
Use the cream yarn.
Rnd 1. 6sc in magic ring (6)
Rnd 2. (inc) x 6 (12)
Rnd 3. (inc, sc) x 6 (18)
Rnd 4. (2sc, inc) x 6 (24)
Rnd 5-6. sc around (24), 2 rounds
Rnd 7. (7sc, inc) x 3 (27)
Rnd 8. sc around (27)
Rnd 9. (8sc, inc) x 3 (30)
Rnd 10-11. sc around (30), 2 arounds
Rnd 12. FLO: (slst in the next st 2 st, ch 4) x 15
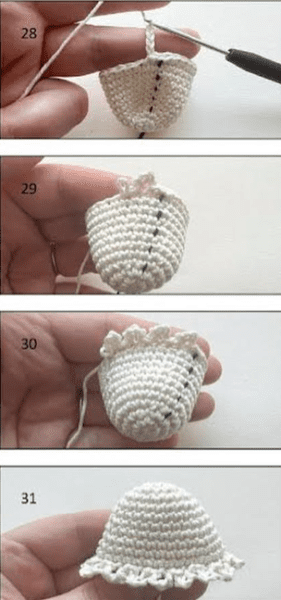
Cut the yarn, leave a long tail for sewing.
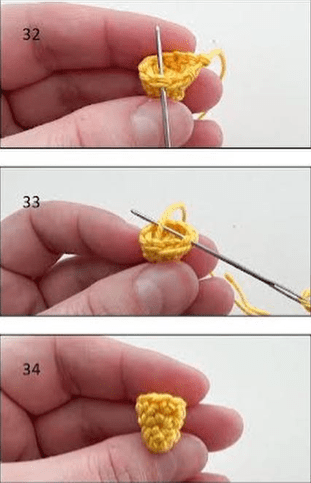
Beak
Use the yellow yarn.
Rnd 1. 6sc in magic ring (6)
Rnd 2. sc around (6)
Rnd 3. (sc, inc) x 3 (9)
Rnd 4. sc around (9)
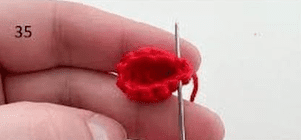
Cut the yarn, leave a tail for sewing.
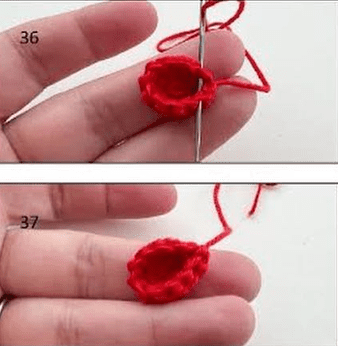
How to invisible fasten off:
Use the needle, insert it in both loops of the second stitch after the last stitch. Then insert it only in the back loop and bar of the last stitch.
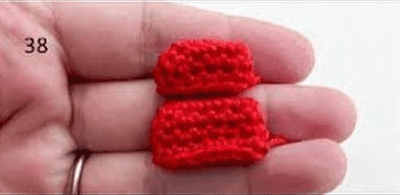
Wattle
Use the red yarn.
Rnd 1. 6sc in magic ring (6)
Rnd 2. (inc) x 6 (12)
Rnd 3. sc around (12)
Cut the yarn, leave a long tail for sewing. Fold the wattle and connect 4 stitches together.
Tail
Use the red yarn.
Ch 6. Stitches are worked around both sides of the foundation chain.
Rnd 1. Start in second ch from the hook, inc in this stitch, 3sc, 3sc in last stitch. Continue on the other side of the foundation chain, 4sc (12)
Rnd 2. (inc, 5sc) x 2 (14)
Rnd 3-4. sc around (14), 2 rounds
Crochet 1sc more after round 4to bring the yarn in the corner. Cut the yarn, leave a tail for sewing.
Comb
Use the red yarn.
Ch5. Stitches are worked around both sides of the foundation chain.
Rnd 1. Start in second ch from the hook, inc in this stitch, 2sc, 3sc in last stitch. Continue on the other side of the foundation chain, 3sc (10)
Rnd 2. (inc, 4sc) x 2 (12)
Rnd 3. sc around (12)
Crochet 1sc more after round 3 to bring the yarn the corner. Cut the yarn, leave a tail for sewing.
Assembling
Sew the cap to the head using the back loops of cap.
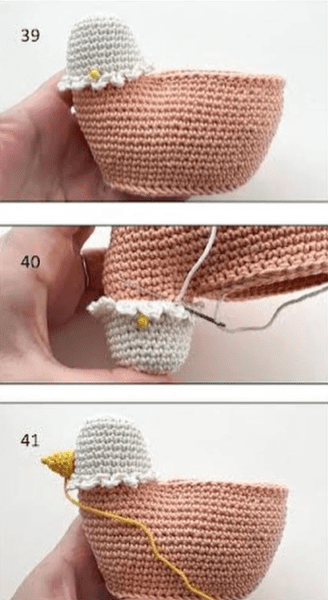
Sew the beak to the cup as show on photo. Sew the wattle below the beak. You should sew only the top of the wattle.
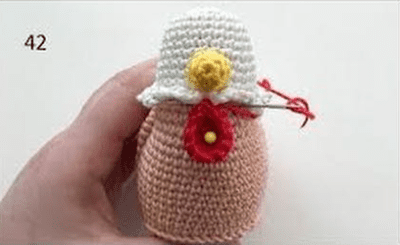
Sew the com on the top of the head. Don’t stuff the comb.

Sew the tail on the back side of the body as show on photo.
Use pins to mark the eyes. Embroider the eyes one stitc height and one stitch leight using the black and white thread.

Eggs (small)
Rnd 1. Start 6sc in magic ring (6)
Rnd 2. (sc, inc) x 3 (9)
Rnd 3. (2sc, inc) x 3 (12)
Rnd 4. (3sc, inc) x 3 (15)
Rnd 5-9. sc around (15), 5 rounds
Rnd 10. (sc, dec) x 5 (10)
Stuff the egg firmly. Fasten off.
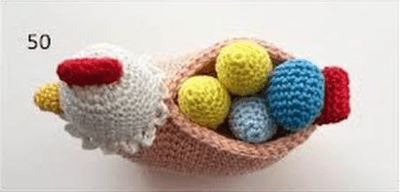
Congratulations, you have completed the amigurumi easter chicken pattern
Crochet Easter Chicken Amigurumi Free Pattern is a delightful and easy-to-follow pattern for creating a cute and fluffy chicken amigurumi. This pattern is perfect for Easter decorations or as a cuddly toy for kids. The pattern includes detailed instructions and step-by-step photos to guide you through the process. You’ll need basic crochet skills and some yarn to complete this project. The finished chicken amigurumi measures approximately 10 inches tall and is made using single crochet stitches. This free pattern is great for beginners and experienced crocheters alike. So, get ready to hook up this adorable Easter Chicken Amigurumi and add a touch of spring to your home!


Comments0