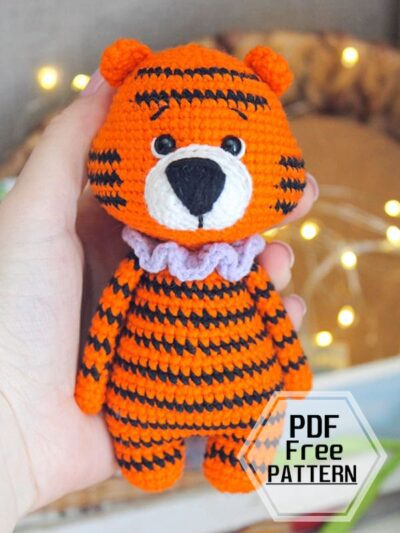
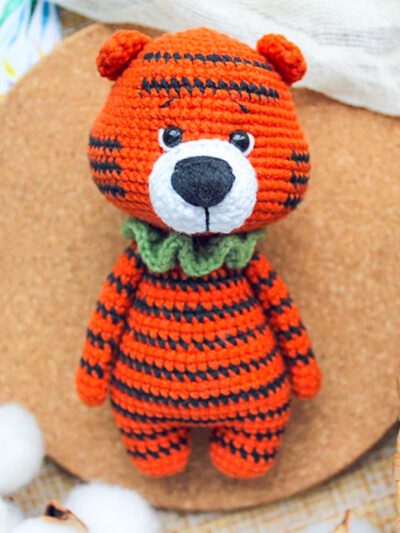
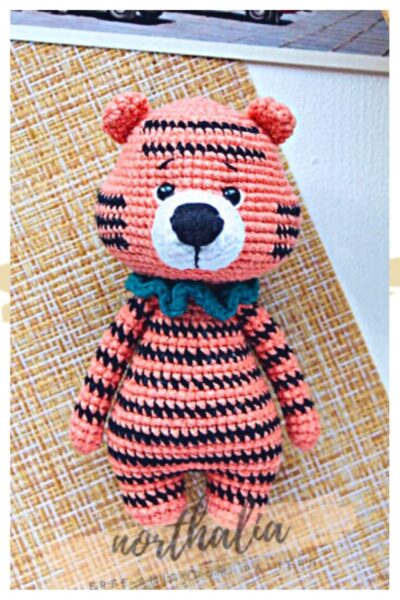
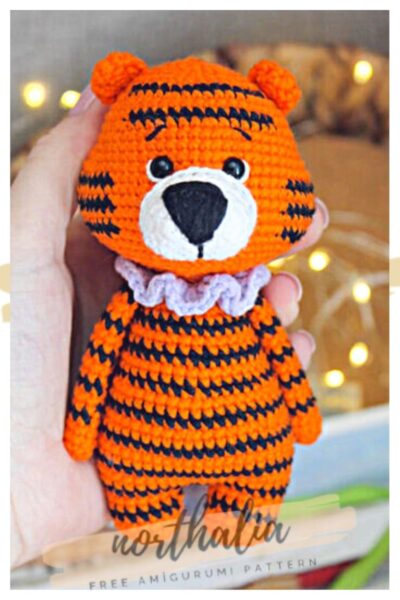
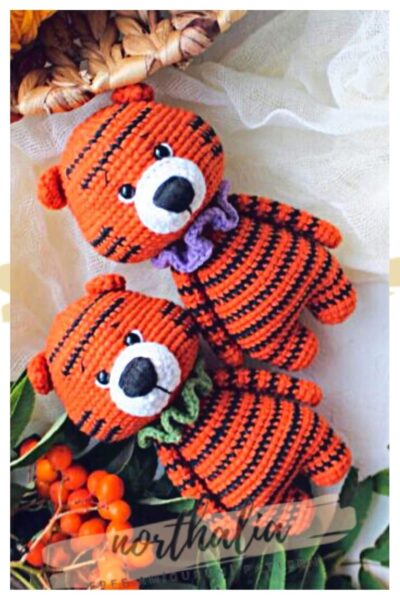
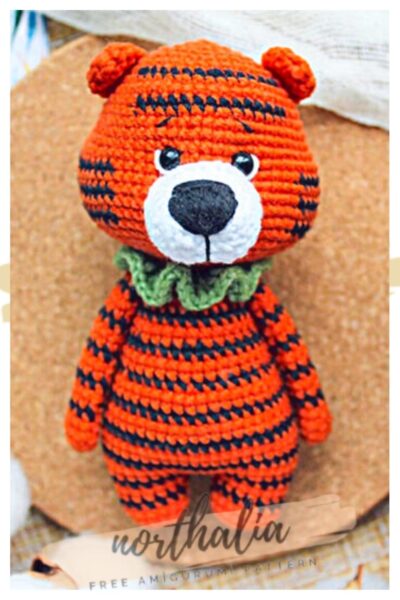
add a new one to the free amigurumi pattern. You can always follow us to reach the newest, most popular, most accurate pattern. Here is Crochet Mini Tiger Amigurumi;
Designer
Instagram: crochet__friend
Necessary Materials
• Yarnart Jeans main yarn (color 23)
Colors:
• Black Yarnart Jeans yarn (color 53)
• White Yarnart Jeans yarn (color 62)
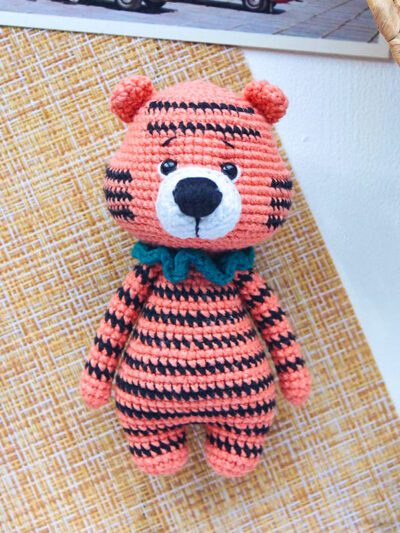
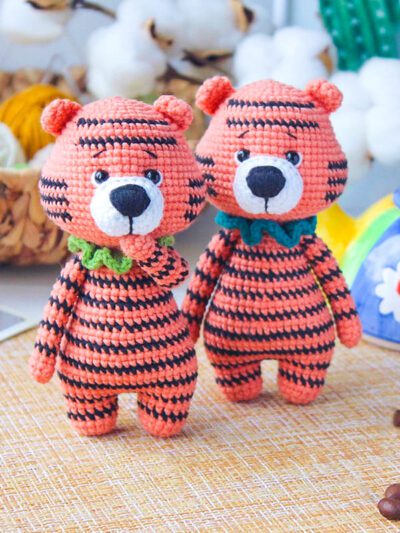
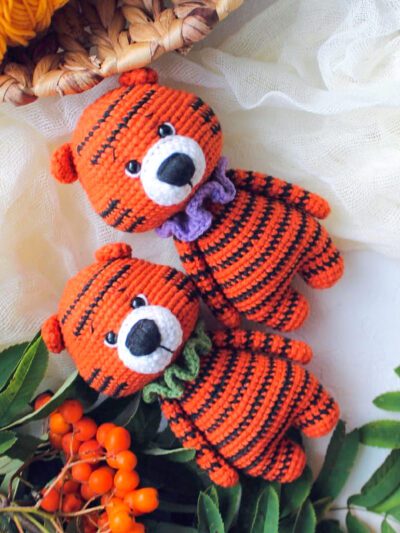
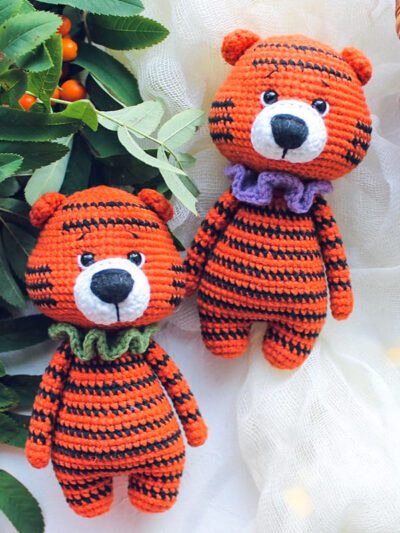
• A little bit of any colored yarn for collar
• Safety eyelets 6 mm
• Fiberfill
• Crochet hook 1.75 mm
• Long needle for tightening
• Scissors
Abbreviations
MR– Magic ring
Sc– Single crochet
Ch– Chain
Inc– Increase
Dec– Decrease
Sl st– Slip stitch
Dc– Double crochet
• The size of the completed tiger is approximately 13 cm.

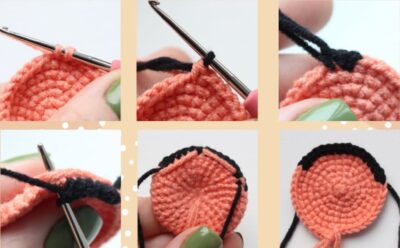
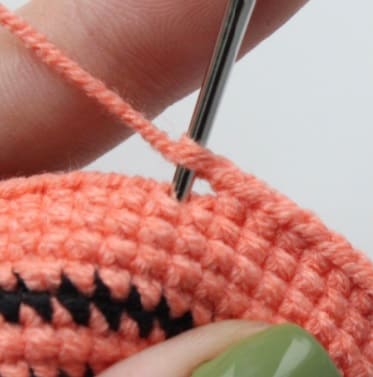
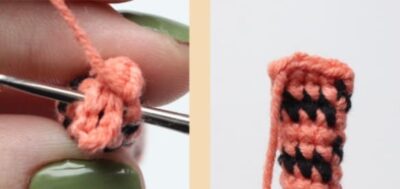
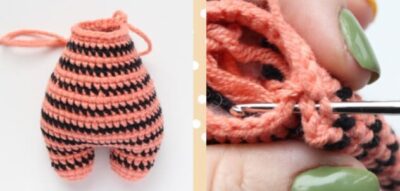
Color change:
We crochet the last loop before changing the color like this:
Crochet the working orange thread, pull it through the loop of the previous row, then we cling to the black thread and stretch it through the red loops (see a photo).
It turns out that we make the beginning of the column the main color, and close it already others.
We lay the thread of the main color from the wrong side so as not to make large broaches.
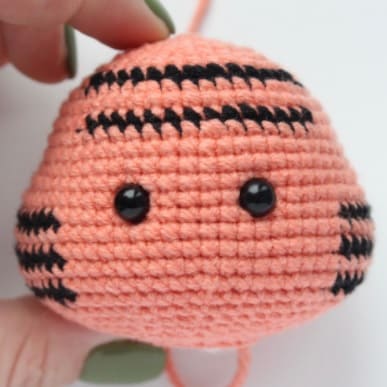
Head
Orange yarn:
Rnd 1. 6 sc in MR (6)
Rnd 2. 6-inc (12)
Rnd 3. (1sc,inc)*6 (18)
Rnd 4. 1sc,inc,(2sc,inc)*5, 1sc (24)
Rnd 5. (3sc,inc)*6 (30)
Rnd 6. 2sc,inc,(4sc,inc)*5, 2sc (36)
From the next row begin to alternate black and orange colors, rows where color change is not specified fully crochet with orange yarn:
Rnd 7. orange 5sc, inc, 5sc, black inc, (5sc,inc)*2, orange (5sc,inc)*2 (42)
Rnd 8. 3sc,inc,(6sc,inc)*5, 3sc (48)
Rnd 9. 48 sc
Rnd 10. orange 16 sc, black 14 sc, orange 18sc (48)
Rnd 11. (7sc,inc)*6 (54)
Rnd 12-13. 54 sc (2 rnds)
Rnd 14. 9sc,6inc,20sc,6inc,13sc (66)

In the next row we will make holes for the bladeless peephole. If you are using sew-on or glue eyes, then crochet 66 sc without changes.
Rnd 15. 27 sc, ch 1, skip one turn, 6 sc, ch 1, skip one turn, 31 sc (66)
Rnd 16. orange 9 sc, black 13 sc, orange 18 sc, black 13 sc, orange 13 sc (66)
Rnd 17. 66 sc
Rnd 18. orange 9 sc, black 13 sc, orange 18 sc, black 13 sc, orange 13 sc (66)
Rnd 19. 66 sc
Rnd 20. orange 9 sc, black 13 sc, orange 18 sc, black 13 sc, orange 13 sc (66)

At this stage, you can insert the eyes.
Getting started stuff your head.
We do this along the way crocheting.
When filling, pay special attention to the eyes, give them shape.
Rnd 21. (9sc,dec)*6 (60)
Rnd 22. 4sc,dec,(8sc,dec)*5, 4sc (54)
Rnd 23. (7sc,dec)*6 (48)
Rnd 24. 3sc,dec,(6sc,dec)*5, 3sc (42)
Rnd 25. (5sc,dec)*6 (36)
Rnd 26. 2sc,dec,(4sc,dec)*5, 2sc (30)
Rnd 27. (3sc,dec)*6 (24)
Rnd 28. 1sc,dec,(2sc,dec)*5, 1sc (18)
Cut the thread and fasten off. Leave long end for sewing.
Muzzle
White yarn:
Rnd 1. 5 ch, knit from the second from the hook: inc, 2 sc, 3 sc in one turn, 3 sc (10)
Rnd 2. 2 inc, 2 sc, 3 inc, 2sc, inc (16)
Rnd 3. (1sc,inc)*2, 2 sc, (1sc,inc)*3, 3 sc, inc (22)
Rnd 4-6. 22 sc (3 rnds)

We make sl st, cut the thread and fasten. Leave long end for sewing.
Ears (Make 2)
Orange yarn:
Rnd 1. 6 sc in MR
Rnd 2. 6-inc (12)
Rnd 3. (2sc,dec)*3 (9)
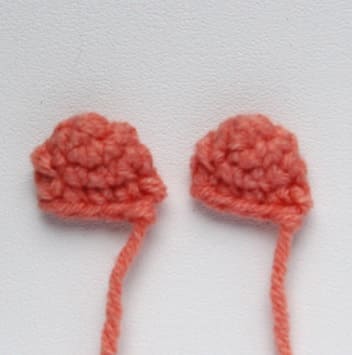
Fold in half and crochet 4 sc for both walls.
A thread cut and fasten. Leave a long tip for sewing.
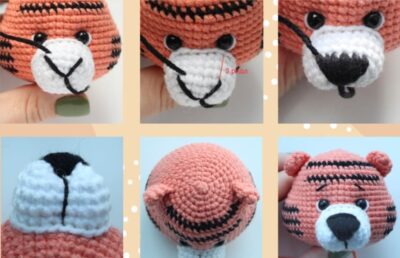
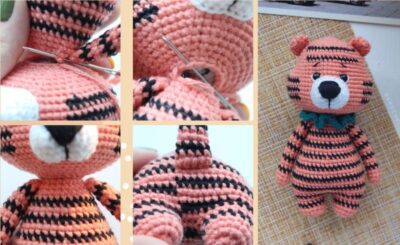
We sew the muzzle between 15 and 21 rows.
Now we make a tightening of the eye. We insert the needle into the “neck” and withdraw at stitch 1. Enter at stitch 2, stepping back 1 sc up. We display at stitch 3 at the second eye and enter at stitch 4, also stepping back 1 sc up. We output in the “neck”. Repeat again. Tie the ends into two knots and hide them in head.

Embroider the nose with black thread, stepping back from the edge of the muzzle (from the eye) 3 rows, as shown in the photo.
With white thread we embroider whites near the eyes. With a black thin thread we embroider the mouth and eyebrows.
Sew on the ears, stepping back from the beginning of crocheting 5 rows.
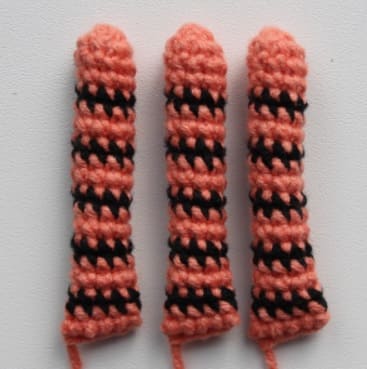
Arms & Tail (Make 3)
Orange:
Rnd 1. 6 sc in MR
Rnd 2. (1sc,inc)*3 (9)
Rnd 3-4. 9 sc (2 rnds)
Black:
Rnd 5. 9 sc
Orange:
Rnd 6-7. 9 sc (2 rnds)
Black:
Rnd 8. 9 sc
Orange:
Rnd 9-10. 9 sc (2 rnds)
Black:
Rnd 11. 9 sc
Orange:
Rnd 12-13. 9 sc (2 rnds)
Black:
Rnd 14. 9 sc
Orange:
Rnd 15-16. 9 sc (2 rnds)
Black:
Rnd 17. 9 sc
Orange:
Rnd 18. 9 sc
Fold in half and crochet 4 sc for both walls. Cut the thread and fasten. On one part leave a long tip for sewing, on the other two can be made shorter, since the handles will be tied into body.
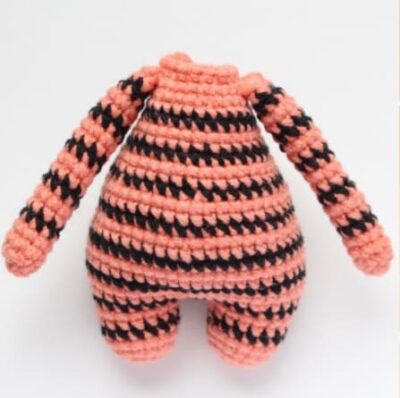
Legs & Body
We stuff in the course of crocheting.
Orange:
Rnd 1. 8 sc in MR
Rnd 2. 8-inc (16)
Rnd 3-4. 16 sc (2 rnds)
Black:
Rnd 5. 16 sc
Orange:
Rnd 6. 16 sc
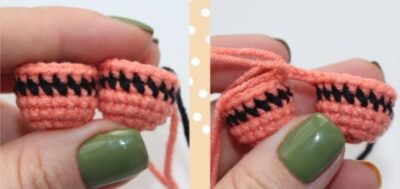
At the first leg, cut the thread and fasten.
Tie the second leg in the same way, but the thread is not cut off. We crochet one additional column offsets to hide the color transition step and do 3 in. Attaching the second leg to the first and crochet further in a circle:
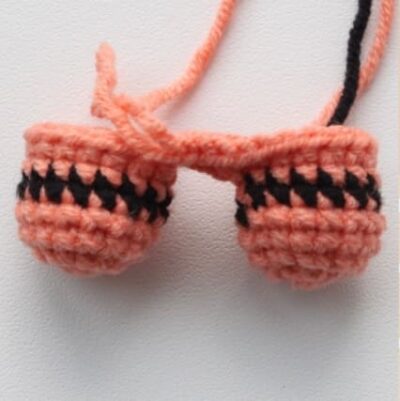
Rnd 7. 16 sc on one leg, 3 sc on the chain of ch, 16 sc on the other leg, 3 sc on the chain of ch (38)
Black:
Rnd 8. 7sc, inc, (9sc,inc)*3 (42)
Orange:
Rnd 9. (6sc,inc)*6 (48)
Rnd 10. 48 sc
Black:
Rnd 11. 48 sc
Orange:
Rnd 12-13. 48 sc (2 rnds)
Black:
Rnd 14. 48 sc
Orange:
Rnd 15. 48 sc
Rnd 16. (6sc,dec)*6 (42)
Black:
Rnd 17. 42 sc
Orange:
Rnd 18-19. 42 sc (2 rnds)
Black:
Rnd 20. (5sc,dec)*6 (36)
Orange:
Rnd 21-22. 36 sc (2 rnds)
Black:
Rnd 23. 36 sc
Orange:
Rnd 24. (4sc,dec)*6 (30)
Rnd 25. 30 sc
Black:
Rnd 26. 30 sc
Orange:
Rnd 27. 30 sc
Rnd 28. (3sc,dec)*6 (24)
In the next row we crochet arms.
Rnd 29. 4 sc, 4 sc with a handle, at the same time clinging turn of the arm and body, 8 sc, 4 sc with a handle, 4 sc (24)
Rnd 30. (2 sc, dec)*6 (18)
Cut the thread and fasten off.
We sew the head to the body.
Sew the tail between the 14th and 15th rows of the body, so that it does not stick up.
Collar
Ch 23, in the fourth from the hook begin to crochet 3 dc in each loop. So crochet until end of the row.
We cut the thread and leave the tip for sewing.
We close the collar on the neck of the tiger and sew the two edges together.
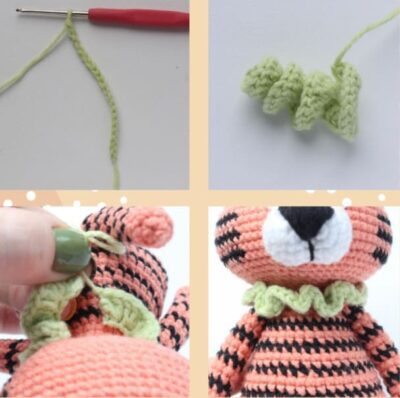
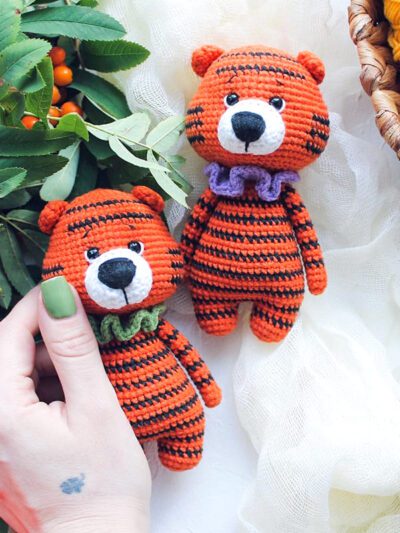
Your tiger is ready!


This is a free pattern for crocheting a mini tiger in the amigurumi style. Amigurumi is a Japanese art of knitting or crocheting small, stuffed animals with precise and intricate stitches. This pattern offers step-by-step instructions for creating a cute and cuddly mini tiger that can be used as a toy, keychain, or decorative item. The pattern includes both written instructions and charts for the stitches used. It is suitable for beginners with some experience in crocheting. The finished size of the tiger is approximately 6 inches in length and 4 inches in height. Get ready to unleash your creativity and make this adorable mini tiger today!


Comments0