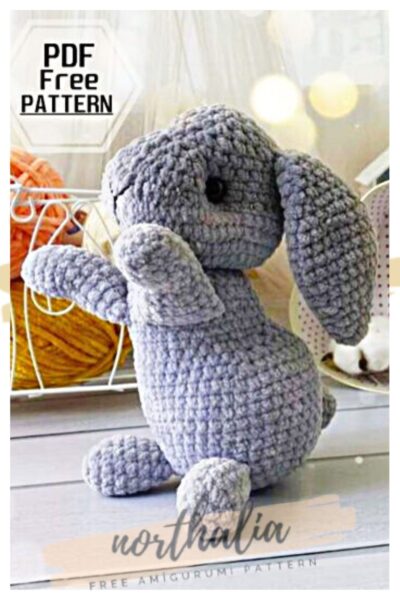
add a new one to the free amigurumi pattern. You can always follow us to reach the newest, most popular, most accurate pattern. Here is Easy Plush Bunny Lelya;
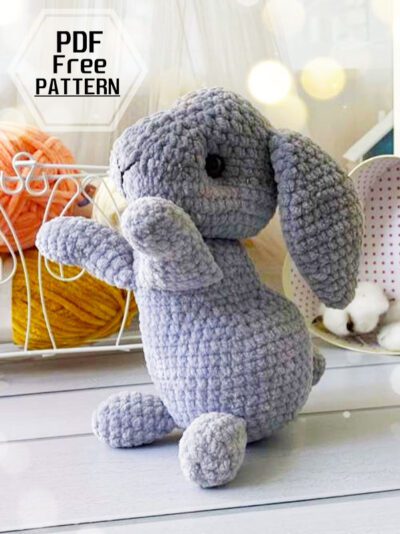
Designer: land_plush
Necessary materials
Yarn Himalaya Dolphin Baby 80351, (gray) – 1 skein,
YarnArt Jeans yarn (black) – a little, to decorate the spout,
Hook number 4,
Eyes 12-13 mm,
Scissors, needles, yarns, filler, tightening yarn.
And good mood!
Abbreviations
MR: Amigurumi Magic ring
sc : Single Crochet
inc : Increase
dec : Decrease
tr : Triple Crochet/ Treble Crochet
st: Stitch
dc : Double Crochet
hdc: Half Double Crochet
slst : Slip Stitch
ch : Chain
..in : make increase into same stitch as many as the number which is given in front of “inc” abbreviation (exp; 3inc, 4inc..).
FLO : Crochet into front loops only
BLO : Crochet into back loops only

Legs
1. 6 sc in MR (6)
2. 6 inc (12)
3-6. 12 sc (4 rows)
Tightly fill the beginning of the leg
7. (1 sc, dec) х4 (8)
8. 8 sc
We fasten the yarn and cut it off.
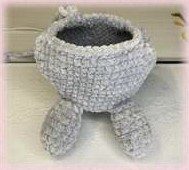
When crocheting into the body, fold the part in half.
Arms
1. 5 sc in MR (5)
2. 5 inc (10)
3. 10 sc
4. (4 sc, inc) х2 (12)
5. 12 sc
6-8. 5 slst, 7 sc (12) (3 rows)
9. (5 sc, inc) х2 (14)
10-12. 14 sc (3 rows)
We fasten the yarn and cut it off.
When crocheting into the body, fold the part in half.

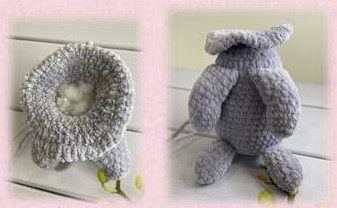
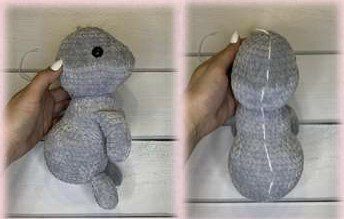
Body and Head
1. 6 sc in MR (6)
2. 6 inc (12)
3. (1 sc, inc) х6 (18)
4. (2 sc, inc) х6 (24)
5. (3 sc, inc) х6 (30)
6. (4 sc, inc) х6 (36)
7. (5 sc, inc) х6 (42)
8. 15 sc, 4 sc with leg, 4 sc, 4 sc with leg, 15 sc (42)
9-11. 42 sc (3 rows)
12. (6 sc, inc) х6 (48)
13-15. 48 sc (3 rows)
16. (7 sc,dec) х2, 15 sc, dec, 7 sc, dec, 4 sc (44)
17. 7 sc, 2 dec, 2 sc, 2 dec, 14 sc, 2 dec, 2 sc, 2 dec, 1 sc, dec (35)
18. (1 sc, dec) х2, 1 sc, 3 dec, 14 sc, 3 dec, 2 sc (27)
19. 4 sc, (3 sc, inc) х5, inc, 2 sc (33)
20-21. 33 sc (2 rows)
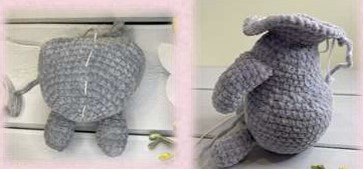
The arms should be parallel above the legs.
22. (1 sc, dec) х2, 3 sc, inc, (with arm 3 sc, inc, 3 sc), inc, (with arm 3 sc, inc, 3 sc), inc, 1 sc, (1 sc, dec) х2 (34)
We fill the detail
23. 34 sc
24. 4 sc, dec, (3 sc, dec) х5, 3 sc (28)
25. (4 sc, dec) х4, 4 sc (24)
26. (2 sc, dec) х6 (18)
27. (2 sc, inc) х6 (24)
28. (3 sc, inc) х6 (30)
29. (4 sc, inc) х6 (36)
30. (5 sc, inc) х2, (1 sc, inc) х6, (5 sc, inc) х2 (46)
!Further, the selected increases and decreases form a muzzle and fit strictly in the middle!
31. 14 sc, (2 sc, inc) х2, (2 sc, inc) х2, (2 sc, inc) х2, 14 sc (52)
32. 22 sc, (3 sc, inc) х2, 22 sc (54)
33. 54 sc
34. (7 sc, dec) х6 (48)
35. (6 sc, dec) х6 (42)
36. 12 sc, (1 sc, dec) х2, (1 sc, dec) х2, (1 sc, dec) х2, 12 sc (36)
37. 12 sc, (dec) х6, 12 sc (30)
38. 30 sc
39. (3 sc, dec) х6 (24)
We insert the eyes between 35, 36 rows, between them 14 sc. We fill the detail.
40. (2 sc, dec) х6 (18)
41. (1 sc, dec) х6 (12)
42. 6 dec
Cut the yarn, tighten the hole, hide the end of the yarn.
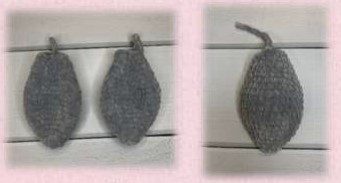
Ears
1. 6 sc in MR (6)
2. 6 inc (12)
3. 12 sc
4. (1 sc, inc) х6 (18)
5. (2 sc, inc) х6 (24)
6. 24 sc
7. (3 sc, inc) х6 (30)
8-11. 30 sc (4 rows)
12. (3 sc, dec) х6 (24)
13. 24 sc
14. (2 sc, dec) х6 (18)
15-16. 18 sc (2 rows)
17. (1 sc, dec) х6 (12)
18-19. 12 sc (2 rows)
We fasten the yarn and cut it off. Sew the ears on the sides at the level of the 38th row
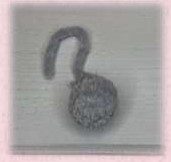
Tail
1. 6 sc in MR
2. 6 inc (12)
3-4. 12 sc (2 rows)
5. (1 sc, dec) х4 (8)
We fasten the yarn and cut it off. We fill the tail and sew in the 8th row of the body.
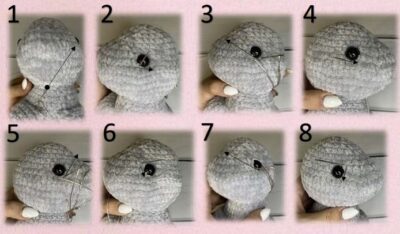
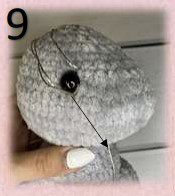
Tightening and muzzle design
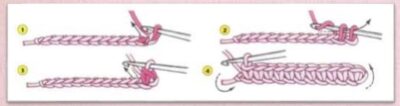
We make the tightening sequentially according to the photographs. The arrows show the direction of the needle.
We insert the needle under the muzzle, in the middle. Stage 9 is the final one. We return to the starting point, pull it off, tie the yarn and hide it inside the toy. If necessary, repeat the tightening a few more times.
Spout embroidery
We mark two points with pins (they can be seen in photo 3).
Between 34 and 35 rows, between pins 5 sc. We embroider the nose sequentially according to the photographs. The arrows show the direction of the needle.
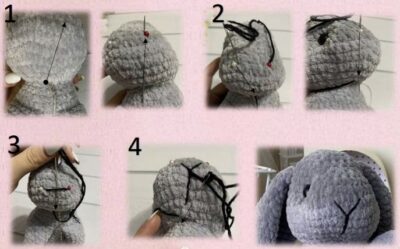
We insert the needle under the muzzle, in the middle. At the second stage bring the needle 2 sc up from the original point. At the fourth stage introduce the needle to the same point from where it was pulled out and return to the original point (i.e. 2 sc down).
We tie the yarn and hide it inside the toy.
Finish Easy Plush Bunny Lelya.


Comments0