Hello dear Amigurumi Followers
We add a new one to the free amigurumi patterns we have created for you. You can always get the most popular amigurumi patterns and the most preferred amigurumi crochet patterns on our site for free. Main crochets, amigurumi gazelles, amigurumi bears, amigurumi polar bears, amigurumi pandas, amigurumi penguins, amigurumi giraffes, amigurumi llama, amigurumi pigs, amigurumi rabbit, amigurumi clowns, amigurumi baby lambs, amigurumi lambs, amigurumi bees, amigurumi lambs dinosaurs, amigurumi elephants, amigurumi hippos, amigurumi monkeys, amigurumi cats, amigurumi dogs and more…
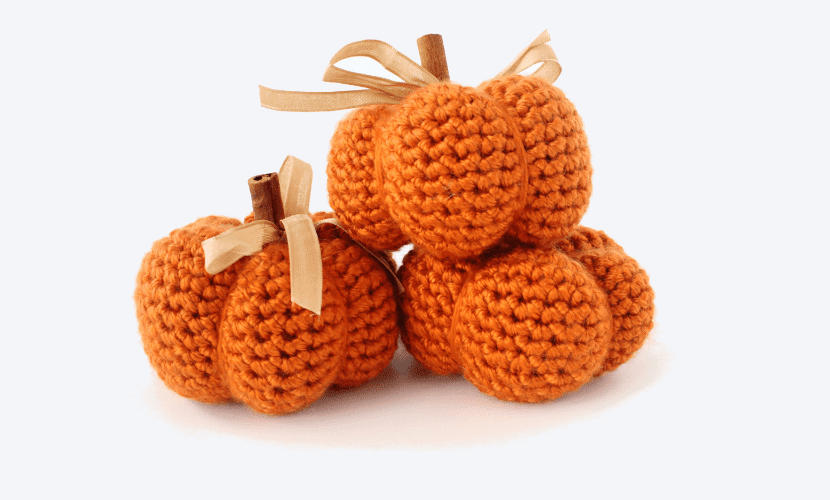
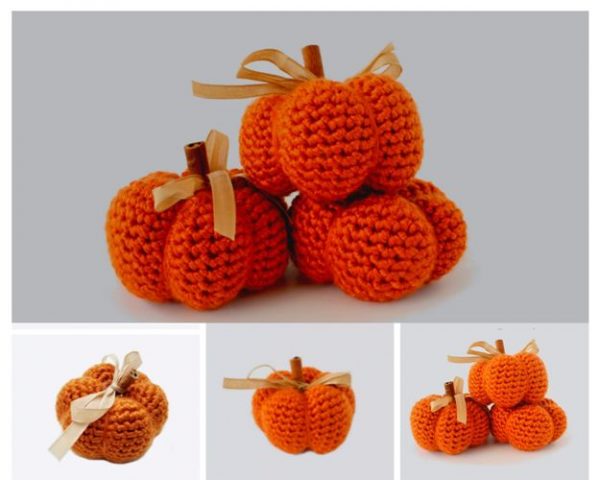
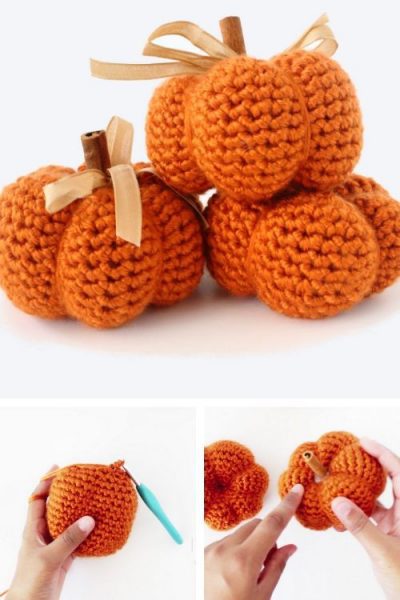
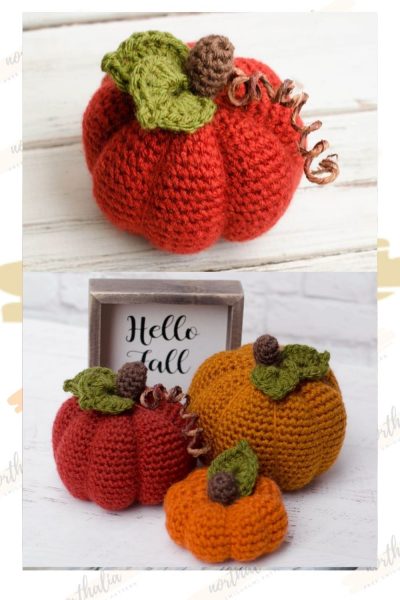
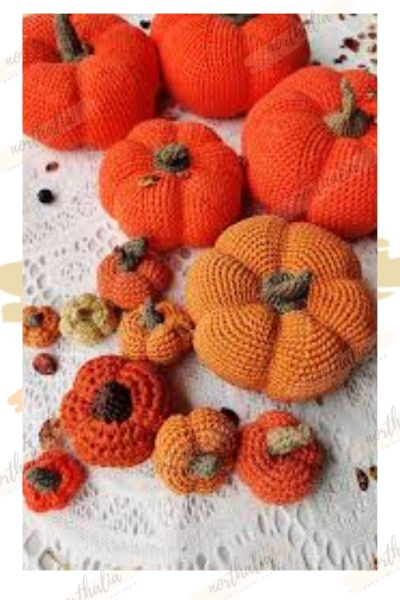
Our new free amigurumi crochet pattern Pumkin.
Here is our pattern;
Materials:
4.50mm crochet hook
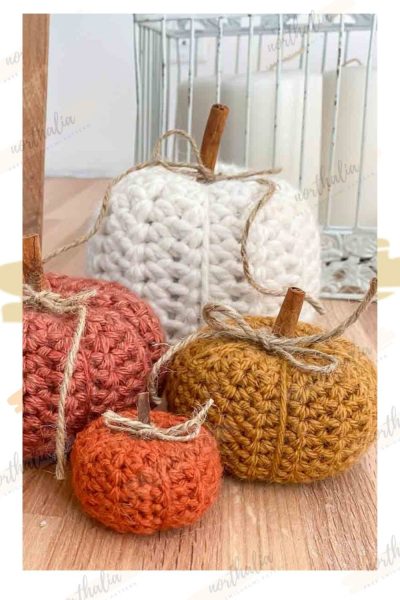
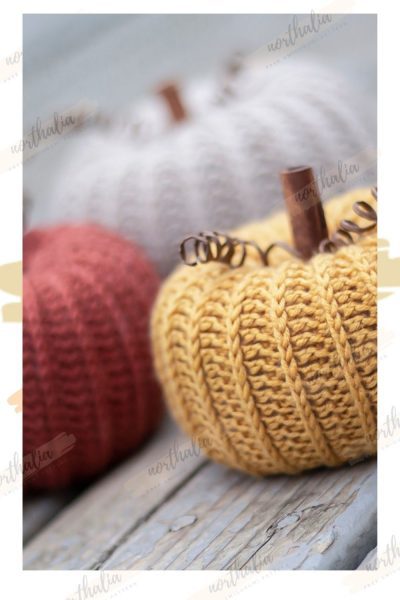
#4 medium weight yarn – I used Yarn Bee Soft Secret in Pumpkin Spice
tapestry needle*
Polyfil stuffing*
Hot glue
Cinnamon stick
Burlap ribbon (optional)
*denotes affiliate link
Abbreviations:
ch – chain
SC – single crochet
sl – slip stitch
Pattern Notes:
Skill level: Beginner
Sizing: 2.5″ tall
Gauge: 3S X 4R per inch
Free Crochet Pumpkin Pattern
Round 1: Holding two strands of yarn together, create a magic loop and work 6 SC into it. Pull the loop closed.
Round 2: Inc in each space by working 2 SC into each (12).
Round 3: *SC, inc* around (18).
Round 4: *SC 2, inc* around (24).
Round 5: *SC 3, inc* around (30).
Round 6: *SC 4, inc* around (36).
Rounds 7-16: SC around for 10 rounds. If you want to make your pumpkin taller, feel free to work a few extra rounds here.
Round 17: *SC 4, dec* around (30).
Round 18: *SC 3, dec* around (24). You can start to add the stuffing now. Don’t add too much that it’ll show through the holes but as you stuff, make sure there’s room for the pumpkin to squish down a little.
Round 19: *SC 2, dec* around (18).
Round 22: *SC, dec* around (12). Finish adding stuffing.
Round 23: Decrease around (6). Cut the yarn and thread tail through a tapestry needle. Run the needle under the front loops of each stitch and secure yarn. Pull tight and cut a long tail.
Finishing Touches
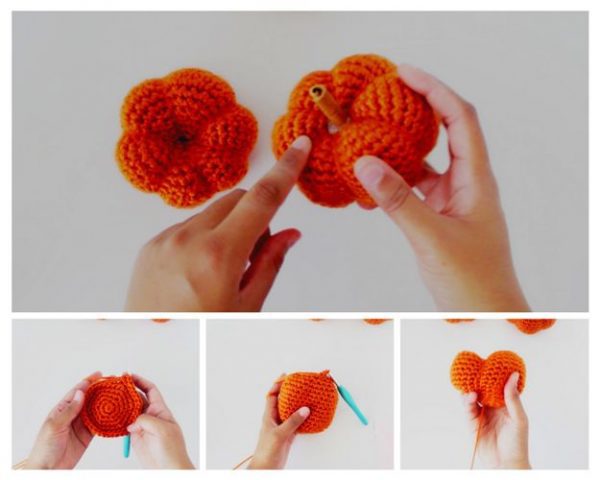
To make the lines for the crochet pumpkin pattern, thread the tail yarn through a tapestry needle and push it through the center of the pumpkin from top to bottom. Then go back through the top center to the bottom and you’ll have a large stitch across the pumpkin. Pull the yarn tight to create the first line and repeat 4 more times to make the other sections of the pumpkin.
Once you’re done, fasten off the tail and weave in the loose end. To finish, add a bit of hot glue to the center of the pumpkin and stick a 1-inch long bit of cinnamon stick for the stem. Hold it in place as the glue dries and you’re done!
And that’s it! These crochet pumpkins are so quick to make and they make great little decoration pieces. Get creative with your pumpkins and try out different colors and yarn types and you can even use these pumpkins as stashbusters!


Comments0