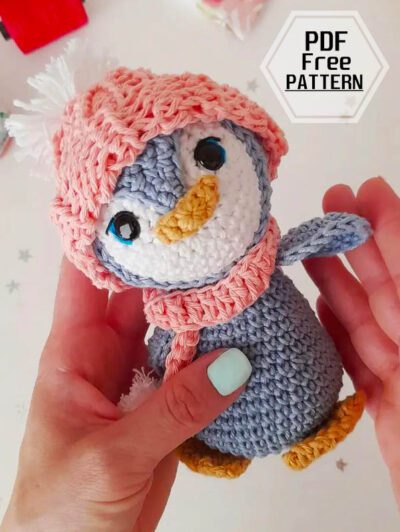
add a new one to the free amigurumi pattern. You can always follow us to reach the newest, most popular, most accurate pattern. Here is Penguin Pipo Crochet Amigurumi;
Designer: mi.media.vareta
Materials
• 6-strand cotton yarn in greyish light blue, white, corn and light salmon.
• Crochet hook no. 3 mm.
• Silicone fleece.
• Safety eyes no. 10.
• Wool needle.
• Scissors.
Abbreviations
MR: Amigurumi Magic ring
sc : Single Crochet
inc : Increase
dec : Decrease
tr : Triple Crochet/ Treble Crochet
st: Stitch
dc : Double Crochet
hdc: Half Double Crochet
slst : Slip Stitch
ch : Chain
..in : make increase into same stitch as many as the number which is given in front of “inc” abbreviation (exp; 3inc, 4inc..).
FLO : Crochet into front loops only
BLO : Crochet into back loops only
Penguin Amigurumi
Let’s start with this crochet penguin.
We start with the head. With white cotton yarn we make a magic ring.
Rnd 1 6 sc.
Rnd 2 1 inc. in each loop (12)
Rnd 3 1 sc., 1 inc. Repeat. (18)
Rnd 4 2 sc., 1 inc. Repeat. (24)
Rnd 5 3 sc., 1 inc. Repeat. (30 )
Rnd 6 4 sc., 1 inc. Repeat. (36)
Rnd 7- 12 36 sc.
Rnd 13 4 sc., 1 dec. Repeat. (30 ) With the circle in front we place the eyes between rows 4 and 5.
Rnd 14 3 sc., 1 dec. Repeat. (24)
Rnd 15 2 sc., 1 dec. Repeat. (18)
Rnd 16 1 sc., 1 dec. Repeat. (12)
Stuff.
Rnd 17 6 dec.
We close and cut the yarn.
Head of the Penguin Amigurumi (in grayish blue color)
We make a magic ring and we are going to start weaving the helmet of the head.
Rnd 1 8 sc.
Rnd 2 1 inc. en cada punto de base. (16)
Rnd 3 1 sc., 1 inc. Repeat. (24)
Rnd 4 2 sc., 1 inc. Repeat. (32)
Rnd 5 3 sc., 1 inc. Repeat. (40 )
Rnd 6 – 11 40 sc.
We make 1 ch. and we turn.
Rnd 12 8 sc.
Rnd 13 1 ch., 1 dec., 4 sc., 1 dec.
Rnd 14 1 ch., 6 sc.
Rnd 15 1 ch., 1 dec., 2 sc., 1 dec.
Rnd 16 2 dec.
Rnd 17 2 sc.
Rnd 18 1 dec.
We make a ch and we are going to crochet a sc all around.
We close and cut the yarn leaving yarn to sew.
Body
The body is oval in shape. The increases are on the sides. Remember to keep that in mind when sewing.
Rnd 1 MR. de 6 sc.
Rnd 2 1 inc. in each loop (12)
Rnd 3 3 sc., 3 inc., 3 sc., 3 inc. (18)
Rnd 4 3 sc., (1 sc., 1 inc. Repeat 3 times), 3 sc., (1 sc., 1 inc. Repeat 3 times) (24)
Rnd 5 3 sc., (2 sc., 1 inc. Repeat 3 times), 3 sc., (2 sc., 1 inc. Repeat 3 times) (30)
Rnd 6 3 sc., (3 sc., 1 inc. Repeat 3 times), 3 sc., (3 sc., 1 inc. Repeat 3 times) (36)
Rnd 7 – 11 36 sc.
Rnd 12 3 sc., (3 sc., 1 dec. Repeat 3 times), 3 sc., (3 sc., 1 dec. Repeat 3 times) (30)
Rnd 13 – 14 30 sc.
Rnd 15 3 sc., (2 sc., 1 dec. Repeat 3 times), 3 sc., (2 sc., 1 dec. Repeat 3 times) (24)
Rnd 16 – 17. 24 sc.
Rnd 18 3 sc., (1 sc., 1 dec. Repeat 3 times), 3 sc., (1 sc., 1 dec. Repeat 3 times) (18)
Rnd 19 – 20 18 sc.
We close and cut leaving a long yarn to sew. Fill with silicone fleece.
Peak
With corn color we are going to weave the beak. For that we make a magic ring.
Rnd 1 6 sc.
Rnd 2 1 inc. en cada punto de base.
Rnd 3 12 sc.
We close and sew.
Wings (we make two)
With grayish blue color we make a magic ring.
Rnd 1 6 sc.
Rnd 2 1 inc. in each loop. (12)
Rnd 3 1 sc., 1 inc. in sc., 1 sc., 1 inc. in sc., 1 hdc., 1 inc. in hdc., 1 hdc., 1 inc. in hdc., 1 sc., 1 inc. in sc., 1 sc., 1 inc. in sc. (18)
Rnd 4 7 sc., 1hdc., 1 inc. in dc., 1 inc. in dc., 1 hdc., 7 sc. (20 )
Close and leave yarn to sew.
Legs (x2)
With corn color we make a magic ring to start weaving.
Rnd 1 – 2 5 sc.
Rnd 3 1 inc. in each loop. (10)
Rnd 4 10 sc.
Rnd 5 1 sc., 1 inc. Repeat. (15)
Rnd 6 – 7 15 sc. Now continue weaving to close the point and make the fingers. For that we crochet 2 ch and make a slip stitch. Repeat until you reach the end.
Close and leave yarn to sew.
Tail
In grayish blue color we make a MR
Rnd 1 – 2 5 sc.
Rnd 3 1 inc. in each loop. (10)
Rnd 4 10 sc.
Rnd 5 2 sc., 5 inc., 3 sc. (15)
Rnd 6 2 sc., (1 sc., 1 inc. Repeat 5 times), 3 sc. (20)
Close and leave yarn to sew. Fill with silicone fleece.
Scarf
With light salmon color we crochet 45 ch.
Rnd 1. 3 ch., 45 dc.
We close. We make two mini pompoms in white and attach it to the ends.
Hat
We are going to crochet the hat in light salmon color. We crochet 15 ch.
Rnd 1. 2 ch., 15 hdc.
Rnd 2. 2 ch., for the front loop we crochet 15 hdc.
Rnd 3. 2 ch., for the back loop we crochet 15 hdc.
We repeat row 2 and 3 until we reach row 14.
We close. We sew and place a pompom in white.
Assembly
We sew the body to the head, legs, legs and tail.
We put his hat, scarf and voila! You already have your Penguin Pipo finished!

Penguin Pipo Crochet Amigurumi Free Pattern is a delightful pattern that allows you to create a cute and cuddly penguin. This amigurumi pattern is perfect for beginners as it uses basic stitches and easy-to-follow instructions. The finished penguin measures approximately 12 inches tall and is made using medium weight yarn. With its adorable expression and fluffy body, Pipo will surely be a favorite among your stuffed animal collection. Plus, it’s a great project for using up leftover yarn from other projects. So, grab your hook and get ready to make a new friend in the form of Penguin Pipo!


Comments0