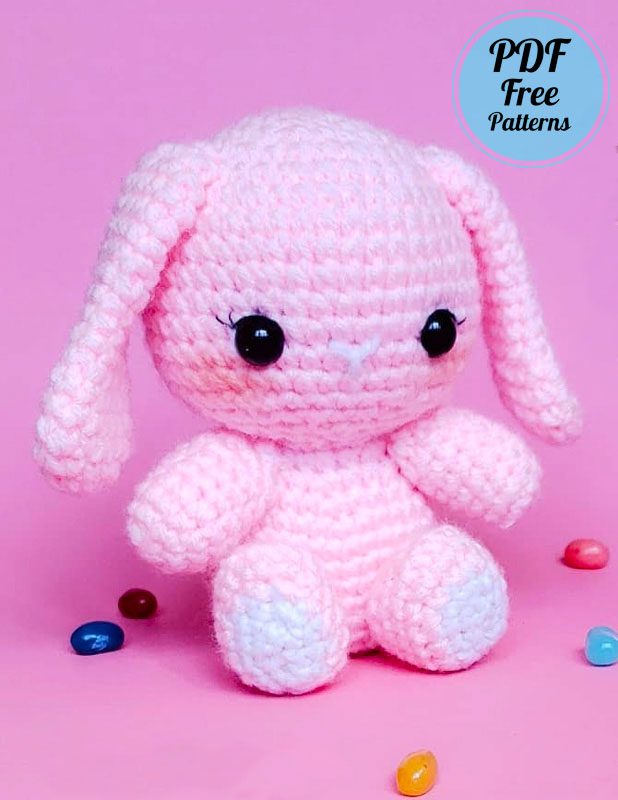
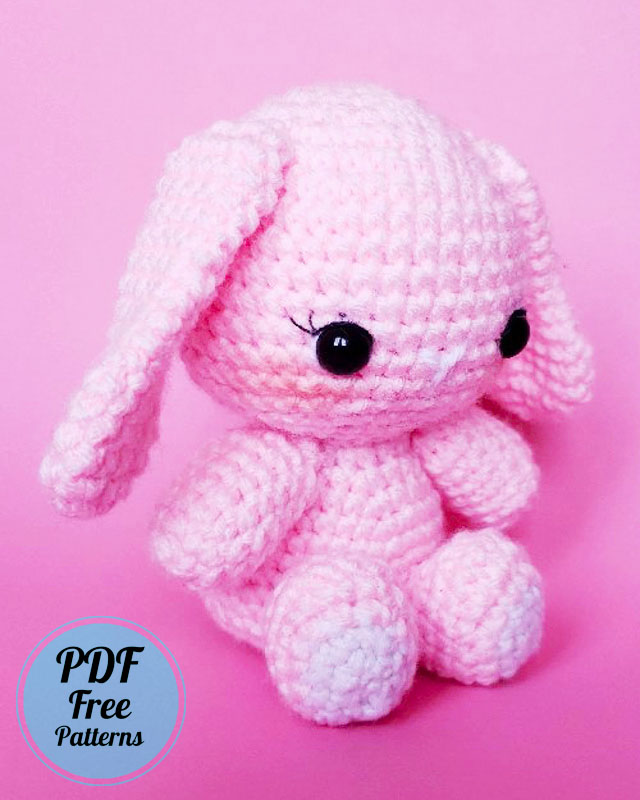
Even though it’s too early for Easter, when I come across cute bunny amigurumi patterns, I still share pdf patterns for free. This cute bunny amigurumi pattern has also been released for free. Don’t forget to follow me to get free amigurumi patterns. The most important point that you should pay attention to when making a bunny amigurumi doll is that the size of the amigurumi toy is quite small, so you need to crochet it carefully.
Designer: pengpuff.crochets
Materials
• 3.5mm hook
• Pink, White yarn (medium weight)
• Polyfill
• 12mm Safety Eyes and backings
• Tapestry Needle
• Pearl pins
Abb.
ch – chain
st – stitch
sl st – slip stitch
sc – sintle crochet
inc – increase
dec – decrease
BLO – hack loops only
Fasten off – cut yarn
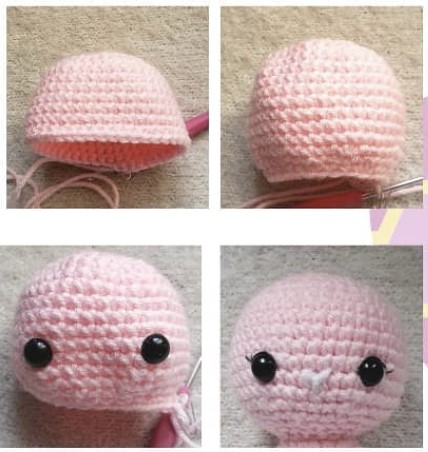
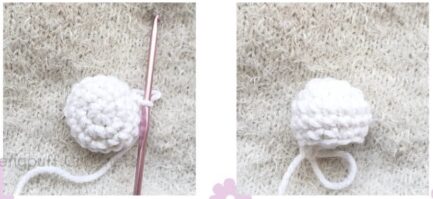
Head
Starting with pink
In a magic circle, sc 6 (6)
Rnd 2: inc (x6) (12)
Rnd 3: (sc, inc) (x6) (18)
Rnd 4: (sc 2, inc) (x6) (24)
Rnd 5: (sc, inc, sc 2) (x6) (30)
Rnd 6: (sc 4, inc) (x6) (36)
Rnd 7: (sc 3, inc, sc 2) (x6) (42)
Rnd 8-14: sc Around (42)
Rnd 15: (sc 3, dec, sc 2) (x6) (36)
Rnd 16: (sc 4, dec) (x6) (30)
Rnd 11: (sc, dec, sc 2) (x6) (24)
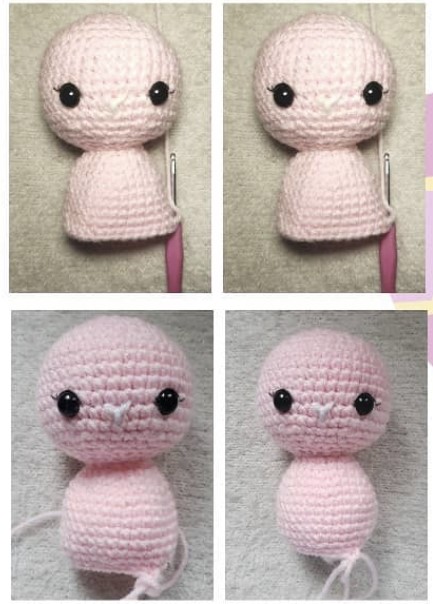
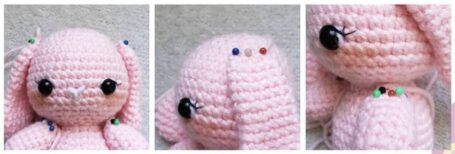
Begin to stuff the head. Add in the safety eyes between rnd12-13, 7 sts apart. Embroider liner and lashes, and a nose.
Rnd 18: (sc 2, dec) (x6) (18)
Rnd 19: (sc, sec) (x6) (12)
This is the end of the head. From here on out we will begin working the body. You should Finish stuffing the head at this point.
Body
Rnd 20: (sc, inc) (x6) (18)
Rnd 21: (sc 2, inc) (x6) (24)
Rnd 22: (sc 3, inc) (x6) (30)
Rnd 23: (sc 4, inc) (x6) (36)
Rnd 24-29: sc around (36)
Rnd 30: (sc 4, dec) (x6) (30)
Rnd 31: (sc 3, sec) (x6) (24)
Rnd 32: (sc 2, dec) (x6) (18)
Begin stuffini the body portion
Rnd 33: (sc, sec) (x6) (12)
Finish stuffing the entire head and body part.
Rnd 34: (dec) (x6) (6)
Fasten off and sew the hole shut.
Arms (x2)
Starting with pink
Ina magic circle, sc 6 (6)
Rnd 2: inc (x6) (12)
Rnd 3-8: sc around (12)
Stuff fully.
Rnd 9: dec (x6) (6)
Fasten off leaving a lont tail.
Press the ends of the arms together and sew the hole shut.
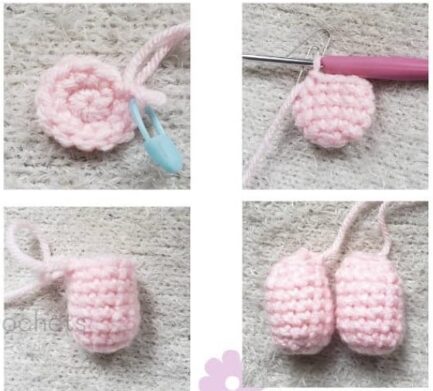
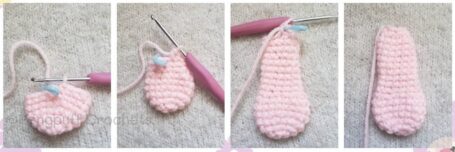
Legs (x2)
Starting in white
To make the Feet, we will be working around the foundation chain.
Ch 4
Rnd 1: Starting in the second ch from the hook, sc, sc, sc 3 in one, sc, inc (8)
Rnd 2: (inc, sc) (x4) (12)
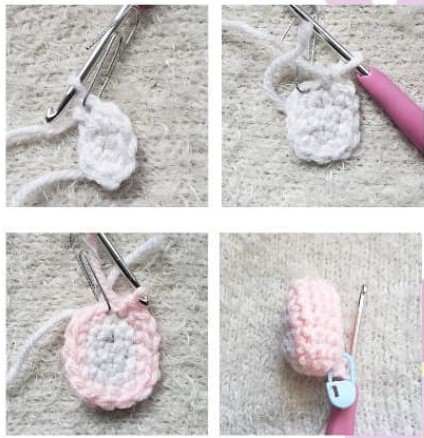
Change to pink
Rnd 3: sc,(inc, sc 2) (x3), inc, sc (16)
Rnd 4: sc 6, inc (x3), sc 7 (19)
Rnd 5: sc around (19)
Rnd 6: sc 6, dec (x3), sc 7 (16)
Rna 7: sc 5, dec (x3), sc 5 (13)
Rnd 8: sc 3, dec (03), sc 4 (10)
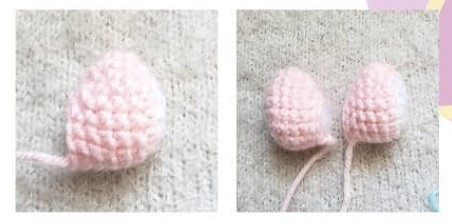
Stuff fully.
Fasten off, leaving a long tail for sewing.
Ears (x2)
In a Magic circle sc 6 (6)
Rnd 2: inc (x6) (12)
Rni 3: (sc, inc) (x6) (18)
Rnd 4-6: sc around (18)
Rnd 7: (sc, dec) (x6) (12)
Rnd 8-16: sc around (12)
Rnd 17: dec (x6) (6)
Fasten off, leaving a long tail for sewing. Flatten the piece so you get the ear shape. Sew the end of the ear shut.
Tail
Starting in white
In a magic circle sc 6 (6)
Rnd 2: inc (x6) (12)
Rnd 3: (sc, inc) (x6) (18)
Rnd 4-5: sc around (18)
Rnd 6: (sc, dec) (z6) (12)
Stuff fully
Rnd 1: dec (x6) (6)
Fasten off, leaving a long tail for sewing.
Assembly
Now that we have all the pieces, we con now assemble the bunny
Pin the ears between Rnds 5-6 of the bunny’s head. They should be about 3 stitches away from the eyes on either side.
Pin the arms in the crevice between the head and the body. They should be about 8 stitches apart. Note that this portion of the body had increases, so be careful about how far apart you put the arms.
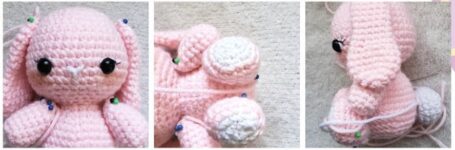
Pin the bottom of the legs between Rnds 29-30 in the body. Pin the side of the legs down so that they face straight up. The legs should fall in between the arms, and the arms should lightly touch the legs.
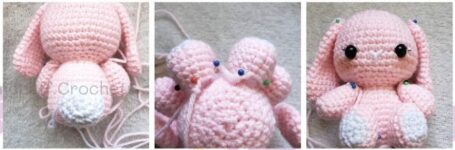
Pin the bottom of the tail between Rods 30-31 of the body. Make sure the tail is directly centralized on the back. Pin the sides of the tail to hold it securely in place.
Now sew on all the parts!
This is a crochet pattern for an adorable Easter Bunny in pink. The pattern is easy to follow and suitable for beginners. It includes detailed instructions and step-by-step photos to guide you through the process. You will need basic crochet skills and some yarn to complete this project. The finished bunny is about 12 inches tall and would make a perfect addition to your Easter decorations or as a gift for a little one. Enjoy creating this cute and festive crochet project!


Comments0