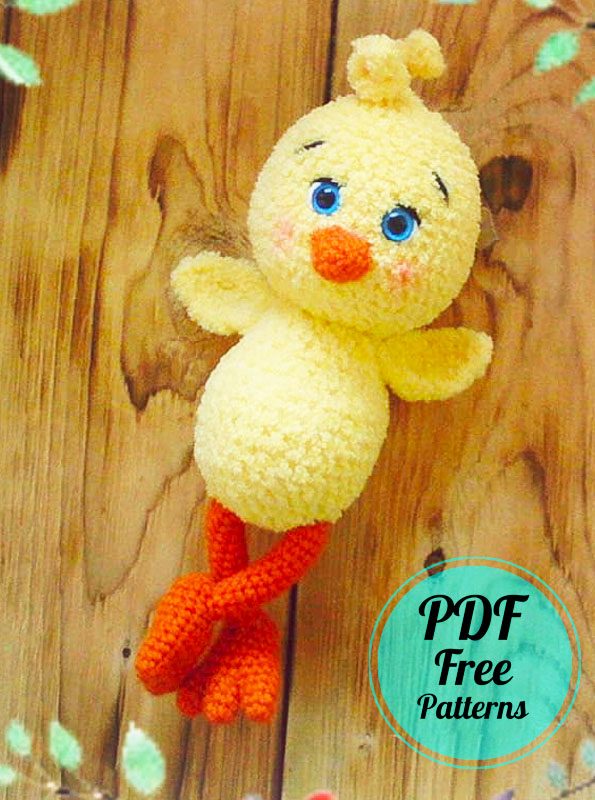
Hello my dears, today we will make a wonderful chick amigurumi together. I am sharing this amazing amigurumi pattern for free. Amigurumi is very easy to make. However, I advise you to be careful when making the feet and wings. You may need to do some detailed work, especially on the wing part. I liked the most used yarn in this chick amigurumi. Especially the appearance and texture of the yellow yarn looks very nice. I hope you enjoyed this free crochet pattern. Now if you’re ready, let’s get started.
Designer: darya_neustroeva
Materials
Body yarn – Alize Softy
Yarn for paws and beak – Novelty for children
Eyes between 9-10 rows, at a distance of 6sc. .
Abbreviations
AR – Amigurumi Magic ring
MR – Amigurumi Magic ring
sc : Single Crochet
inc : Increase
dec : Decrease
tr : Triple Crochet/ Treble Crochet
st: Stitch
dc : Double Crochet
hdc: Half Double Crochet
sl-st or Slst: Slip Stitch
ch : Chain
tch: Turnin chain crochet
..in : make increase into same stitch as many as the number which is given in front of “inc” abbreviation (exp; 3inc, 4inc..).
FLO : Crochet into front loops only
BLO : Crochet into back loops only
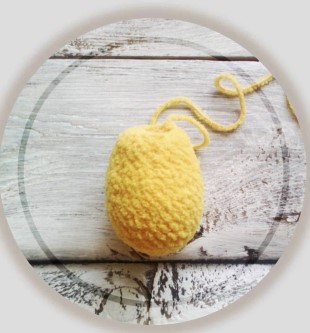
Body
1) 6 in MR
2) 6 inc (12sc)
3) 1sc, inc *6 (18sc)
4) 2sc, inc *6 (24sc)
5) 24sc
6) 3sc, inc *6 (30sc)
7) – 10) 30sc
11) 3sc, dec *6 (24sc)
12) 3sc, 4 dec, 13sc (20sc)
13) – 14) 20sc
15) 2sc, dec *5 (15sc)
16) 3sc, dec *3 (12sc)
Stuff the body, leave the thread for sewing
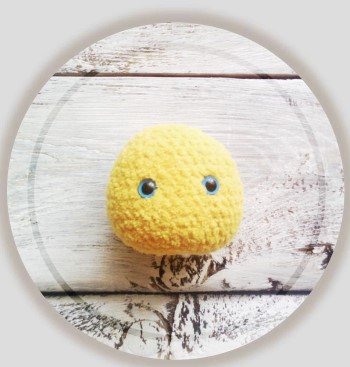
Head
1) 8sc in MR
2) 8inc (16sc)
3) 1sc, inc *8 (24sc)
4) 24sc
5) 3sc, inc *6 (30sc)
6) 30sc
7) 4sc, inc *6 (36sc)
8) – 9) 36sc
10) 5sc, inc *6 (42sc)
11) – 13) 42sc
14) 5sc, dec *6 (36sc)
15) 4sc, dec *6 (30sc)
16) 3sc, dec *6 (24sc)
Stuff.
17) dec * 12 (12sc)

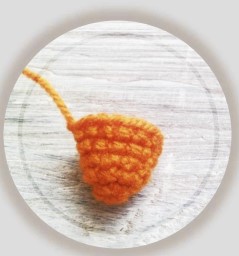
Beak
1) 6sc in MR
2) 1sc, inc *3 (9sc)
3) 9sc
4) 2sc, inc *3 (12sc)
5) 12sc
We stuff in the process of sewing to the head.
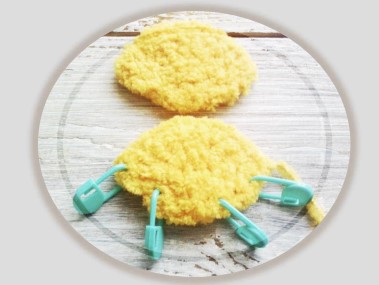
Hair
Make a chain of 9ch, in the second loop from the hook, 3sc in each loop. You can link the number of details as much as you think is necessary) Two were enough for my head.
The tail can be tied in the same way.
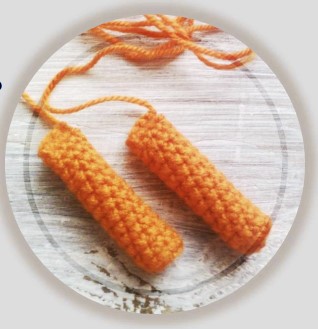
Legs
Part #1
1) Make 8ch, close in a ring and knit in a circle 13 rows. At the end, we knit, fold in half and knit for both sides. Leave the thread for sewing. We fill the detail.
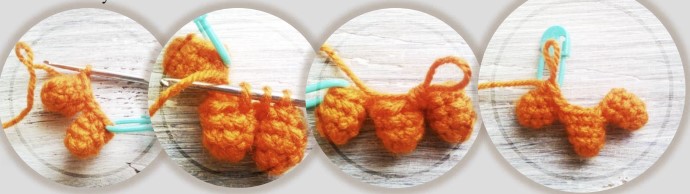
Part #2
1) 6sc in MR
2) – 3) 6sc.
We cut the thread. We knit three parts in this way.
At the third part, we do not cut the thread, we continue to knit.
We connect all three parts together.
In total it will turn out 18sc.
5) 18sc
6) dec, 7sc, dec, 7sc – 16sc
7) 16sc
8) dec, 6sc, dec, 6sc – 14sc
9) 14sc
10) dec, 5sc, dec, 5sc – 12sc
11) 12sc fill the detail.
12) 6 dec. We tighten the hole, hide the thread.
Sew part 1.
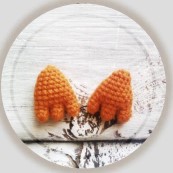
Wings
1) 4hdc in MR, do not close the ring, 1ch, turn the work
2) 1hdc, (inc in hdc) *3, 1ch, turn work
3) 2hdc, inc, 1hdc, (inc) *2, 1hdc, 1ch, turn
4) 2hdc, (inc, 1hdc) *3, 2hdc. Fasten the thread, cut
I marked the beginning of each row with a marker so as not to get lost))
This is a free crochet pattern for an adorable Easter chick amigurumi. This pattern is perfect for beginners and can be completed in a few hours. The finished chick measures approximately 6 inches tall and is made using worsted weight yarn. The pattern includes step-by-step instructions with photos to guide you through the process. You will need to know basic crochet stitches such as single crochet, double crochet, and slip stitch. Don’t let the simplicity of the pattern fool you, the end result is a cute and festive decoration for your Easter celebrations.


Comments0