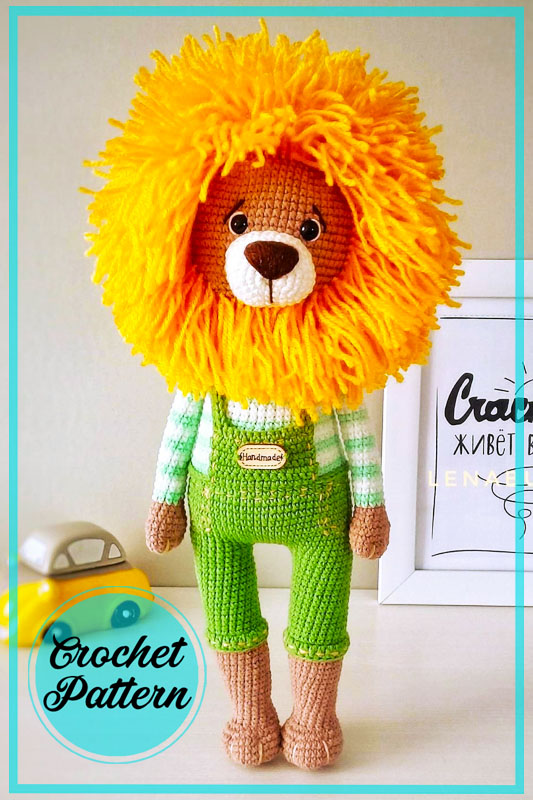
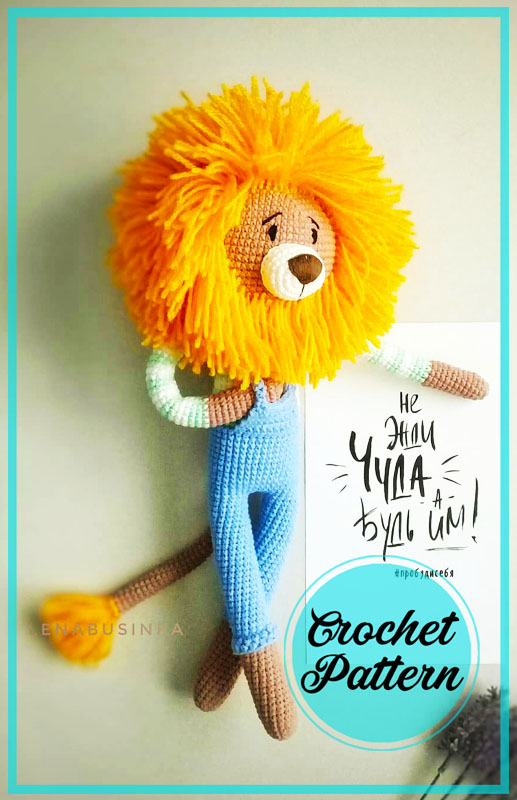
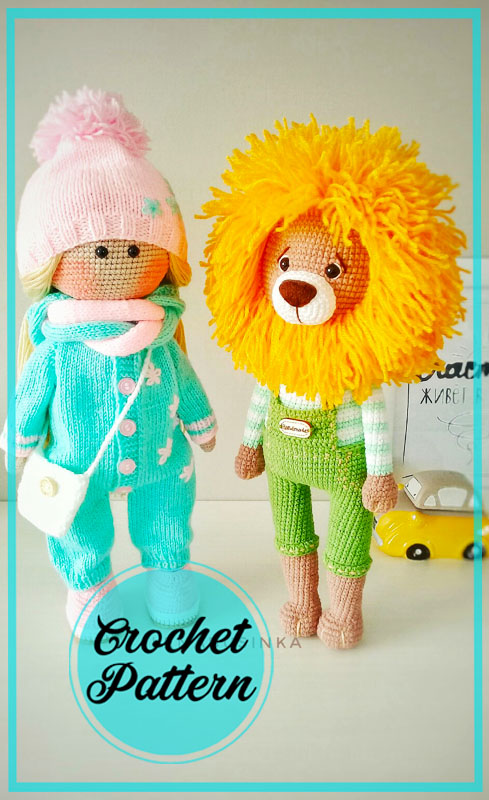
Dear friends, today I want to share a wonderful lion pattern. I don’t need to talk about the general construction of the lion, you can find it in detail in the description section. The most striking part of the lion is its mane. A really great mane design has been made. Such crochet designs occupy a very large place in the development of amigurumi art. Thus, it becomes open to innovations. As you know, lions are predatory animals that look cute as well. I hope you liked my crochet lion pattern sharing. Love to you all.
Helpful information
1. The pattern is free and NOT FOR SALE! When posting this pattern on various resources, as well as when translating into other languages, an indication and a link to the author of the description are required!
2. This pattern is intended for those who have the skills of crocheting. Difficulty: medium.
3. A toy, when using the specified materials, turns out to be 30 cm tall, taking into account the mane. Has no removable parts.
Save, knit with pleasure! Share your results and don’t forget to tag me as the author of Pattern!
Designer: Lena Businka
Materials used
Yarnart Jeans yarn (50gr -160m, 55% cotton, 45% acrylic)
Any suitable yarn can be used.
-color 71 (head, arms, legs, tail)
-color 69 (pants)
-color 79 (blouse)
-color 62 (blouse, muzzle)
-color 07 (leg tightening)
Yarn Alize shekerim color 488 (mane)
You can use Pekhorka children’s novelty or other suitable yarn.
Hook No. 2
Eyes on a secure mount # 9 or # 10
Holofiber filler
Brown yarn for nose and eyebrow embroidery (floss or others)
Needle for stitching parts
Scissors
Good mood!
Abbreviations
AR – Amigurumi Magic ring
MR – Amigurumi Magic ring
App – application
ll – lift loop
sc : Single Crochet
inc : Increase
dec : Decrease
tr : Triple Crochet/ Treble Crochet
st: Stitch
dc : Double Crochet
hdc: Half Double Crochet
sl-st : Slip Stitch
ch : Chain
..in : make increase into same stitch as many as the number which is given in front of “inc” abbreviation (exp; 3inc, 4inc..).
FLO : Crochet into front loops only
BLO : Crochet into back loops only
BL : Bobble Stitch – do 5dc all in the same stitch and then yarn over and pull through all the loops on your hook (the original loop + 1 loop for each partially completed dc).


Work description
Head
1 R: 6sc in MR
2 R: (inc)*6 (12)
3 R: (1sc, inc)*6 (18)
4 R: (2sc, inc)*6 (24)
5 R: (3sc, inc)*6 (30)
6 R: (4sc, inc)*6 (36)
7 R: (5sc, inc)*6 (42)
8 R: (6sc, inc)*6 (48)
9 R: (7sc, inc)*6 (54)
10 R: (8sc, inc)*6 (60)
11 R: (9sc, inc)*6 (66)
12 -23 R: 66sc (12 rows)
Eyes No. 9 or No. 10 are inserted between 17 and 18 rows, at a distance of 9sc
24 R: (9sc, dec)*6 (60)
25 R: (8sc, dec)*6 (54)
26 R: (7sc, dec)*6 (48)
27 R: (6sc, dec)*6 (42)
28 R: (5sc, dec)*6 (36)
29 R: (4sc, dec)*6 (30)
30 R: (3sc, dec)*6 (24)
Fasten the yarn, cut, leaving enough for sewing to the body.
We fill it tightly, giving the desired shape to the head.
Ears (2 parts)
1 R: 6sc in MR
2 R: (inc)*6 (12)
3 R: (1sc, inc)*6 (18)
4 -8 R: 18sc (5 rows)
Fold in half, knit at both ends with 9sc, fasten and cut yarn, leaving enough for sewing.
Muzzle
1 R: 6sc in MR
2 R: (inc 3sc in one loop)*2, 1sc, (inc 3sc in one loop)*2, 1sc (14)
3 R: (1sc, inc)*3,1sc, (1sc, inc)*3, 1sc (20)
4 R: (2sc, inc)*3, 1sc, (2sc, inc)*3, 1sc (26)
5 R: (3sc, inc)*3, 1sc, (3sc, inc)*3, 1sc (32)
6 -8 R: 32sc (3 row)
Fasten the yarn, cut, leaving enough for sewing.
Tail
1 R: 6sc in MR
2 R: (1sc, inc)*3 (9)
3 -35 R: 9sc
Fold in half, knit at both edges 4sc, cut the yarn, leave the tip for sewing.
Hands (2 parts)
1 R: 6sc in MR
2 R: (inc)*6 (12)
3 R: (1sc, inc)*6 (18)
4-7 R: 18sc (4 row)
8 R: (1sc, dec)*6 (12)
9-10 R: 12sc
11 R: color change12sc
12-37 R: 12sc (26 rows)
Change color every 2 rows, for a striped blouse.
Fold in half, knit at both ends 6sc, trim the yarn.
Legs (2 parts)
1 R: 6sc in MR
2 R: (inc)*6 (12)
3 R: (1sc, inc)*6 (18)
4 R: (2sc, inc)*6 (24)
5 R: (3sc, inc)*6 (30)
6-8 R: 30sc (3 row)
9 R: 6sc, (1sc, dec)*6, 6sc (24)
10 R: 6sc, 6dec, 6sc (18)
11 R: (4sc, dec)*3 (15)
12-14 R: 15sc (3 row)
15 R: (4sc, inc)*3 (18)
16-19 R: 18sc (4 row)
20 R: (5sc, inc)*3 (21)
21-26 R: 21sc (6 rows)
27 R: changing the color to green 21sc
28 R: behind the back wall of the loop 21sc
29-43R: 21sc (15 rows)
Cut the yarn on one leg, do not cut on the other.
Attach yarn to row 28 and knit 1 row of hdc and 1 row sc of 21sc behind the front wall of the loop. Fasten the ends and hide inside the legs.
Body
Cast on 6ch from the second leg and attach to the first leg.
1 R: 21sc on one leg, 6sc on the chain, 21sc on the other leg, 6sc on the chain (54)
2 R: (8sc, inc)*6 (60)
3-13 R: 60sc (11 rows)
14 R: behind the front wall of the loop 60sc
14 R: behind the back wall of the loop color change 60sc
15 R: 60sc
16 R: (8sc, dec)*6 (54)
17 R: (7sc, dec)*6 (48)
18-21 R: 48sc (4 row)
22 R: (10sc, dec)*4 (44)
23-30 R: 44sc (8 rows)
31 R: (9sc, dec)*4 (40)
32-33 R: 40sc (2 row)
34 R: (8sc, dec)*4 (36)
35 R: 36sc
36 R: (4sc, dec)*6 (30)
37 R: 30sc
38 R: (3sc, dec)*6 (24)
39 R: 24sc
Fasten the yarn, cut.
Assembly and design
Sew the muzzle to the head, place it under the eyes.
Sew the ears to the head.
Embroider nose, eyebrows, eyes.
Attach a yarn in the color of the panties in the front and knit 8 rows of 16sc in pivoting rows.
Make the straps for the pants, having typed the required number of air loops, knit a row of psn.
Sew the arms to the body between rows 35 and 36.
Make a slight tightening of the legs.
Customize the pants as desired.
Sew the head to the body.
Cut the yarn for the mane
To arrange a mane:
Attach -2 rows below the muzzle in each loop;
– make markings around the face;
– fasten the yarn to each loop.
Design the tassel on the tail in the same way.
If you do not make a mane, you will get a cute bear cub, only knit the ears 2 rows less and tie a round tail!
Congratulations! Your lion amigurumi cub is ready!
This title refers to a free crochet pattern available in PDF format for creating an amigurumi lion dressed up in a costume. Amigurumi is a Japanese art of knitting or crocheting small, stuffed animals using yarn. This pattern offers step-by-step instructions and illustrations to guide the crafter through the process of creating a cute and unique lion figurine. The lion is depicted wearing a costume, adding a fun and creative touch to the project. This pattern is perfect for beginners looking to try their hand at amigurumi, as well as more experienced crafters looking for a new challenge. With the help of this free pattern, you can create a charming and whimsical lion that will be the perfect addition to your collection or as a gift for a loved one.


Comments0