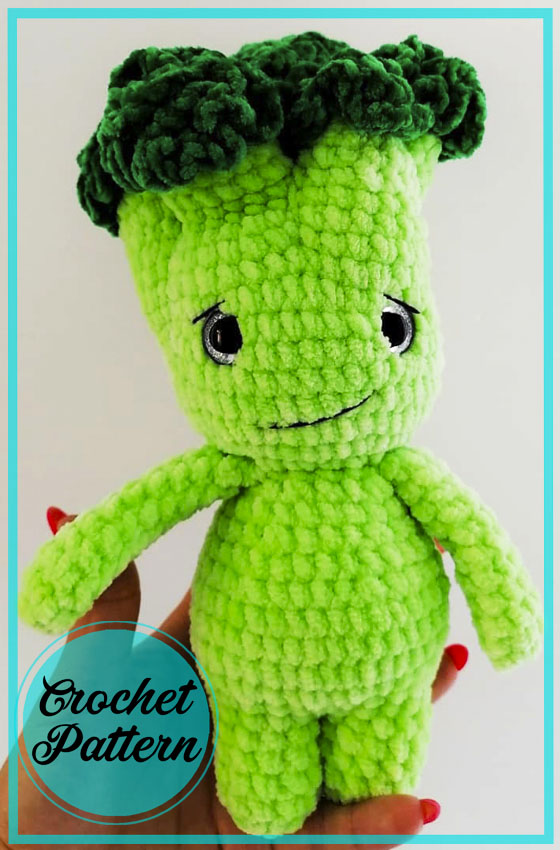
Friends, are you ready to crochet a very cute broccoli amigurumi? I’m going to share the crochet broccoli pattern with you for free today. A very realistic amigurumi. It actually looks more like a doll but broccoli pattern due to the texture and color of her hair. As you know, broccoli is one of the healthiest and most beneficial vegetables. We need to feed our children plenty of broccoli. In this way, you can draw the attention of children to healthier foods by making dolls. The pattern is made using velvet thread. Now let’s crochet broccoli amigurumi step by step.
The size of the finished toy when using a hook No. 3.5 is 24-27 cm. But the size may differ and depend on the density of knitting and the number of the hook you choose.
Mr. Broccolini))) ???
When publishing finished works, please indicate @valerika_crochettoys as the author
Designer: @valerika_crochettoys
NECESSARY MATERIALS:
• Yarn HiMALAYA DOLPHIN BABY. You need one skein of basic green and one skein of dark green. My main color is # 350, and I took the dark color from YarnArt Velor # 856
• Hook No. 3.5-4 (you can use any other hook number, respectively, the size and yarn consumption will be different);
• Eyes on a secure mount with a diameter of 16 mm;
• Scissors;
• Filler.
Abbreviations
AR – Amigurumi Magic ring
MR – Amigurumi Magic ring
App – application
ll – lift loop
sc : Single Crochet
inc : Increase
dec : Decrease
tr : Triple Crochet/ Treble Crochet
st: Stitch
dc : Double Crochet
hdc: Half Double Crochet
sl-st : Slip Stitch
ch : Chain
..in : make increase into same stitch as many as the number which is given in front of “inc” abbreviation (exp; 3inc, 4inc..).
FLO : Crochet into front loops only
BLO : Crochet into back loops only
BL : Bobble Stitch – do 5dc all in the same stitch and then yarn over and pull through all the loops on your hook (the original loop + 1 loop for each partially completed dc).
ZPS
– knitting for the back loop of the column.
CH1
– column with 1 crochet
Arms (2 times):
1) 5 sc in MR
2) inc*5 (10)
3) -5) 3 row 10 sc (10)
6) (3 sc, dec)*2 (8)
7) -11) 5 rows 8 sc (8)
Fold handle in half and knit 4 sc. Fasten and cut the thread
LEGS – BODY – HEAD
First leg:
1) 6 sc in MR
2) inc*6 (12)
3) -6) 4 row по 12 sc. Cut the thread.
Second leg and body:
1) 6 sc in MR
2) inc*6 (12)
3) -6) 4 row по 12 sc (12)
6) Knit 12 sc on the first leg, return to the second leg and also knit 12 sc (24) Fill the legs a little with filler.
7) (3 sc, inc)*6 (30)
8) (4 sc, inc)*6 (36)
9) -12) 3 row 36 sc (36)
10) (4 sc, dec)*6 (30)
11) 30 sc (30)
12) (3 sc, dec)*6 (24)
13) 24 sc (24)
14) (2 sc, dec)*6 (18)
15) 18 sc (18) In this row we knit handles: 5 sc, 4 sc together with the handle, 4 sc, 4 sc together with the second handle, 1 sc. We fill the body as we knit.
16) From this row, we begin to knit the head immediately: inc * 18 (36)
17) (5 sc, inc)*6 (42)
18) -26) 9 rows of 42 sc. The eyes are inserted between 21 and 22 row, between the peephole approximately 7-8 sc.
Now we begin to knit the twigs, like with real broccoli.
Twig 1:
Knit 2 more sc, cast on 4ch, count back 12 sc and insert crochet at 13 sc. We knit in a circle 3 rows of 17 sc.
We close the top of the twig behind the ZPS:
• 8 sc, dec, 7 sc (16)
• (2 sc, dec) * 4 (12) Next, we make decreases until the end of knitting, not forgetting that we are knitting for ZPS.
Twig 2:
Go back to the left head posts, attach the thread, knit 34 sc in a circle, cast in 5 ch, count back 9 sc and insert the hook into the 10th sc. We knit in a circle 4 rows of 15 sc. We close the ZPS with decreases until the end of knitting.
Twig 3:
It is bifurcated.
Attach the thread to the main knit, knit 10 sc, cast in 7 ch, insert the hook in the middle of ch from the second twig.
We knit in a circle 2 rows of 23 sc.
• 7 sc, cast on 3 ch, count back 9 sc, insert the hook into the 10th sc.
We knit a row behind the ZPS and close it with decreases to the end also behind the ZPS.
• We return to the remaining columns of the twig, attach the thread and knit 3 row. We close behind the ZPS, first alternating (1 sc, dec), then simply by decreasing to the end.
We begin to fill the head and twigs. We try not to stuff too much, so that later we can make tightening.
Twig 4:
Attach the thread to the main knitting, knit 8 sc, cast on 2 ch, join twigs No. 1 and 3 into the joint.
• We knit 2 row (16 sc)
• dec, 7 sc, dec, 5 sc (14 )
• 3 row for 14 sc
• We close knitting with reductions for ZPS
twig 5:
We attach the thread to the remaining sc, fill in the head and twigs, knit 2-3 row and close the knitting with decreases for the ZPS.
Now we take a thread of dark green color.
We attach the thread to the remaining front stitches of the posts and simply knit 5-6 hdc or CH1 in each front st on each twig. I alternated the number and type of columns in a chaotic manner.
Finally, we tighten the base yarn to form more distinct twigs on the head. We introduce the thread into the middle, between the twigs, and draw it along each twig at a different distance (lower or higher) around the head, tightening a little and fixing it immediately at the point of insertion of the thread.
So our Mr. Broccolini is ready
All pleasant creativity and excellent results

Title: “Little Broccoli Amigurumi Crochet PDF Free Pattern”
Introducing our delightful Little Broccoli Amigurumi Crochet PDF Free Pattern! This charming and playful pattern is perfect for all amigurumi enthusiasts, whether you are a beginner or an experienced crocheter. Create a cute and quirky addition to your home decor or a unique gift for a loved one with this easy-to-follow pattern.
Our Little Broccoli Amigurumi pattern features detailed instructions and step-by-step photos to guide you through the process. You’ll learn how to create the adorable little broccoli with its characteristic florets and stalk, using simple crochet techniques. The finished amigurumi measures approximately 10 inches tall, making it a perfect size for display or cuddles.
This free pattern includes both written instructions and a color chart, ensuring that you can easily customize the color of your Little Broccoli to suit your preferences. The pattern is designed to be versatile and fun, allowing you to experiment with different yarn types and colors to create your own unique version of this cute vegetable.
Don’t miss out on the chance to add a touch of whimsy and creativity to your crochet projects. Download our Little Broccoli Amigurumi Crochet PDF Free Pattern now and start stitching today!


Comments0