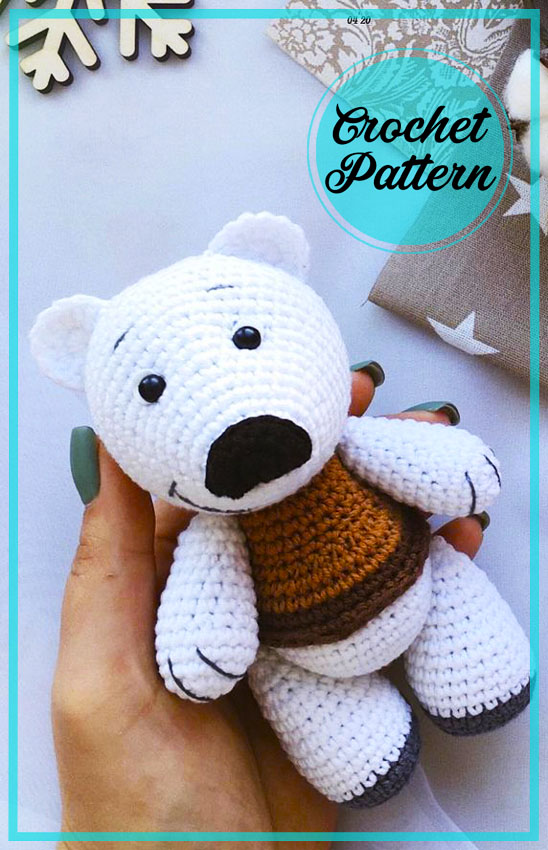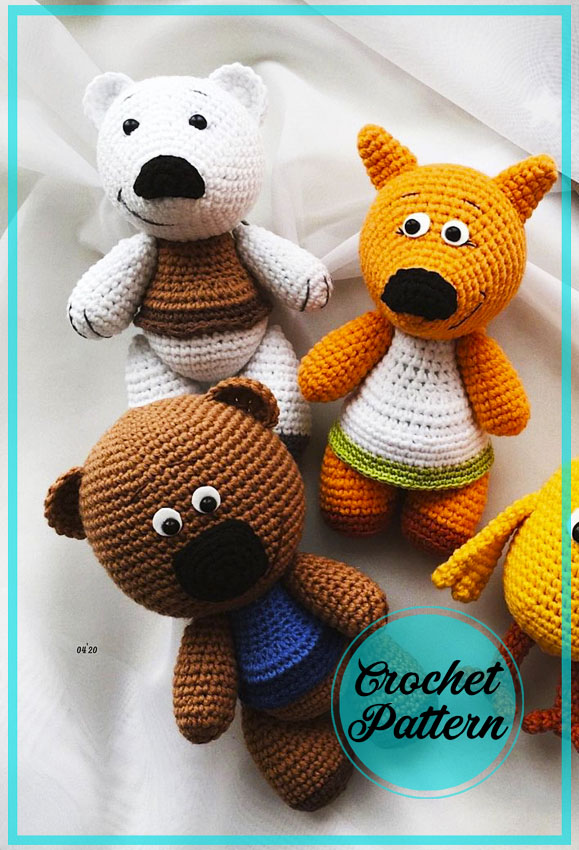
Friends, I am with you today with a different model about mouse designs. Actually, I likened it to a bear amigurumi, but the designer states that it is a mouse amigurumi pattern. I don’t think it is right to choose white as a color. Because the white color shows a lot of dirt. Even the slightest contact can cause stains on it. If you are not going to use this crochet mouse amigurumi for a good decoration, I think you should make a different choice about color. My favorite part of this amigurumi pattern is the mouth and nose design. A truly wonderful facial expression has been created.
The master class does not contain knitting lessons, it is intended for craftswomen (s) with crochet skills.
When using these materials, you will receive a Cloud no more than 20 cm in height.
Designer: Ekaterina Gapeeva
So, we need Materials:
Threads: Bambino from Nako (light brown), Pekhorka Children’s novelty (white), and so
a little gray, black and dark brown
Hook No. 1.9
Needle with a large eye
Wool and felting needle
Eyes – half beads
Glue moment
Filler
Abbreviations
AR – Amigurumi Magic ring
MR – Amigurumi Magic ring
App – application
ll – lift loop
sc : Single Crochet
inc : Increase
dec : Decrease
tr : Triple Crochet/ Treble Crochet
st: Stitch
dc : Double Crochet
hdc: Half Double Crochet
sl-st : Slip Stitch
ch : Chain
..in : make increase into same stitch as many as the number which is given in front of “inc” abbreviation (exp; 3inc, 4inc..).
FLO : Crochet into front loops only
BLO : Crochet into back loops only
BL : Bobble Stitch – do 5dc all in the same stitch and then yarn over and pull through all the loops on your hook (the original loop + 1 loop for each partially completed dc).

Head
1. In the amigurumi ring we knit 6 sc (6)
2. inc х 6 (12)
3. One row unchanged (12)
4. (1 sc, inc) х 6 (18)
5. One row unchanged (18)
6. (2 sc, inc) х 6 (24)
7. One row unchanged (24)
8. (3 sc, inc) х 6 (30)
9. One row unchanged (30)
10.(4 sc, inc) х 6 (36)
11.One row unchanged (36)
12.(5 sc, inc) х6 (42)
13.One row unchanged (42)
14.(6 sc, inc) х6 (48)
15.– 20. Knit 6 rows unchanged (48)
21. (6 sc, dec) х6 (42)
22. (5 sc, dec) х6 (36)
23. (4 sc, dec) х6 (30) Start stuffing your head.
24. (3 sc, dec) х6 (24)
25. (2 sc, dec) х6 (18)
26. (1 sc, dec) х6 (12)
Reduce to the end, cut the thread and leave the tip for sewing.
Body
1. With a white thread, tie 6 sc amigurumi into a ring (6)
2. inc х 6 (12)
3. (1 sc, inc) х 6 (18)
4. (2 sc, inc) х 6 (24)
5. (3 sc, inc) х 6 (30)
6. (4 sc, inc) х 6 (36)
7. -10. Knit 4 rows unchanged. In the last loop, make a color change to dark brown. The white thread can be cut. (36)
11. Knit one more row without changing (36)
12. One row unchanged, but behind the back of the hinge. In the last loop, change the color to light brown, while we do not cut the previous thread, but bring it to the front side. (36)
13.-14. We knit 2 more rows without changes. (36)
Pull out the loop longer and leave it light brown for now. Go back to the dark brown thread to knit the remaining stitches of the 12th row. After we do this, cut the thread, leave the tip in order to grab the bottom of the sweater, otherwise it will puff up. Next, knit in light brown.
14. 12 sc, уб х 6, 12 sc (30)
15. (3 sc, dec) х6 (24)
16.-18. We knit 3 rows without change. (24)
19. (2 sc, dec) х6 (18)
We fill our little body, cut the thread and fix it.
Hands (2 times.)
1. Tie 6 sc into the amigurumi ring (6)
2. inc х 6 (12)
3. (1 sc, inc) х 6 (18)
4. -5. Knit two rows unchanged (18)
6. (4 sc, dec) х3 (15)
7. -9. Knit 3 rows unchanged (15)
10. (3 sc, dec) х3 (12)
11. -13. Knit 3 rows unchanged (12)
14. Fill in, decrease the loops to the end. Knit the second hand in the same way.
Legs (2 times)
1. With a gray thread, knit 6 sc amigurumi into a ring (6)
2. inc х 6 (12)
3. (1 sc, inc) х 6 (18)
4. (2 sc, inc) х 6 (24)
5. Knit One row unchanged, but behind the back of the loop. (24)
6. We knit one more row unchanged. In the last loop we make a color change to white (24)
7. -12. Knit 6 rows unchanged. (24)
13. (2 sc, dec) х6 (18)
14.- 15. Two rows unchanged. (eighteen)
We begin to fill in the detail.
16. (1 sc, dec) х6 (12)
17. One row unchanged. (12)
18. dec х 6.
Pull off the loops, leave the tip for sewing.
We knit the second leg in the same way.
Nose
1. Tie 7 sc into the amigurumi ring (7)
2. One row unchanged (7)
3. inc, 5 sc, inc (9)
Cut the thread, leave the tip for sewing.
Ears (2 times)
1. Knit 8 sc into the amigurumi ring. Do not close the circle, turn knit and do one ch, turn. (8)
2. inc, 6 sc, inc, ch, turn.(10)
3. 10 sc (10)
Cut the thread, leave the tip for sewing. Knit the second ear in the same way.
Assembly and design
1. First, we sew the head to the body. We fix, hide the strings.
2. Next, let’s go back to the bottom of the sweater. We grab the sweater with small stitches, in no case we do not tighten it.
3. After that we sew on the handles. We place them symmetrically along the body. If everything suits you, we sew. We fix the thread, hide the ends. We embroider claws with dark brown thread. The height of one claw is 3 rows, the distance between them is 1-2 loops. There should be three things in total.
4. Now we sew on the legs. We place them also symmetrically along the body.
They should be in line with the arms.
5. We sew a nose.
6. Sew ears in an arc somewhere in the 6th row from the crown.
After sewing on all the details, the Cloud should look like this:
– view from the back
7. We begin to make eyes. To do this, take a small piece of wool for felting, roll a ball out of it, and then flatten it into a pancake. We put this pancake in place of our eye, stepping back two rows from the nose and start to roll. The size of the white of the eye will depend on which pupil you choose. The bee-bears have small eyes, so we will try to make them like that.
To get an even edge of proteins, you need to twist the wool into a thin bundle and weld it around the entire circumference.
After our edges have leveled off, it remains only to glue the pupil or weld it out of black wool. To make the eyes clearer, I tinted them with black pastel.
8. Embroider eyebrows and mouth in gray
That’s all! The cloud is ready!
If you have any questions during the knitting process, you can always write to me
In contact with
vk.com/tveryankina_gapeeva.kati
Best regards, Ekaterina Gapeeva
Title: “Mi mi Mouse Amigurumi PDF Free Pattern”
Introducing the delightful and charming “Mi mi Mouse Amigurumi PDF Free Pattern,” a perfect pattern for all amigurumi enthusiasts who are looking to create a cute and cuddly mouse. This free pattern offers step-by-step instructions, along with detailed illustrations, making it easy for both beginners and experienced crocheters to recreate this adorable mouse.
The “Mi mi Mouse Amigurumi PDF Free Pattern” showcases a beautifully crafted mouse with intricate details and a soft texture. The pattern includes instructions for creating the body, ears, tail, and paws, ensuring that you can create a fully assembled mouse once completed.
Not only is this pattern incredibly fun and rewarding to work on, but it also makes for an excellent gift for loved ones or a cute addition to your own collection of handmade amigurumi animals. So why wait? Download the “Mi mi Mouse Amigurumi PDF Free Pattern” today and embark on a whimsical journey of crocheting your very own adorable mouse!


Comments0