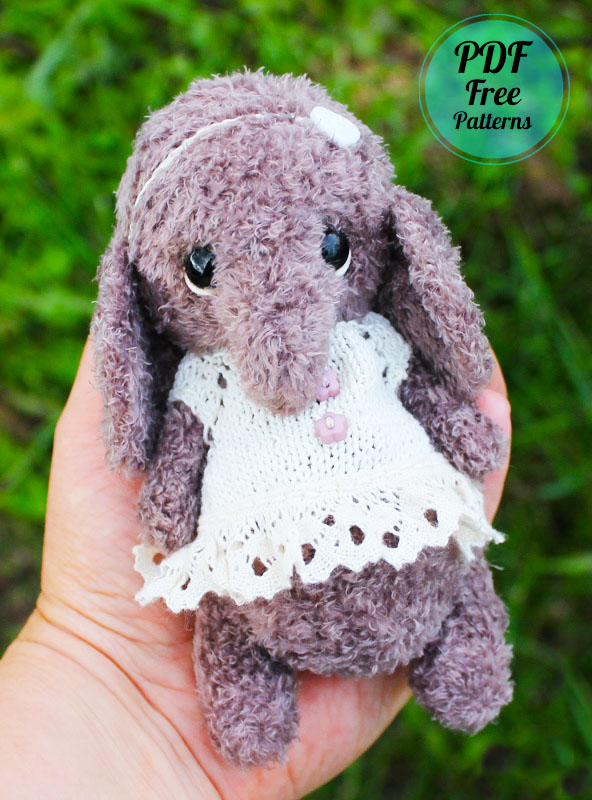
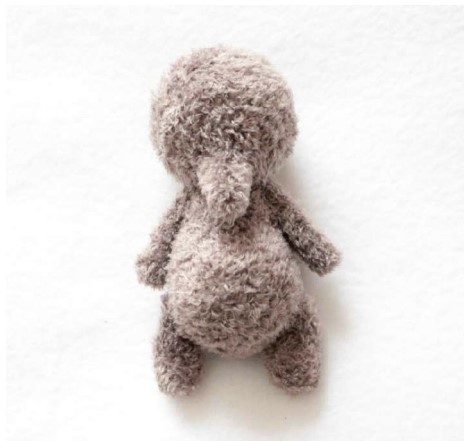
Today we are adding a new one to the elephant amigurumi toy pattern archive. However, the elephant amigurumi that I will share today looks quite unusual. The rope used in making elephant amigurumi is really different. You can add difference to the amigurumi toys you make using this type of rope. Elephant amigurumi was a russian crochet pattern and I translated it. I hope you will like it. Now if you’re ready, let’s get started.
Designer: viyasheff
Materials:
Yarn. I have a Chinese Koala, you can take any footage of 100-120 m in 50 grams
Filler
Hook, which is more convenient for you to crochet.
Eyes 5 mm
My elephant is on cotter pins, mobile. Therefore, who wants the same, then you still need disks
8mm-4pcs, 10mm-4pcs, 12mm-1sh, 15mm-1pcs
Thin yarn, such as iris, for a blouse and hat (can be thicker)
We crochet inside out on the face if you have fluffy yarn !!!
We crochet in a circle without ch at the beginning of the row
Abbreviations
MR – Amigurumi Magic ring
sc : Single Crochet
inc : Increase
dec : Decrease
st: Stitch
dc : Double Crochet
hdc: Half Double Crochet
sl-st or Slst: Slip Stitch
ch : Chain
FLO : Crochet into front loops only
BLO : Crochet into back loops only
Legs
2 ch we crochet from them 6sc
2 Rnd: (1 sc, inc)(9)
3-11Rnd: around (9). 9 rnds
Step back down 2 rows and insert a cotter pin with a 10 mm disc.
Fill. Make dec and close.

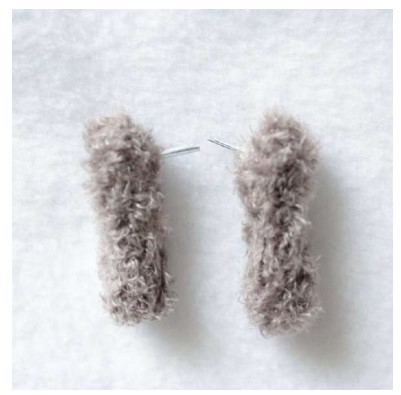
Arms
2 ch from 6 sc
2-13Rnd: around (6). 12 rnds.
Step back 2 rows down, install a cotter pin with an 8 mm disc.
Fill. Make dec and close.
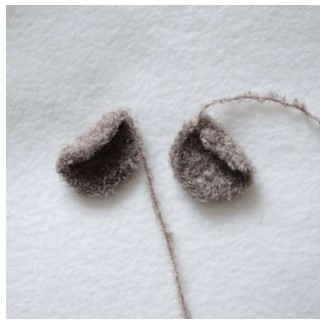
Ears
2 ch from 6 sc
2Rnd: inc (12)
3Rnd: (1 sc, inc) (18)
4Rnd: (2 sc, inc) (24)
Leave the thread for sewing.
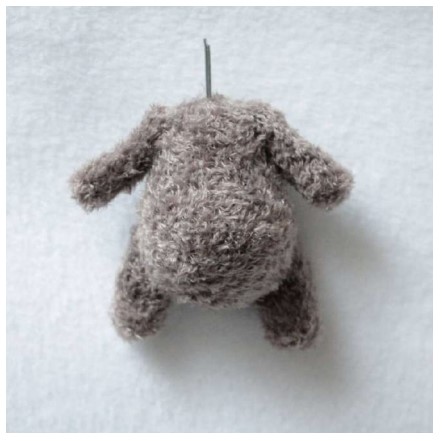
Body
Marker in the middle of the back.
2ch from 6 sc
2Rnd:inc (12)
3Rnd:(1 sc, inc) (18)
4Rnd: (2 sc, inc) (24)
5Rnd: (3 sc, inc) (30)
6Rnd: (4 sc, inc) (36)
7-11Rnd: around (36). 5 rnds
Step back 7 rows down and install the cotter pins of the legs. To do this, fold the crocheting in half so that the marker is in the middle of the back and looks at you. We install cotter pins on the folds. If you want a pot-bellied, then we install the cotter pins a couple of loops closer to the marker.
12Rnd: 9 sc, ( 1 sc , dec) *6 раз, 9 sc (30)
13Rnd: around (30)
14Rnd: (3 sc, dec) (24)
15-16рRnd: around (24)
17Rnd: (2 sc, dec) (18)
18-20Rnd: around (18)
Step back 2 rows and install the cotter pins of the handles. We do the same for the legs.
Fill.
21Rnd: (1 sc, dec) (12)
22Rnd: around (12)
Add more filler if needed. Install a cotter pin and a 12 mm disc for the neck. Then we crochet decreases until the hole closes. We hide the thread inside.
Head
Marker from the chin to the back of the head.
2 ch from 6 sc
2Rnd: around (6)
3Rnd: 5 sc, inc (7)
4Rnd: 6 sc, inc (8)
5Rnd: 7 sc, inc (9)
6Rnd: 8 sc, inc (10)
7Rnd: 9 sc, inc (11)
8Rnd: 10 sc, inc (12)
9Rnd: (1 sc, inc) (18)
10Rnd: (2 sc, inc) (24)
11Rnd: (3 sc, inc) (30)
Put an additional marker at the beginning of the row, then you will need to install a cotter pin in this place.
12Rnd: (4 sc, inc) (36)
13-18Rnd:around (36). 6 rnds
19Rnd: (4 sc, dec) (30)
20Rnd: (3 sc, dec) (24)
Install the head pin.
21Rnd: (2 sc,dec) (18)
22Rnd: (1 sc, dec) (12)
Fill.
23Rnd: dec (6)
Make dec until the hole closes. Cut the thread and hide inside.
Assembly
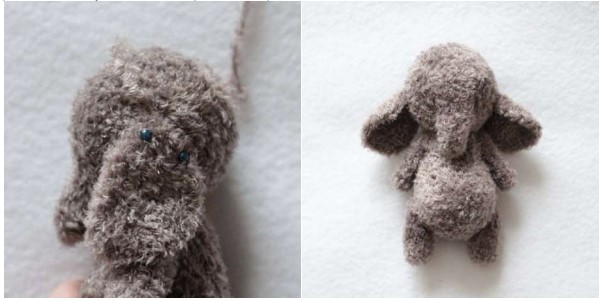
First, sew on the ears. Remember how I had ears in the photo? Here they also need to be folded and pinned to the head with pins, as in my photo. Be sure to make sure that the ears are symmetrical, if in doubt, then bring the elephant to the mirror, it clearly shows how the ears are located. If everything is even, then sew them to the head.
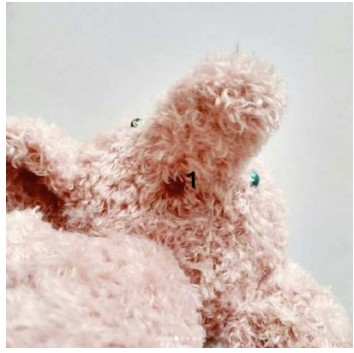
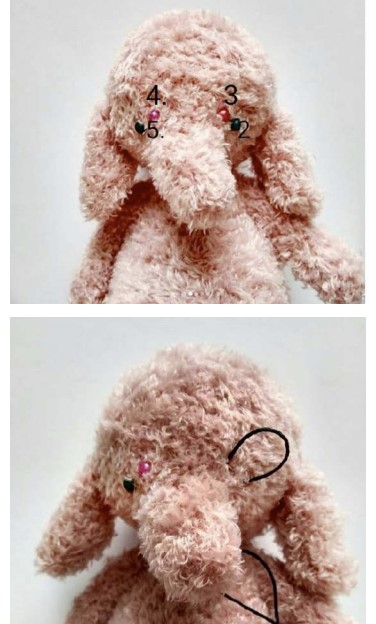
We do tightening. First, note where we have a mouth and eyes. The point of the mouth is at the base of the trunk, with eyes we focus on my photo. We introduce a needle with a thread, it should be very strong, at point 1 (mouth), we withdraw at point 2, we enter at point 3, we withdraw at point 1, we tighten and tie a knot, we do not cut the thread. We repeat the same with the second eye.
If you are satisfied with the resulting hollow, then you can safely cut the thread and hide it in your head.
If not, then we repeat the tightening again, but we make them one row above the pin markers
We tint the resulting dimples, I do it with a fabric marker, you can use pastel, oil paints. We glue the eyes and make an eyelid from a suede cord.
Clothing
I warn you right away, I count all the loops at the beginning of the row from the hem. I used knitting needles number 1.6, Alpina Anabel yarn for the cap, Soso for the dress.

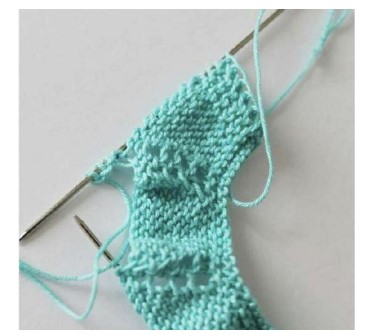
Dress.
Cast on 40 sts on knitting needles, with hem stitches.
1-3R -right side
4R- 8 knit, yarn over, 1 knit, yarn over,6 knit, yarn over, 1 knit, yarn over, 8 knit, yarn over, 1 knit, yarn over, 6 knit, yarn over, 1 knit, yarn over, 8 knit (48)
5R – 4 knit, 40 purl, 4 knit (48)
6R- 9 knit, yarn over, 1 knit, yarn over,8 knit, yarn over, 1 knit, yarn over, 10 knit, yarn over, 1 knit, yarn over, 8 knit, yarn over, 1 knit, yarn over, 9 knit (56)
7R – 4 knit, 48 purl, 4 knit (56)
8R- 10 knit, yarn over, 1 knit, yarn over,10 knit, yarn over, 1 knit, yarn over, 12 knit, yarn over, 1 knit, yarn over, 10 knit, yarn over, 1 knit, yarn over, 10 knit (64)
9R – 4 knit, 56 in, 4 knit (64)
10R- 11 knit, yarn over, 1 knit, yarn over,12 knit, yarn over, 1 knit, yarn over, 14 knit, yarn over, 1 knit, yarn over, 12 knit, yarn over, 1 knit, yarn over, 11 knit (72)
11R – 4 knit, 64 из, 4 knit (72)
12R-13 knit, 14 cast off, 18 knit, 14 cast off, 13 knit (44)
13R- 4 knit, 9 purl, cast on 3 sts on needles, 18 purl, cast on 3 sts on needles, 9 purl, 4 knit (50)
14R – 16 р- right side (50)
15 – 17R- 4 knit, 42 purl, 4 knit (50)
18R- 4 knit, yarn over, ( 3 knit, yarn over)* 14 раз, 4 knit (65)
19, 21, 23 – 25R – 4 knit, 57 purl, 4 knit (65)
20, 22, 24 – 26R- right side (65)
Close loops.
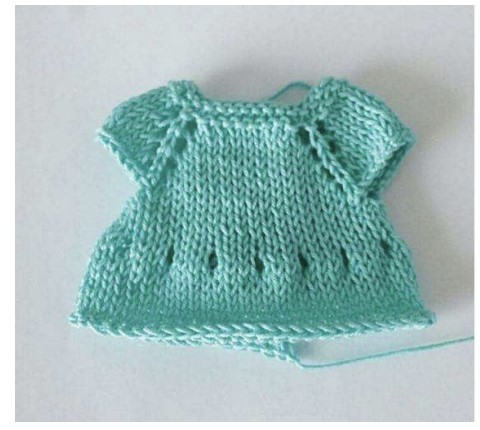
Sew lace along the hem, buttons on the shelf. I also put some tape in the holes.
The clothes are ready.
This is a free crochet pattern for making a plush elephant in dress. The pattern includes detailed instructions and step-by-step photos to guide you through the process. It is suitable for intermediate level crocheters and requires basic knowledge of amigurumi techniques. The finished elephant measures approximately 12 inches tall and is made using medium weight yarn. This cute and unique design makes it a perfect addition to any child’s toy collection or as a decorative item in your home. Get creative and enjoy making this adorable plush elephant in dress!

Comments0