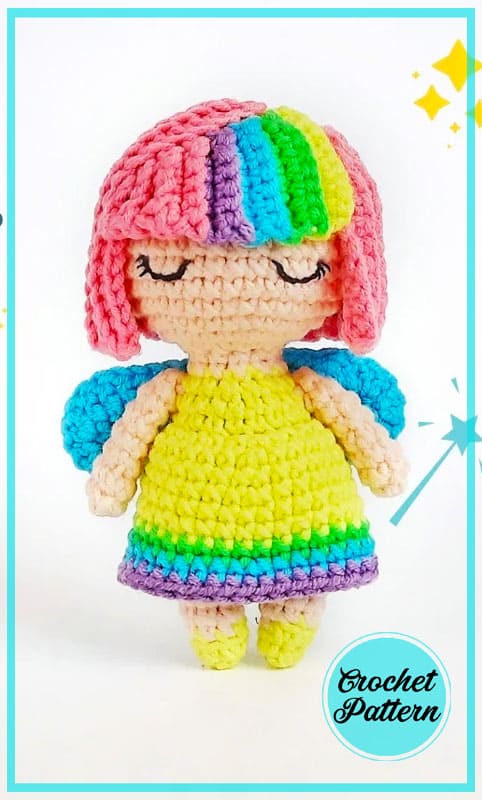
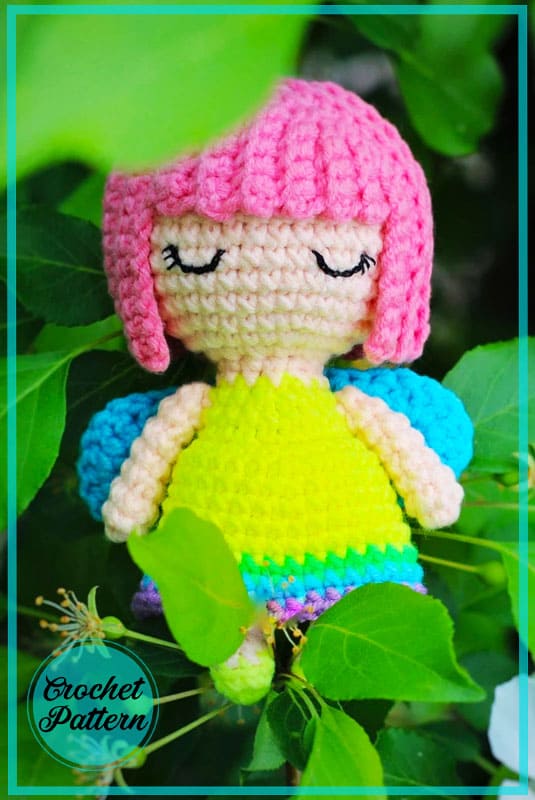
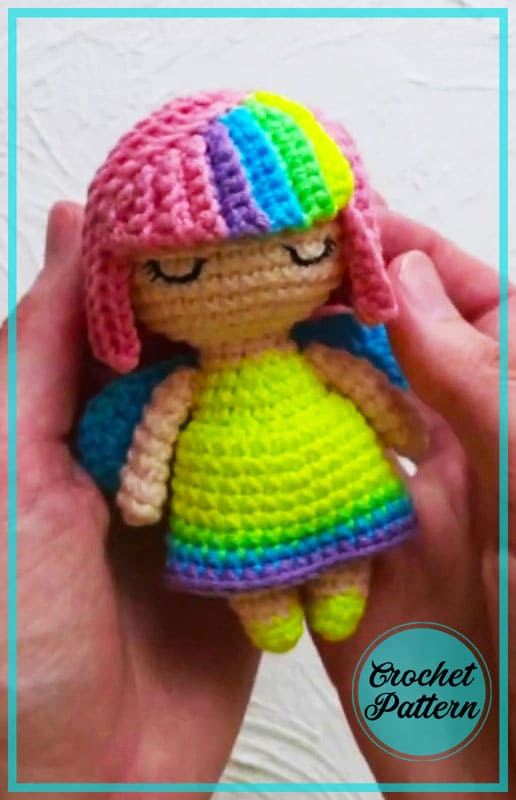
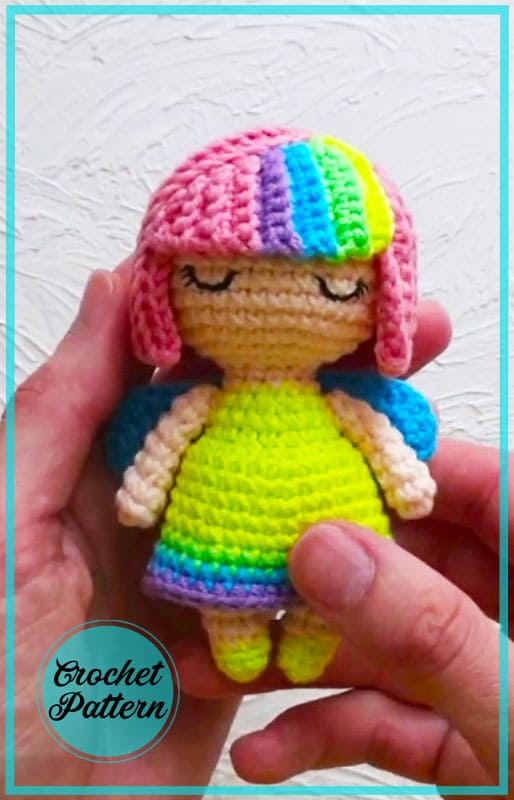
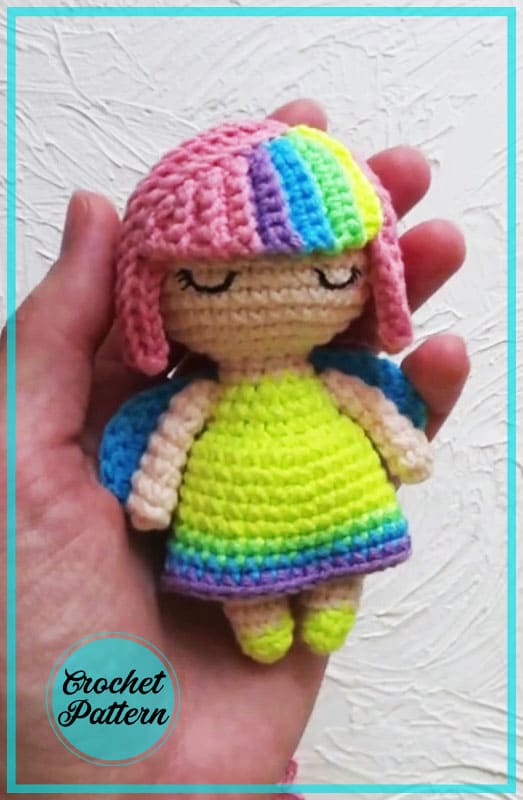
Dear friends, today we will crochet a wonderful doll amigurumi. First of all, this beautiful doll is called Rainbow Fairy. Amigurumi dolls are not usually available for free. Thank you very much to the friends who shared such beautiful doll amigurumis. First of all, amigurumi has a rainbow-shaped hair structure. She also has wings like a butterfly because she is a fairy girl. It is a little difficult to work with crochet. I must say that it is an advanced amigurumi pattern. Now let’s work together with crochet step by step.
Designer: camomile.cloud
Materials
• Sport yarn with colors: beige, pink, purple, blue, green, yellow
• Crochet hook N 2
• Black embroidery thread
• Sewing needle, yarn needle, pins, scissors
• Fiberfill
Finished toy 10cm
Abbreviations
AR – Amigurumi Magic ring
MR – Amigurumi Magic ring
App – application
ll – lift loop
sc : Single Crochet
inc : Increase
dec : Decrease
tr : Triple Crochet/ Treble Crochet
st: Stitch
dc : Double Crochet
hdc: Half Double Crochet
sl-st : Slip Stitch
ch : Chain
..in : make increase into same stitch as many as the number which is given in front of “inc” abbreviation (exp; 3inc, 4inc..).
FLO : Crochet into front loops only
BLO : Crochet into back loops only
BL : Bobble Stitch – do 5dc all in the same stitch and then yarn over and pull through all the loops on your hook (the original loop + 1 loop for each partially completed dc)


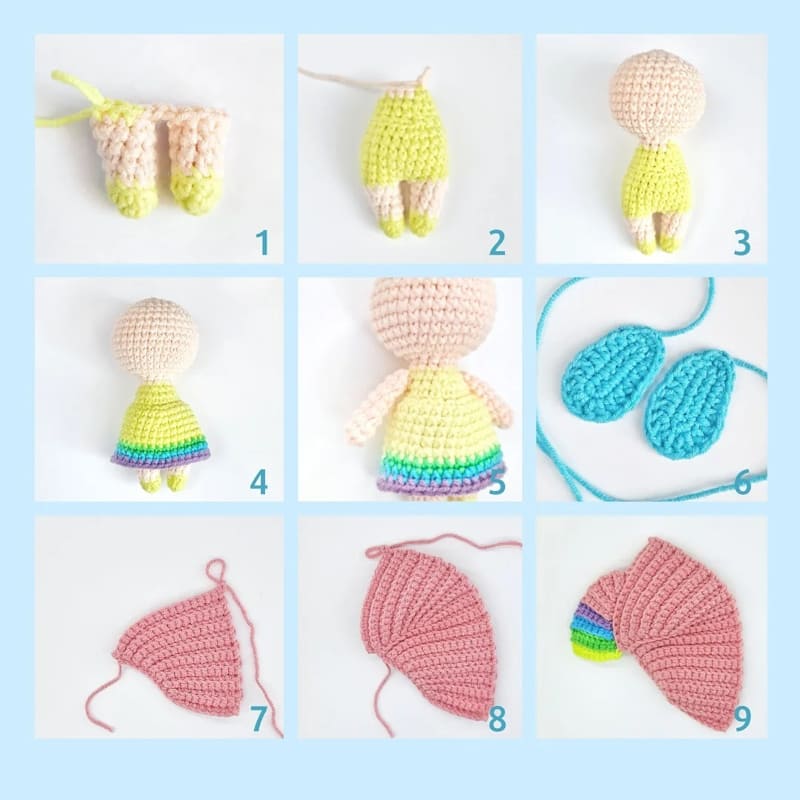
Legs + body + Head
Stuff in process.
Crochet first leg. Start with yellow color:
Rnd 1. 6 sc in magic ring
Rnd 2. (inc, 2 sc) x 2 (8)
Change to beige:
Rnd 3. Into BLO 8 sc (8)
Rnd 4. 8 sc (8)
Rnd 5. 4 sc, inc, 3 sc (9)
Rnd 6. 4 sc, inc, 4 sc (10)
Fasten off.
Crochet the second leg, do not fasten off. Make 2 ch and join with the first leg.
Continue crocheting the body in the round, change to yellow:
Rnd 1. 10 sc on the first leg, 2 sc on 2 ch, 10 sc on the second leg, 2 sc on 2 ch (opposite side) (24)
Rnd 2 — 5. 24 sc (24) (4 rnds)
Rnd 6. (6 sc, dec) x 3 (21)
Rnd 7. (5 sc, dec) x 3 (18)
Rnd 8. Into BLO 18 sc (18)
Rnd 9. 18 sc (18)
Rnd 10. (4 sc, dec) x 3 (15)
Change to beige:
Rnd 11. (3 sc, dec) x 3 (12)
Rnd 12. 12 sc (12)
Rnd 13. 12 inc (24)
Rnd 14. (3 sc, inc) x 6 times (30)
Rnd 15. (4 sc, inc) x 6 times (36)
Rnd 16 — 22. 36 sc (36) (7 rnds)
Rnd 23. (4 Sc, dec) x 6 (30)
Rnd 24. (3 sc, dec) x 6 (24)
Rnd 25. (2 sc, dec) x 6 (18)
Rnd 26. (1 sc, dec) x 6 (12)
Rnd 27. 6 dec (6)
Fasten off, tighten the hole.
Skirt
With yellow color:
Go to the rnd 8 of the body.
Rnd 1. Into FLO (2 sc, inc)x 6 (24)
Rnd 2. (7sc, inc) x 3 (27)
Rnd 3. 27 sc (27)
Rnd 4. (8 sc, inc) x 3 (30)
Rnd 5. 30 sc (30)
Rnd 6. 4 sc, inc (9 sc, inc) x 2, 5 sc (33) Change to green:
Rnd 7. 33 sc (33) Change to blue:
Rnd 8. (10 sc, inc) x 3 (36) Change to purple:
Rnd 9. 36 sc (36) Fasten off.
Arms (2 details)
With beige color:
Rnd 1.6 sc in magic ring
Rnd 2. Inc, 5 sc (7)
Rnd 3. 7 sc (7)
Rnd 4. dec, 5 sc (6)
Rnd 5 — 6. 6 sc (6) (2 rnds)
Rnd 7. dec, 4 sc (5) Stuff slightly.
Tighten the hole, fasten off, leaving a long tail for sewing.
Wing (2 details)
With blue color:
Ch 8, start on the 2nd ch from the hook:
Rnd 1. 6 sc, 3 sc in last ch, on the other side of ch: 5 sc, inc (16)
Rnd 2. inc, 3 hdc, 2 dc, (2 dc in 1 ch) x 3, 2 dc, 3 hdc, 2 inc (22)
Fasten off leaving a long tail for sewing.
Hair
Crochet in rows.
With pink color:
Ch 18, start on the 2nd ch from the hook:
R1 9 sc, sl st, ch 1, turn(10)
R2 sl st, 9 sc, ch 1, turn(10)
R3 10 sc, sl st, ch 1, turn(11)
R4 sl st, 10 sc, ch 1, turn(11)
R5 11 sc, sl st, ch 1, turn(12)
R6 sl st, 11 sc, ch 1, turn(12)
R7 12 sc, sl st, ch 1, turn(13)
R8 sl st, 12 sc, ch 1, turn(13)
R9 13 sc, sl st, ch 1, turn(1 4)
R10 st st, 13 sc, ch 1, turn(14)
R11 14 sc, sl st, ch 1, turn(15)
R12 sl st, 14 sc, ch 1, turn(15)
R13 15 sc, st st, ch 1, turn(16)
R14 sl st, 15 sc, ch 1, turn (16)
R15 16 sc, sl st, ch 1, turn (17)
R16 sl st, 16 sc, ch 1, turn (17) (see the photo 7)
R17 — 32. Repeat instructions of 1 — 16 rows. (see the photo 8)
R33 9 sc, sl st, ch 1, turn (10)
R34 sl st, 2 sc, ch 1, turn (3)
R35 3 sc, st st, ch 1, turn (4)
R36 sl st, 3 sc, ch 1, turn (4)
R37 4 sc, st st, ch 1, turn (5)
R38 sl st, 4 sc, ch 1, turn (5)
R39 5 sc, sl st, ch 1, turn (6)
R40 sl st, 5 sc, ch 1, turn (6) Change to purple:
R41 6 sc, sl st, ch 1, turn (7)
R42 sl st, 6 sc, ch 1, turn (7) Change to blue:
R43 7 sc, sl st, ch 1, turn (8)
R44 sl st, 7 sc, ch 1, turn (8)
Change to green:
R 45 8 sc, sl st, ch 1, turn (9)
R 46 sl st, 8 sc, ch 1, turn (9) Change to yellow:
R 47 9 sc, sl st, ch 1, turn (10)
R 48 sl st, 9 sc, ch 1, turn (10) (see the photo 9)
Fasten off.
Assembling
Sew the arms to between rounds 9 and 10 of the body. Embroider the eyes over round 18 of the head.
Sew the hair to the head.
Sew the wings to the body.
This is a free crochet pattern for a Rainbow Fairy Doll in PDF format. The amigurumi technique is used to create a whimsical and colorful fairy that is perfect for decorating your home or as a gift for a little one. The pattern includes step-by-step instructions and detailed photos to guide you through the process. Whether you are a seasoned crocheter or just starting out, this pattern is suitable for all skill levels. Create a magical and enchanting Rainbow Fairy Doll with this free crochet pattern today!


Comments0