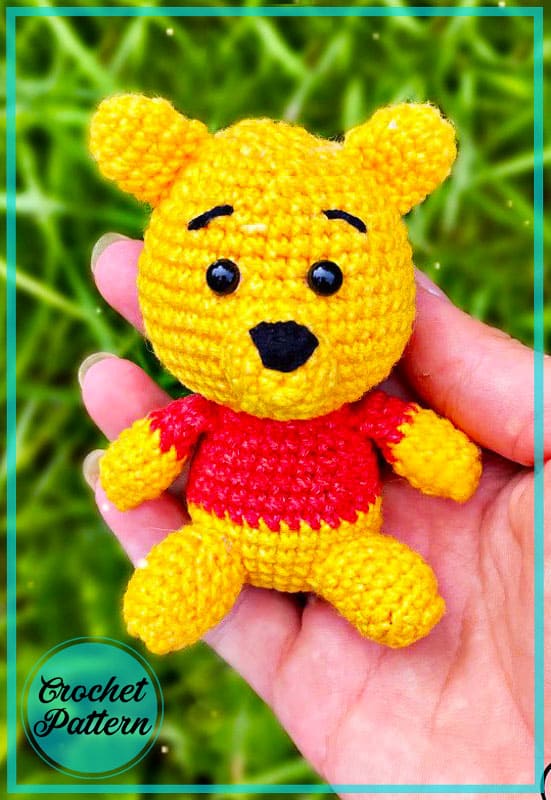
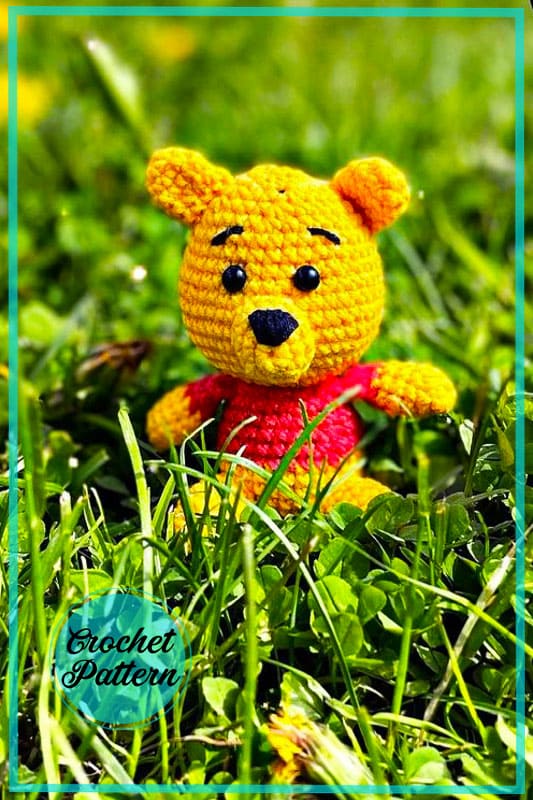
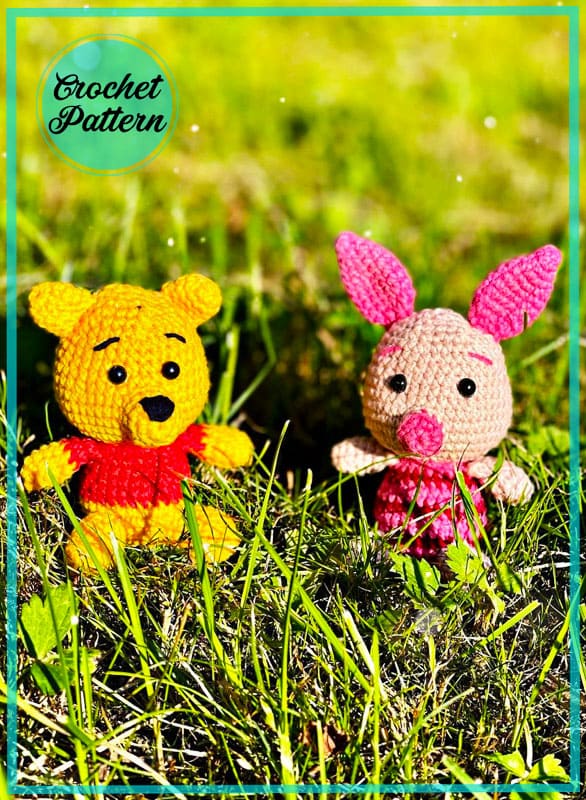
Do you know the character of Winnie? Winnie is a very cute teddy bear. Winnie a favorite cartoon character. Today we will crochet the winnie keychain amigurumi together. Crochet keychain amigurumis have started to attract a lot of attention lately. What is the reason for this? We all started to get bored of mediocrity and went on different quests. Crochet amigurumis make us different in this regard. It will also help you develop your own creativity. You don’t need to have a lot of crochet knowledge to knit the Winnie the pooh amigurumi pattern. A beginner can easily crochet. Now let’s crochet step by step.
Materials
1.Yarn (red, yellow)
2. Hook 1.5 mm.
3.Plastic eyes.
4.Scissors, needle
5 filler
Abbreviations
AR – Amigurumi Magic ring
LL: Lifting loop Click for mean!
MR – Amigurumi Magic ring
App – application
sc : Single Crochet
inc : Increase
dec : Decrease
tr : Triple Crochet/ Treble Crochet
st: Stitch
dc : Double Crochet
hdc: Half Double Crochet
sl-st : Slip Stitch
ch : Chain
..in : make increase into same stitch as many as the number which is given in front of “inc” abbreviation (exp; 3inc, 4inc..).
FLO : Crochet into front loops only
BLO : Crochet into back loops only
BL : Bobble Stitch – do 5dc all in the same stitch and then yarn over and pull through all the loops on your hook (the original loop + 1 loop for each partially completed dc)


Hind legs
1 -6 in MR
2 -incбавки (12)
3 -BLO 12sc
4 -12 sc
5 -( 2sc, dec.)*3 (9)
6 -9 sc
Leave the yarn for sewing.
Fill.
Front legs
1 -6 in MR
2 -(1 sc., inc.)*3 (9)
3-5 -9 sc
change the color to red
6-7 -9 sc
Sew the part.
Body and Head
We sew the front legs while crochetting the body.
The body and head are crochet in one piece.
1 -6 in MR
2 -6 inc (12)
3 -12 inc (24)
4 -(3 sc, inc)*6 (30)
5-8 -30 sc
Change the color to red.
9 -30 sc
10 -(8 sc, dec)*3 (27)
11 -(7 sc, dec)*3(24)
12 -24 sc
13 – we sew hands 24 sc
14 -12 dec (12)
Change the color to yellow.
15 -12 inc (24)
16 -(1 sc, inc)*12 (36)
17 -(2 sc, inc)*12 (48)
18-21 -48 sc
22 -3 sc, dec, (6 sc, dec)*5, 3 sc (42)
23 -42 sc
24 -(5 sc, dec)*6 (36)
25-26 -36 sc
27 -2 sc, dec, (4 sc, dec)*5, 2 sc (30)
28 -(3 sc, dec)*6 (24)
29 -(2 sc, dec)*6 (18)
30 -(1 sc, dec)*6 (12)
31 -6 dec
Muzzle
1 -6 in MR
2 -6 inc (12)
3 -(3 sc, inc)*3 (15)
4 -15 sc
Leave the end to be sewn on.
Ears
1 -6 in MR
2 -(1 sc, inc)*3 (9)
3-5 – 9 sc
Leave the end to be sewn on.
Assembly
The rows are scolded from above.
1-Sew on the ears at a distance of 2-6 rows on the sides of the head.
2-Sew on the muzzle at a distance from 10 to 14 rows, embroider the nose with a triangle on the muzzle.
3 – glue the eyes between the 8-9 row, between the eyes 5 sc.
4 – embroider eyebrows at a distance of 5-6 rows.
5 – Sew on the legs (or that Winnie would sit, or that would stand)
The title refers to a free crochet pattern for creating a Winnie the Pooh themed keychain in the amigurumi style. Amigurumi is a Japanese art of knitting or crocheting small, stuffed animals using continuous spirals and simple stitches. This pattern offers a fun and easy way for crafters to create a cute and cuddly keychain featuring everyone’s favorite bear, Winnie the Pooh. The pattern includes step-by-step instructions and illustrations to guide the user through the process, making it suitable for both beginners and experienced crocheters. With this pattern, you can add a touch of nostalgia and charm to your keys or give it as a unique gift to a loved one who shares your love for Winnie the Pooh.


Comments0