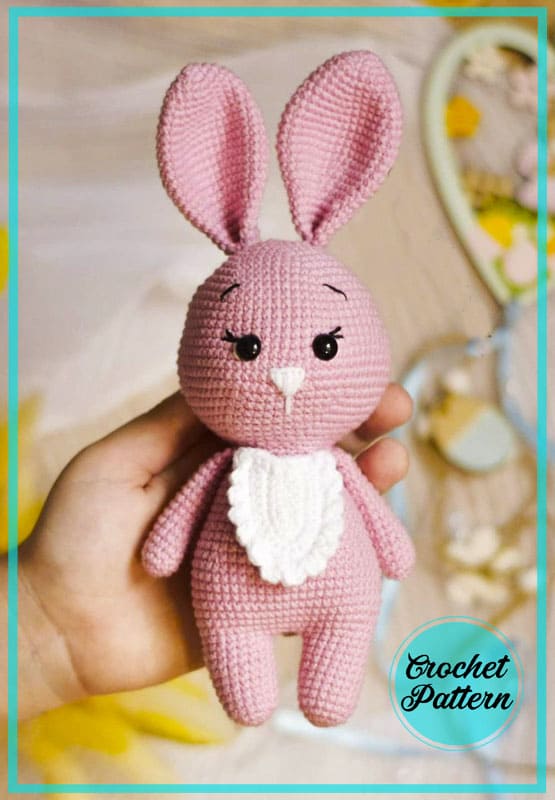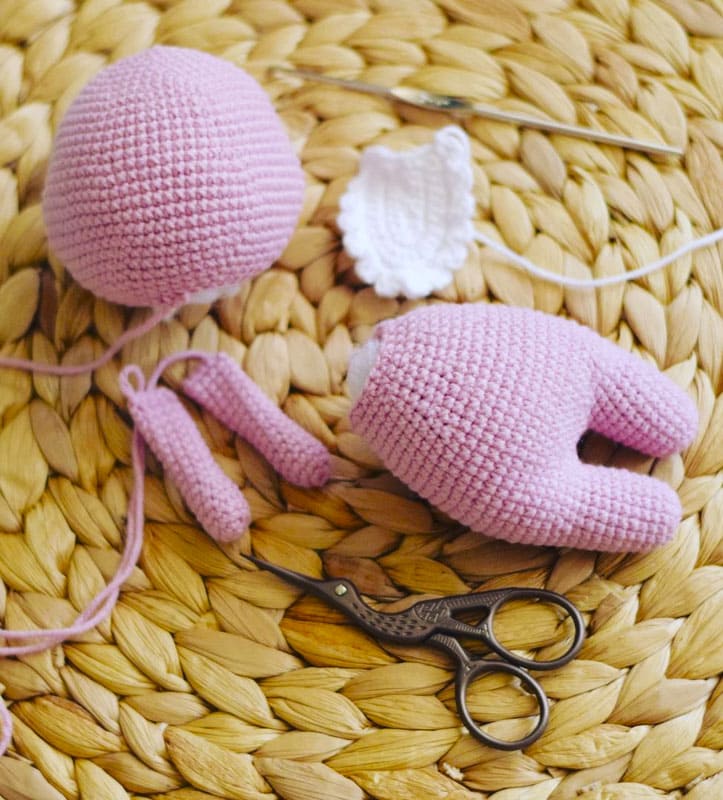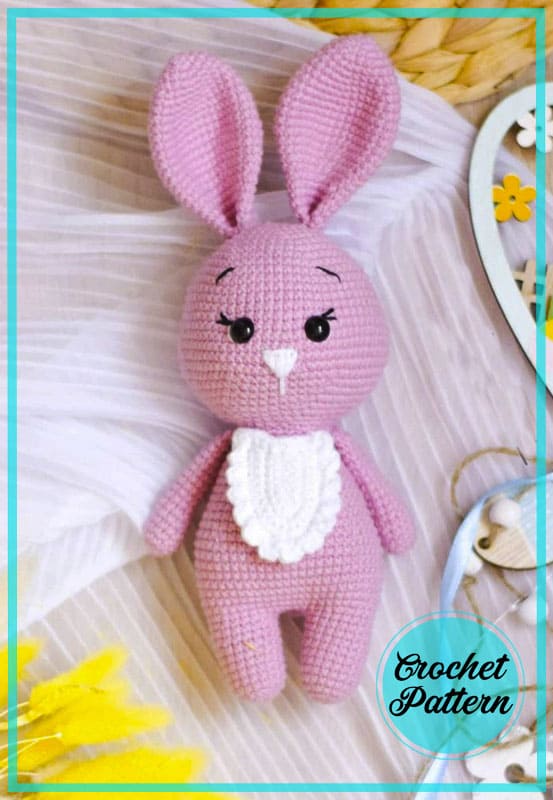
Dear friends, today we will crochet a gorgeous pink bunny. First of all, the bunny pattern is quite easy. Only the bib part can be a bit difficult. If you wish, you can not crochet this piece. In this way, it can turn into a very suitable pattern for beginners. Usually very simple crochet techniques are used. A very easy bunny amigurumi pattern to make. You can find many models of bunny amigurumi patterns on our site. You can choose the bunny amigurumi pattern you like from the categories section by entering the bunny patterns section. As for this pink bunny amigurumi pattern, it’s pretty easy to make a facial expression. Her ears look absolutely gorgeous. By the way, the amigurumi pattern is completely free. Now let’s crochet the pink bunny amigurumi step by step.
Designer: kris_shevtsova_
Materials
– Yarnart JEANS yarn
No: 62 (white)
No: 36 (light pink)
– Hook 1.9 mm.
– Filler
– Eyes 8 mm.
– Marker of the beginning of the row
– Needle for stitching parts – Mouline yarn for feeding
– Scissors
Abbreviations
AR – Amigurumi Magic ring
LL: Lifting loop Click for mean!
MR – Amigurumi Magic ring
App – application
sc : Single Crochet
inc : Increase
dec : Decrease
tr : Triple Crochet/ Treble Crochet
st: Stitch
dc : Double Crochet
hdc: Half Double Crochet
sl-st : Slip Stitch
ch : Chain
..in : make increase into same stitch as many as the number which is given in front of “inc” abbreviation (exp; 3inc, 4inc..).
FLO : Crochet into front loops only
BLO : Crochet into back loops only
BL : Bobble Stitch – do 5dc all in the same stitch and then yarn over and pull through all the loops on your hook (the original loop + 1 loop for each partially completed dc)

Head
1. 6 in MR
2. 6 inc (12)
3. (sc, inc) х6 (18)
4. (2 sc, inc) х6 (24)
5. (3 sc, inc) х6 (30)
6. (4 sc, inc) х6 (36)
7. (5 sc, inc) х6 (42)
8. (6 sc, inc) х6 (48)
9. (7 sc, inc) х6 (54)
10. (8 sc, inc) (60)
11-15. 60 sc (5 rows)
16. (9 sc, inc) х6 (66)
17. (10 sc, inc) х6 (72)
18. (17 sc, inc) х4 (76)
19-20. (76 sc) (2 rows)
21. (dec, 17 sc) х4 (72)
22. (10 sc, dec) х6 (66)
23. (9 sc, dec) х6 (60)
24. (8 sc, dec) х6 (54)
25. (7 sc, dec) х6 (48)
26. (6 sc, dec) х6 (42)
27. (5 sc, dec) х6 (36)
28. (4 sc, dec) х6 (30)
29. (3 sc, dec) х6 (24)
Make slst, cut, leave a long yarn for sewing.
Legs (2 details)
1. 6 in MR
2. 6 inc (12)
3. (sc, inc) х6 (18)
4-11. 18 sc (8 rows) Make slst, cut the yarn, hide.
Similarly, we crochet the second leg, only without slst, we do not cut the yarn.
Body
12. From the first leg we make 3 ch, attach it to the second leg. Further along the leg 18 sc, 3 sc along the chain from ch, 18 sc along the leg, 3 sc along the chain from ch (42)
13. (6 sc, inc) х6 (48)
14. (7 sc, inc) х6 (54)
15-21. 54 sc (7 rows)
22. (7 sc, dec) х6 (48)
23-24. 48 sc (2 rows)
25. (6 sc, dec) х6 (42)
26. 42 sc
27. (5 sc, dec) х6 (36)
28. 36 sc
29. (4 sc, dec) х6 (30)
30. 30 sc
31. (3 sc, dec) х6 (24)
32. 24 sc
Make slst. Hide the yarn.
Hands (2 parts)
1. 6 in MR
2. 6 inc (12)
3-4. 12 sc
5. dec, 10 sc (11 sc)
6. 11 sc
7. dec, 9 sc (10 sc)
8-16. 10 sc (9 rows)
Fold together, crochet 3 sc, slst. Cut, leave yarn for sewing.
Tail
1. 6 in MR
2. 6 inc (12)
3-4. 12 sc (2 rows)
5. dec, 4 sc, dec, 4 sc (10)
Make slst, cut, leave yarn for sewing.
Ears (2 parts)
1. 5 in MR
2. 5 inc (10)
3. (sc, inc) х5 (15)
4. (2 sc, inc) х5 (20)
5. 20 sc
6. (3 sc, inc) х5 (25)
7. 25 sc
8. (4 sc, inc) х5 (30)
9. 30 sc
10. (5 sc, inc) х5 (35)
11-15. 35 sc (5 rows)
16. (5 sc, dec) х5 (30)
17. 30 sc
18. (4 sc, dec) х5 (25)
19. 25
20. (3 sc, dec) х5 (20)
21-24. 20 sc (4 rows)
Fold together, crochet 9 sc, slst. Fold the ends of the base of the ear together and sew to normalize the fold. Cut, leave yarn FOR sewing.
Bib
We start crochetting with 8 stitches.
From the second loop from the hook, crochet 6 sc, 4 sc in 1 loop, on the other side we crochet 6 sc (16)
Expand crochetting in the Reverse direction.
1. Ch, 6 sc, 4 inc, 6 sc (20) Expand crochetting in the Reverse direction.
2. Ch, 8 sc, 4 inc, 8 sc (24) Now we tie the base of the bib with single crochets in the free holes (I got 8 sc). then we begin to crochet a frill. crochet 1 sc, 1 dc, 1 dc, 1 sc into 1 loop, then slst and repeat to end of base. It looks like this (sc, 2 dc, sc), slst. Cut it off, leave the yarn for sewing on the bib.

This is a free crochet pattern for a cute pink bunny in the amigurumi style. The pattern includes detailed instructions and step-by-step photos to guide you through the process. With a little bit of patience and skill, you can create a adorable and soft bunny that will be perfect for cuddling or as a decorative item. This pattern is suitable for beginners who are familiar with basic crochet stitches. So, grab your yarn and hook and get ready to make a sweet and fluffy bunny friend.


Comments0